Category: acne-prone skincare

  • 5 Critical Mistakes That Shattered Your Skin Barrier (And How to Heal It)

    5 Critical Mistakes That Shattered Your Skin Barrier (And How to Heal It)


    I’ve spent the last three years watching people destroy their skin in the name of clarity.

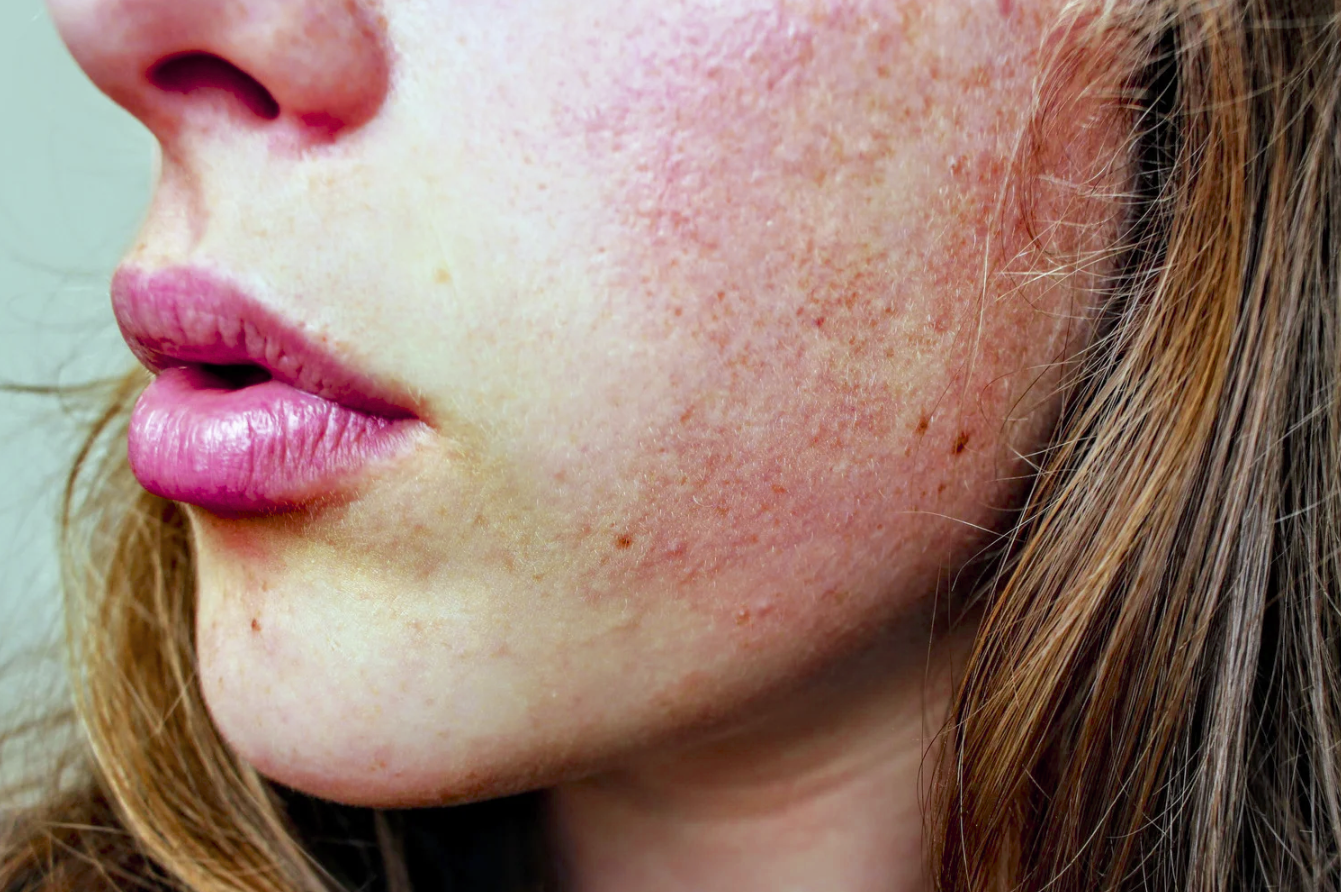
    They come to me frustrated, confused, sometimes even angry. “I’m doing everything right,” they say. “I’m exfoliating twice a week. I’m using active ingredients. I’m following every skincare trend I can find.” And yet their acne is getting worse. Their skin is red, itchy, flaking — sometimes even burning.

    The real problem? They have skin barrier damage, and they don’t even know it.

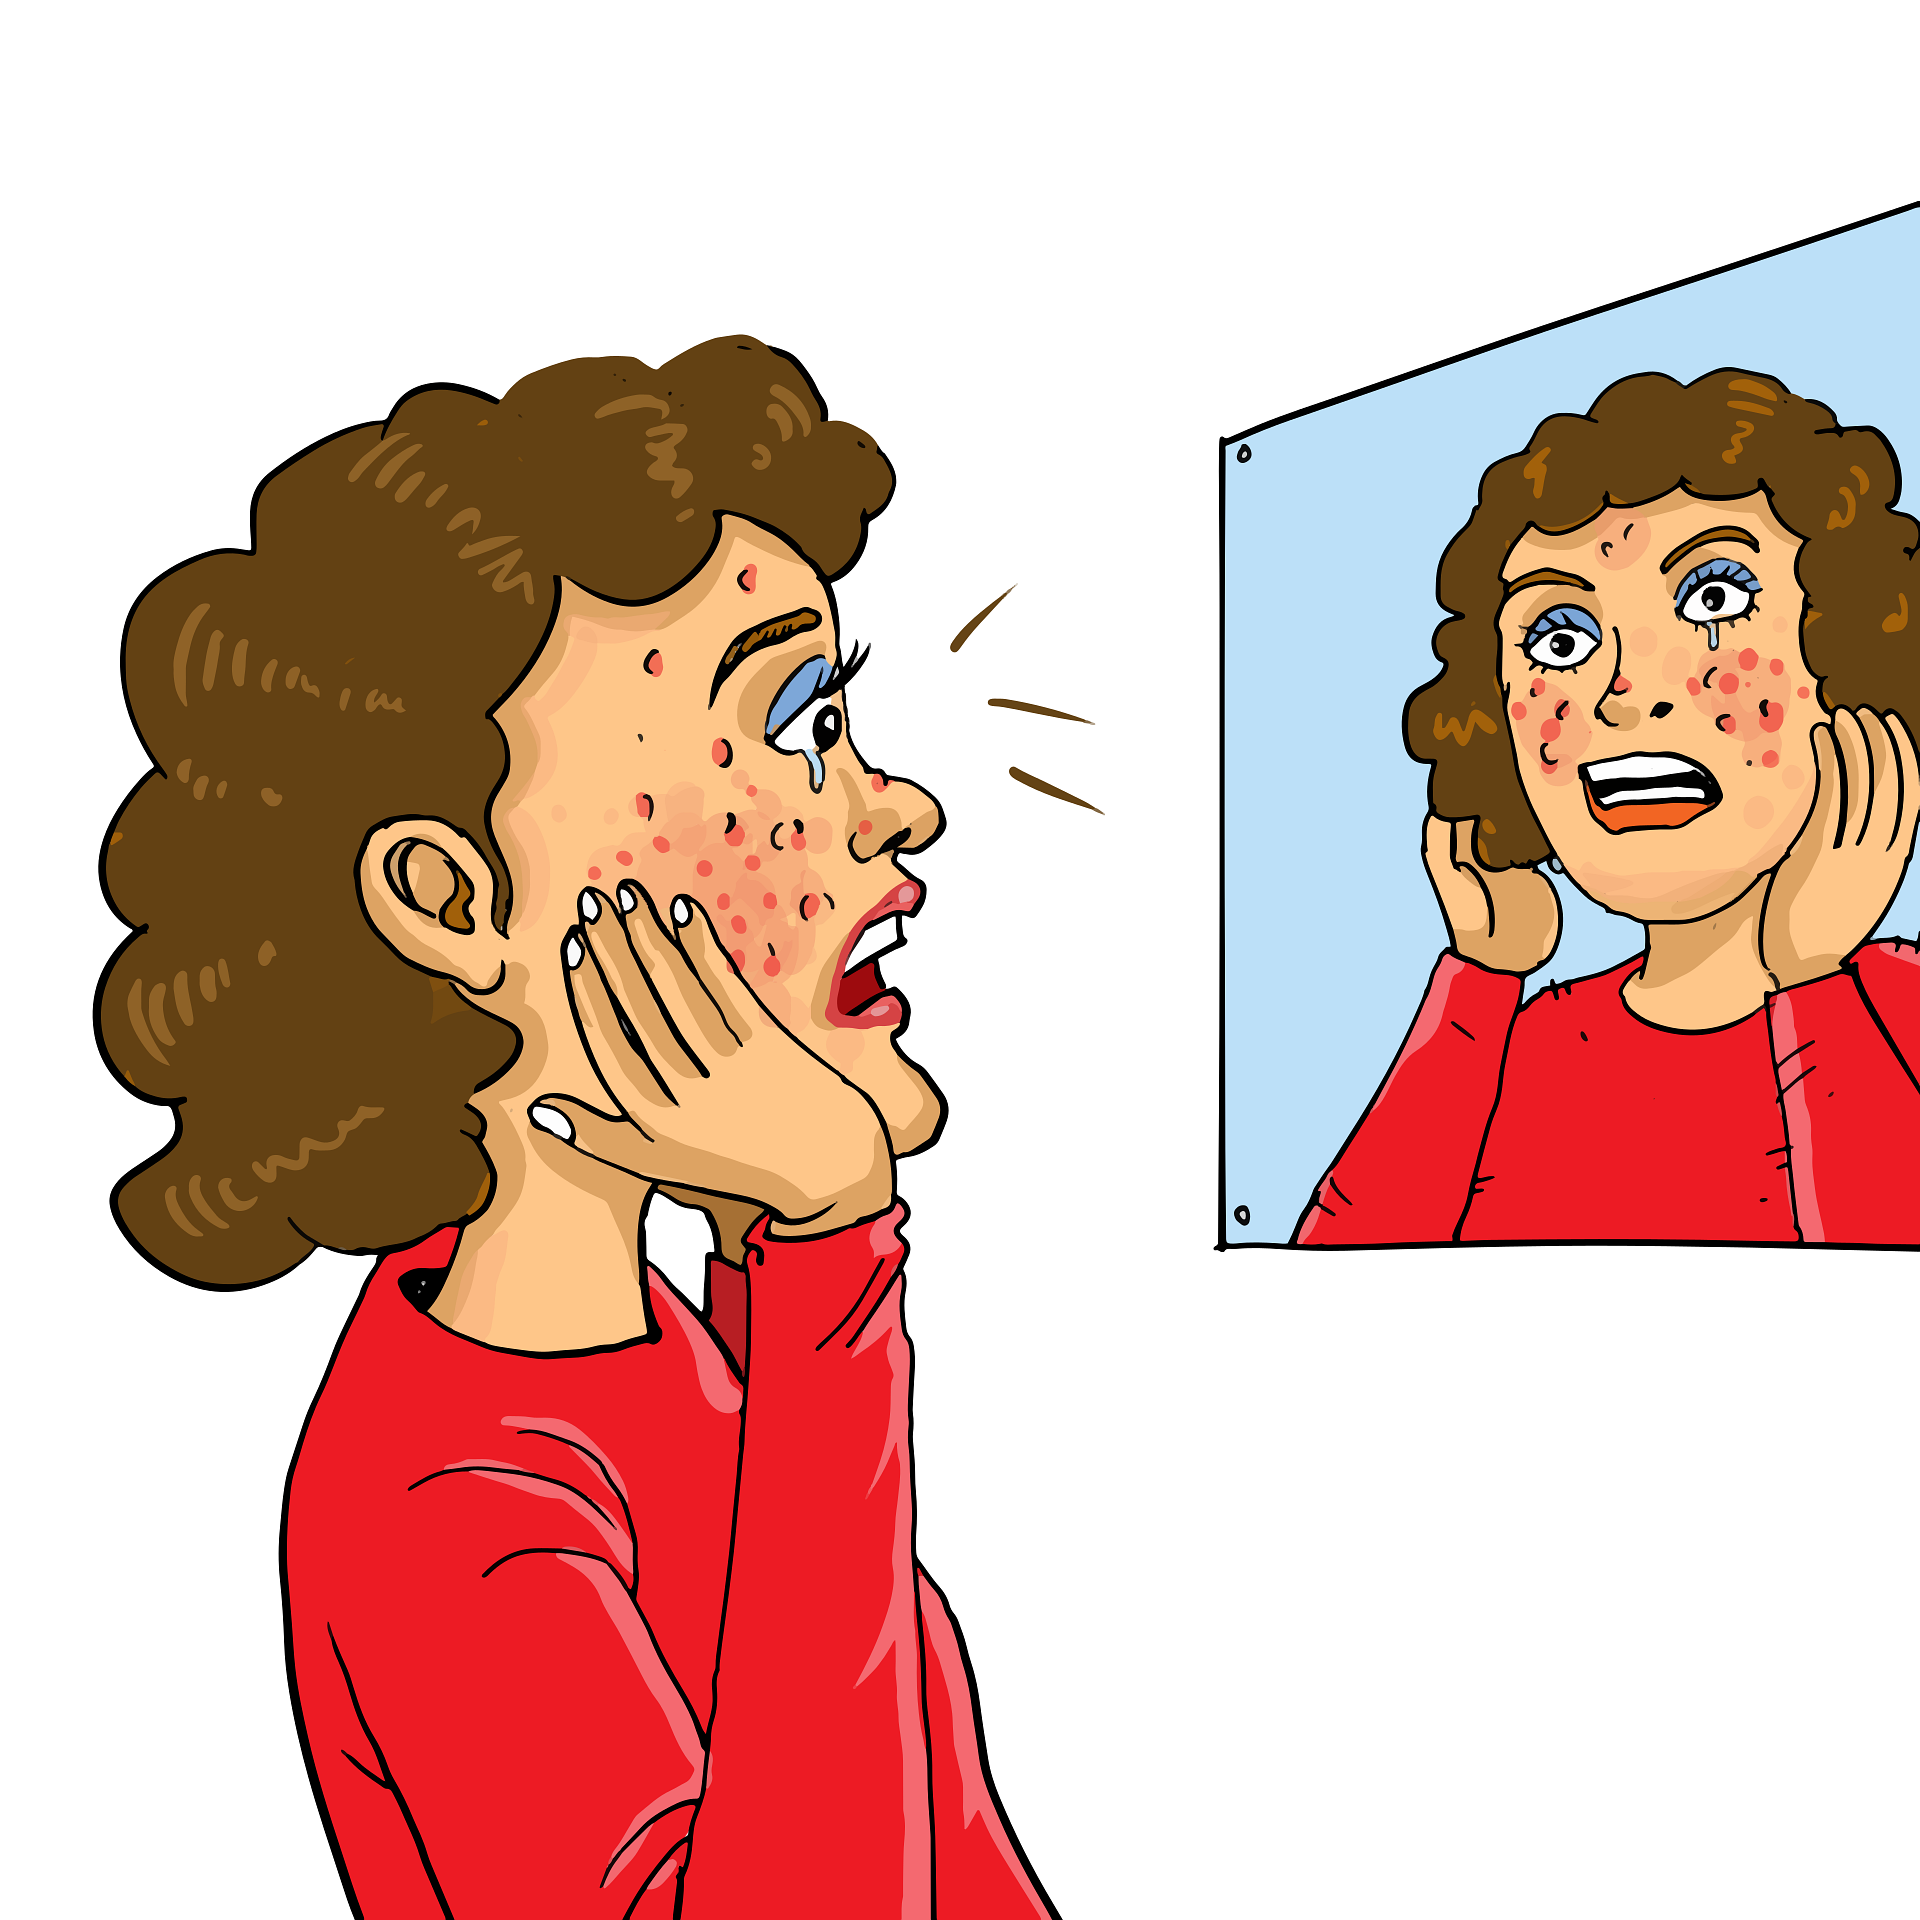
    What’s cruel about skin barrier damage is that it usually happens to the people who care the most about their skin. The ones who read every article, buy every serum, and genuinely want to fix their acne. They’re so focused on treating breakouts that they accidentally obliterate the protective wall their skin needs to actually heal.

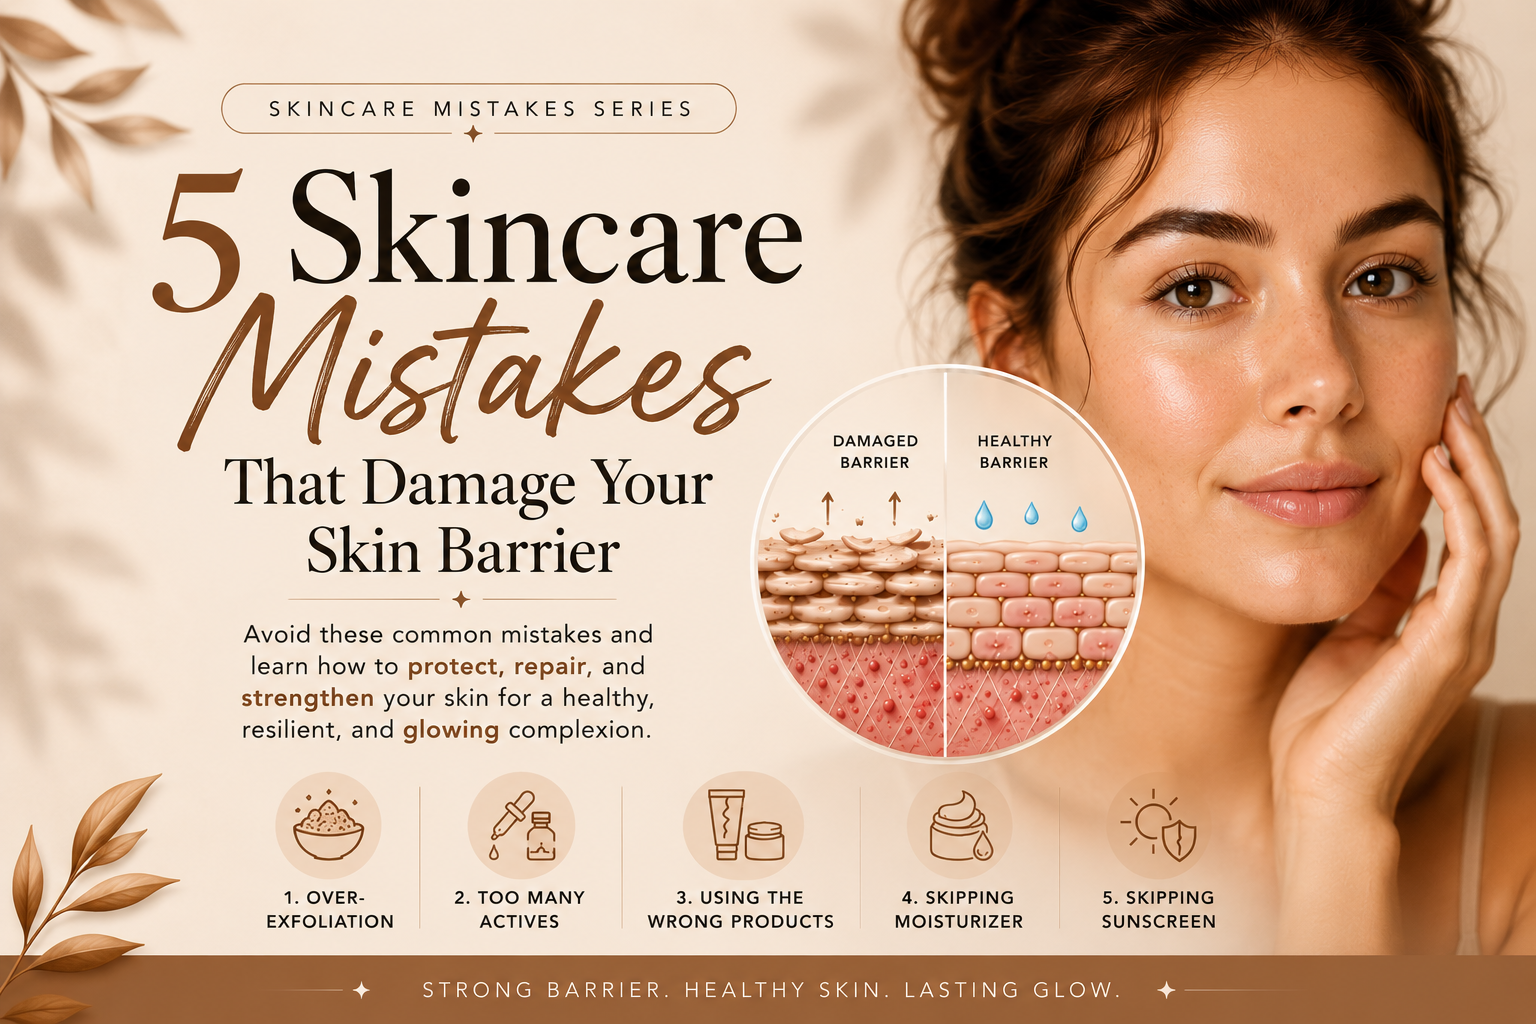
    Here are the five critical mistakes most likely causing your skin barrier damage — and exactly what to do about each one.


    Why Skin Barrier Damage Matters More Than Any Serum You Own

    Before we get into the mistakes, let’s be clear about what skin barrier damage actually means.

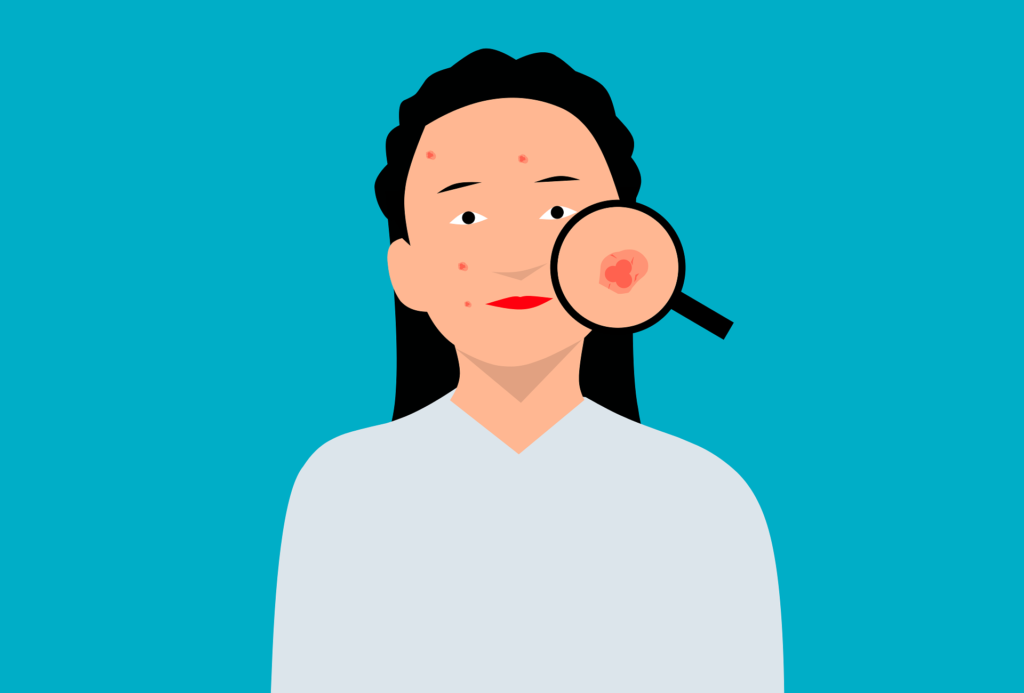
    Your skin barrier isn’t just a skincare buzzword. It’s the difference between healthy, clear skin and a relentless cycle of inflammation, sensitivity, and persistent acne. Think of it like the security system of your house: when it’s working, it lets good things in (hydration, beneficial ingredients) and keeps bad things out (bacteria, pollutants, irritants). When you have skin barrier damage, that system breaks down. Water escapes. Irritants penetrate. Inflammation follows. And your acne doesn’t stay the same — it gets worse.

    According to the American Academy of Dermatology, a healthy skin barrier is the foundation of resilient, youthful skin — and harsh routines are one of the leading causes of damage. Research suggests approximately 60% of people with acne are actively causing skin barrier damage while trying to treat their breakouts. They’re using the right ingredients in the wrong way, and they don’t realize it until the problem is severe.


    Mistake #1: Over-Exfoliating (Leading Cause)

    Over-exfoliation is responsible for more cases of skin barrier damage than any other single factor, and it almost always happens with the best intentions.

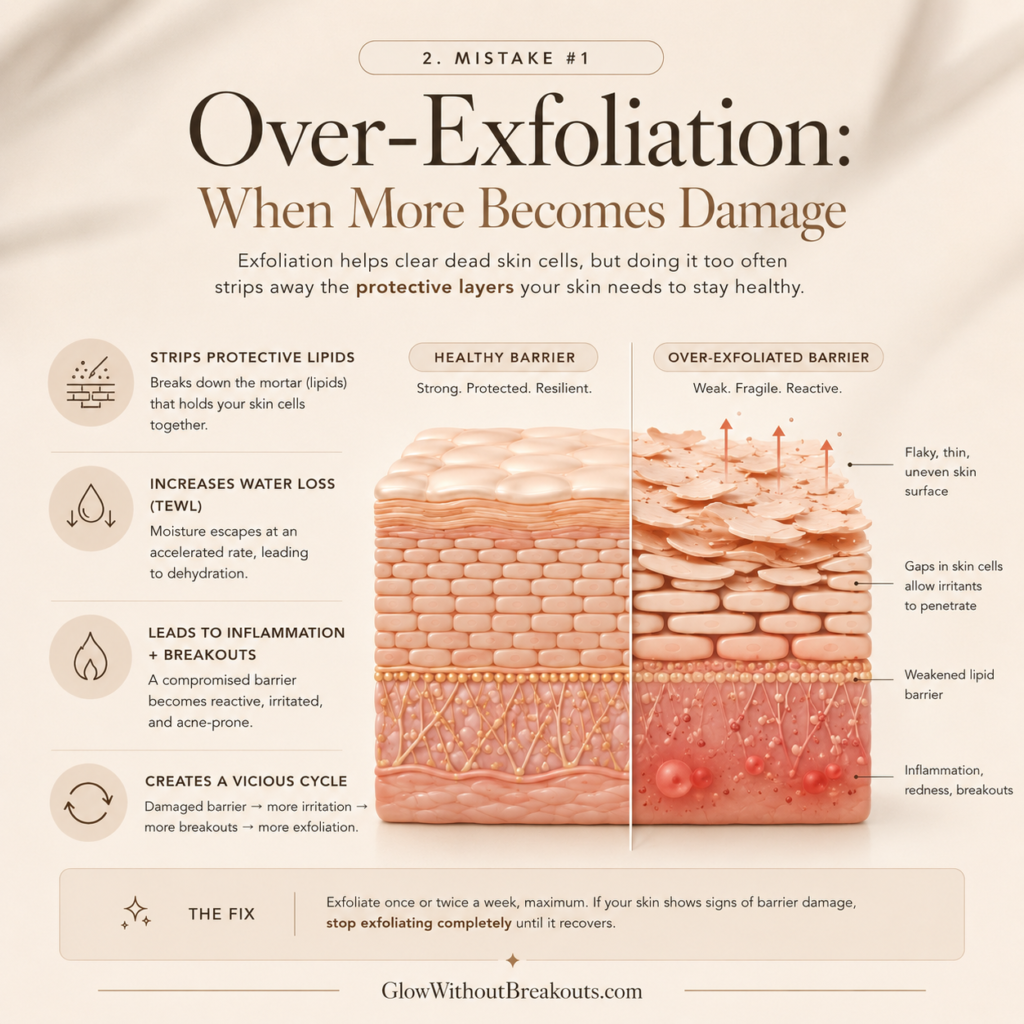
    The messaging around exfoliation isn’t wrong — removing dead skin cells does unclog pores and smooth texture. But nobody emphasizes the difference between healthy exfoliation and the kind that strips away the protective lipids your skin needs to function.

    Here’s what’s happening beneath the surface. Your outermost skin layer — the stratum corneum — is made up of dead skin cells held together by lipids: ceramides, cholesterol, and fatty acids. Think of it as a brick wall, where the cells are the bricks and the lipids are the mortar. When you over-exfoliate, you’re not just removing bricks. You’re dissolving the mortar too — and that’s how skin barrier damage begins.

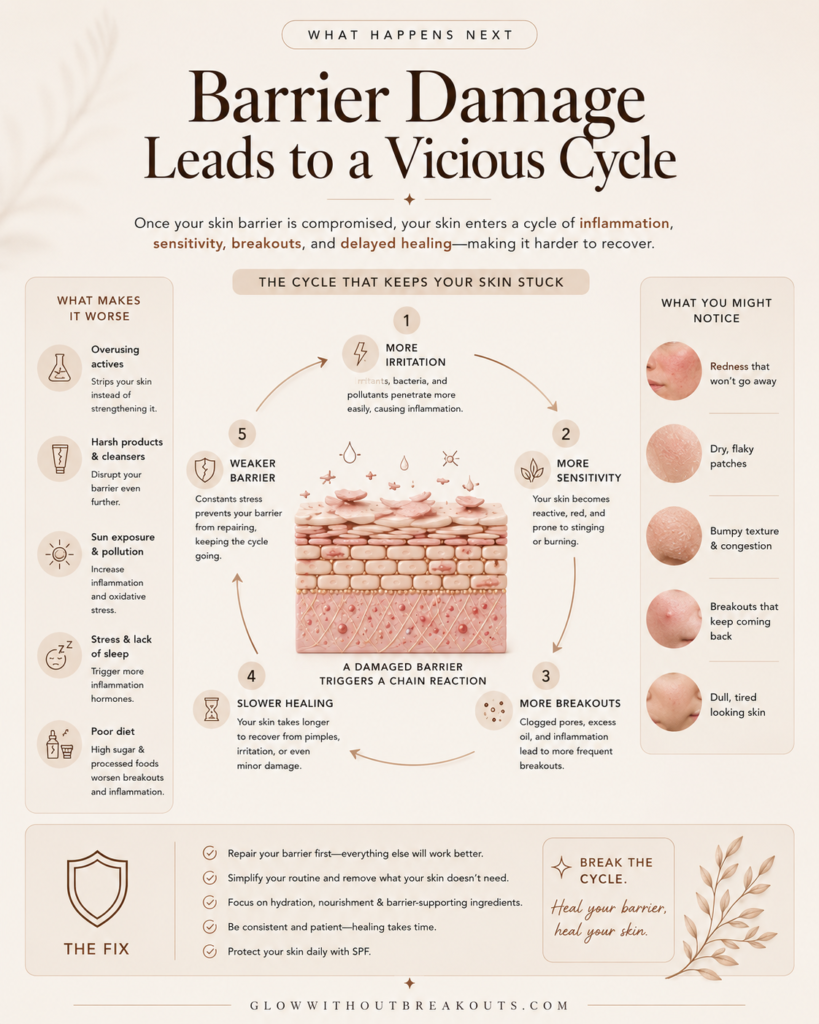
    The result is elevated transepidermal water loss (TEWL). Your skin starts leaking moisture at an accelerated rate, even if you’re applying moisturizer. Dehydrated skin is inflamed skin. Inflamed skin is acne-prone skin. This is the vicious cycle that skin barrier damage creates.

    I see this pattern constantly. Someone exfoliates twice a week, gets results, bumps it to three times, then adds a physical scrub. Within a few weeks their skin is red, reactive, and breaking out worse than before. They assume they need stronger acne treatments and add a retinoid or benzoyl peroxide on top of already serious skin barrier damage. By that point, recovery takes months.

    The fix: Most skin types do well with exfoliation once or twice a week, maximum. If you already have signs of skin barrier damage, stop exfoliating entirely until your skin recovers. For a full step-by-step guide to getting your skin back on track, read our post on Over-Exfoliation Recovery: How to Fix Damaged Skin.


    Mistake #2: Combining Too Many Active Ingredients

    Here’s another common path to skin barrier damage: layering multiple active ingredients in the same routine.

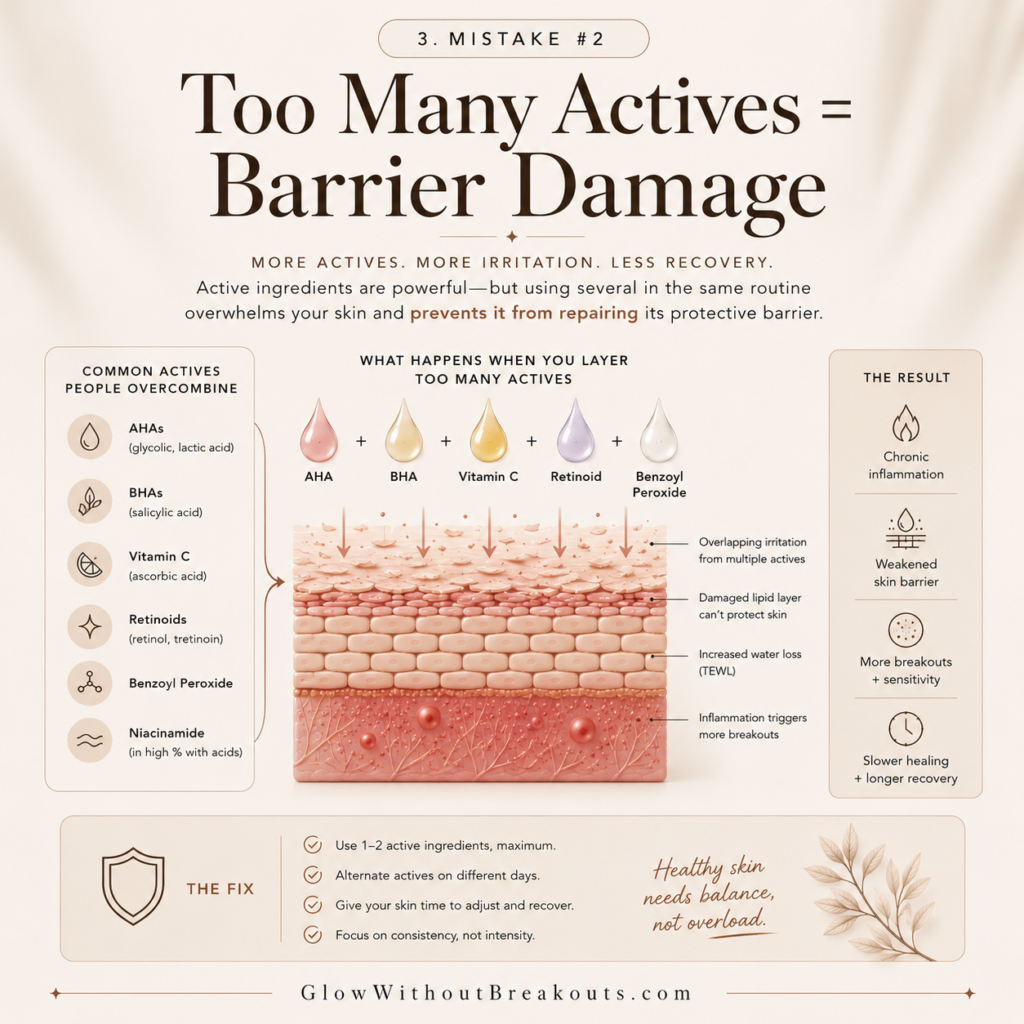
    Active ingredients — AHAs, BHAs, vitamin C, retinoids, niacinamide, benzoyl peroxide — are powerful tools. But they’re all, by definition, irritating to some degree. One active ingredient gives your skin time to adapt and recover. Three or four in the same routine creates progressive skin barrier damage, day after day, with no recovery window.

    I had a client using a BHA toner, vitamin C serum, nightly retinoid, and benzoyl peroxide spot treatment all at once. Within two weeks she had severe skin barrier damage — her skin burned at the touch of anything. She’d developed contact dermatitis, her acne was significantly worse, and her recovery took months longer than it needed to.

    The problem isn’t just the immediate irritation. Constant chemical disruption keeps your skin in a perpetual state of inflammation, making it impossible to repair the existing skin barrier damage.

    The fix: Use one to two actives maximum, on alternating days. If your skin is already irritated, strip your routine back to basics until it stabilizes. For a deeper look at how daily habits quietly worsen breakouts, read our post on the 8 Best Tips to Prevent Breakouts and Acne.


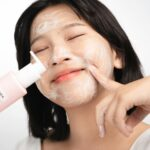
    Mistake #3: Using the Wrong Cleanser

    This one surprises people, but it shouldn’t. Your cleanser is the first product you use every single day — if it’s too harsh, you’re creating skin barrier damage twice daily before you even get to your other products.

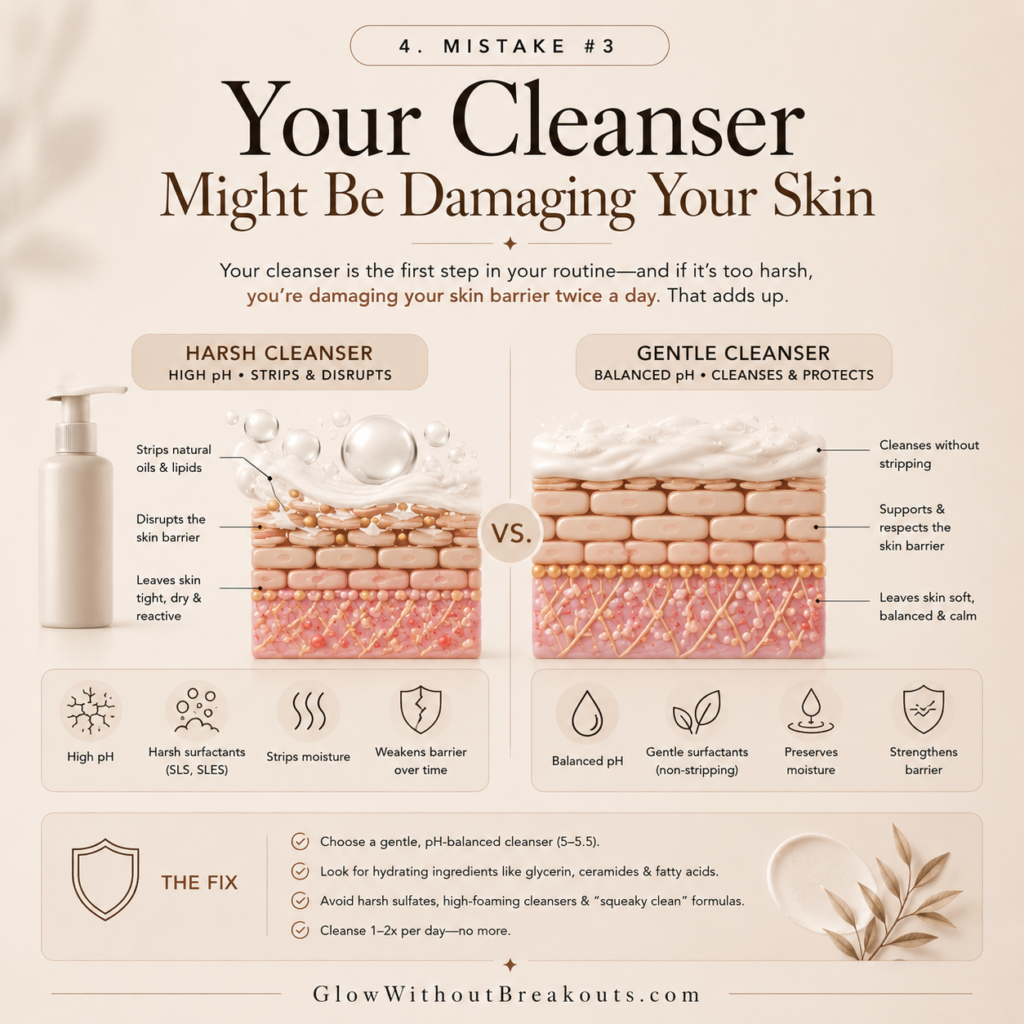
    Most commercial cleansers use surfactants that don’t discriminate between excess surface oil and the essential lipids that make up your barrier. High-pH cleansers (above 7), sulfates, and alcohol also disrupt the acid mantle — the slightly acidic environment that keeps your microbiome balanced. Used twice a day, these cleansers cause cumulative skin barrier damage with every wash.

    Many people think the tight, squeaky-clean feeling means the cleanser is working. It doesn’t. That feeling is skin barrier damage happening in real time.

    The fix: Switch to a gentle, pH-balanced cleanser (around 5.5). Oil cleansers and non-foaming gel or cream formulas are excellent choices. Your skin should feel clean after washing — not tight or uncomfortable. Not sure which cleanser is right for you? We tested and ranked six popular options in our guide to the Best Cleansers for Acne-Prone Skin. And if you’re curious about oil cleansing, our guide to Oil Cleansers for Acne-Prone Skin explains why it might be the gentlest option for a compromised barrier.


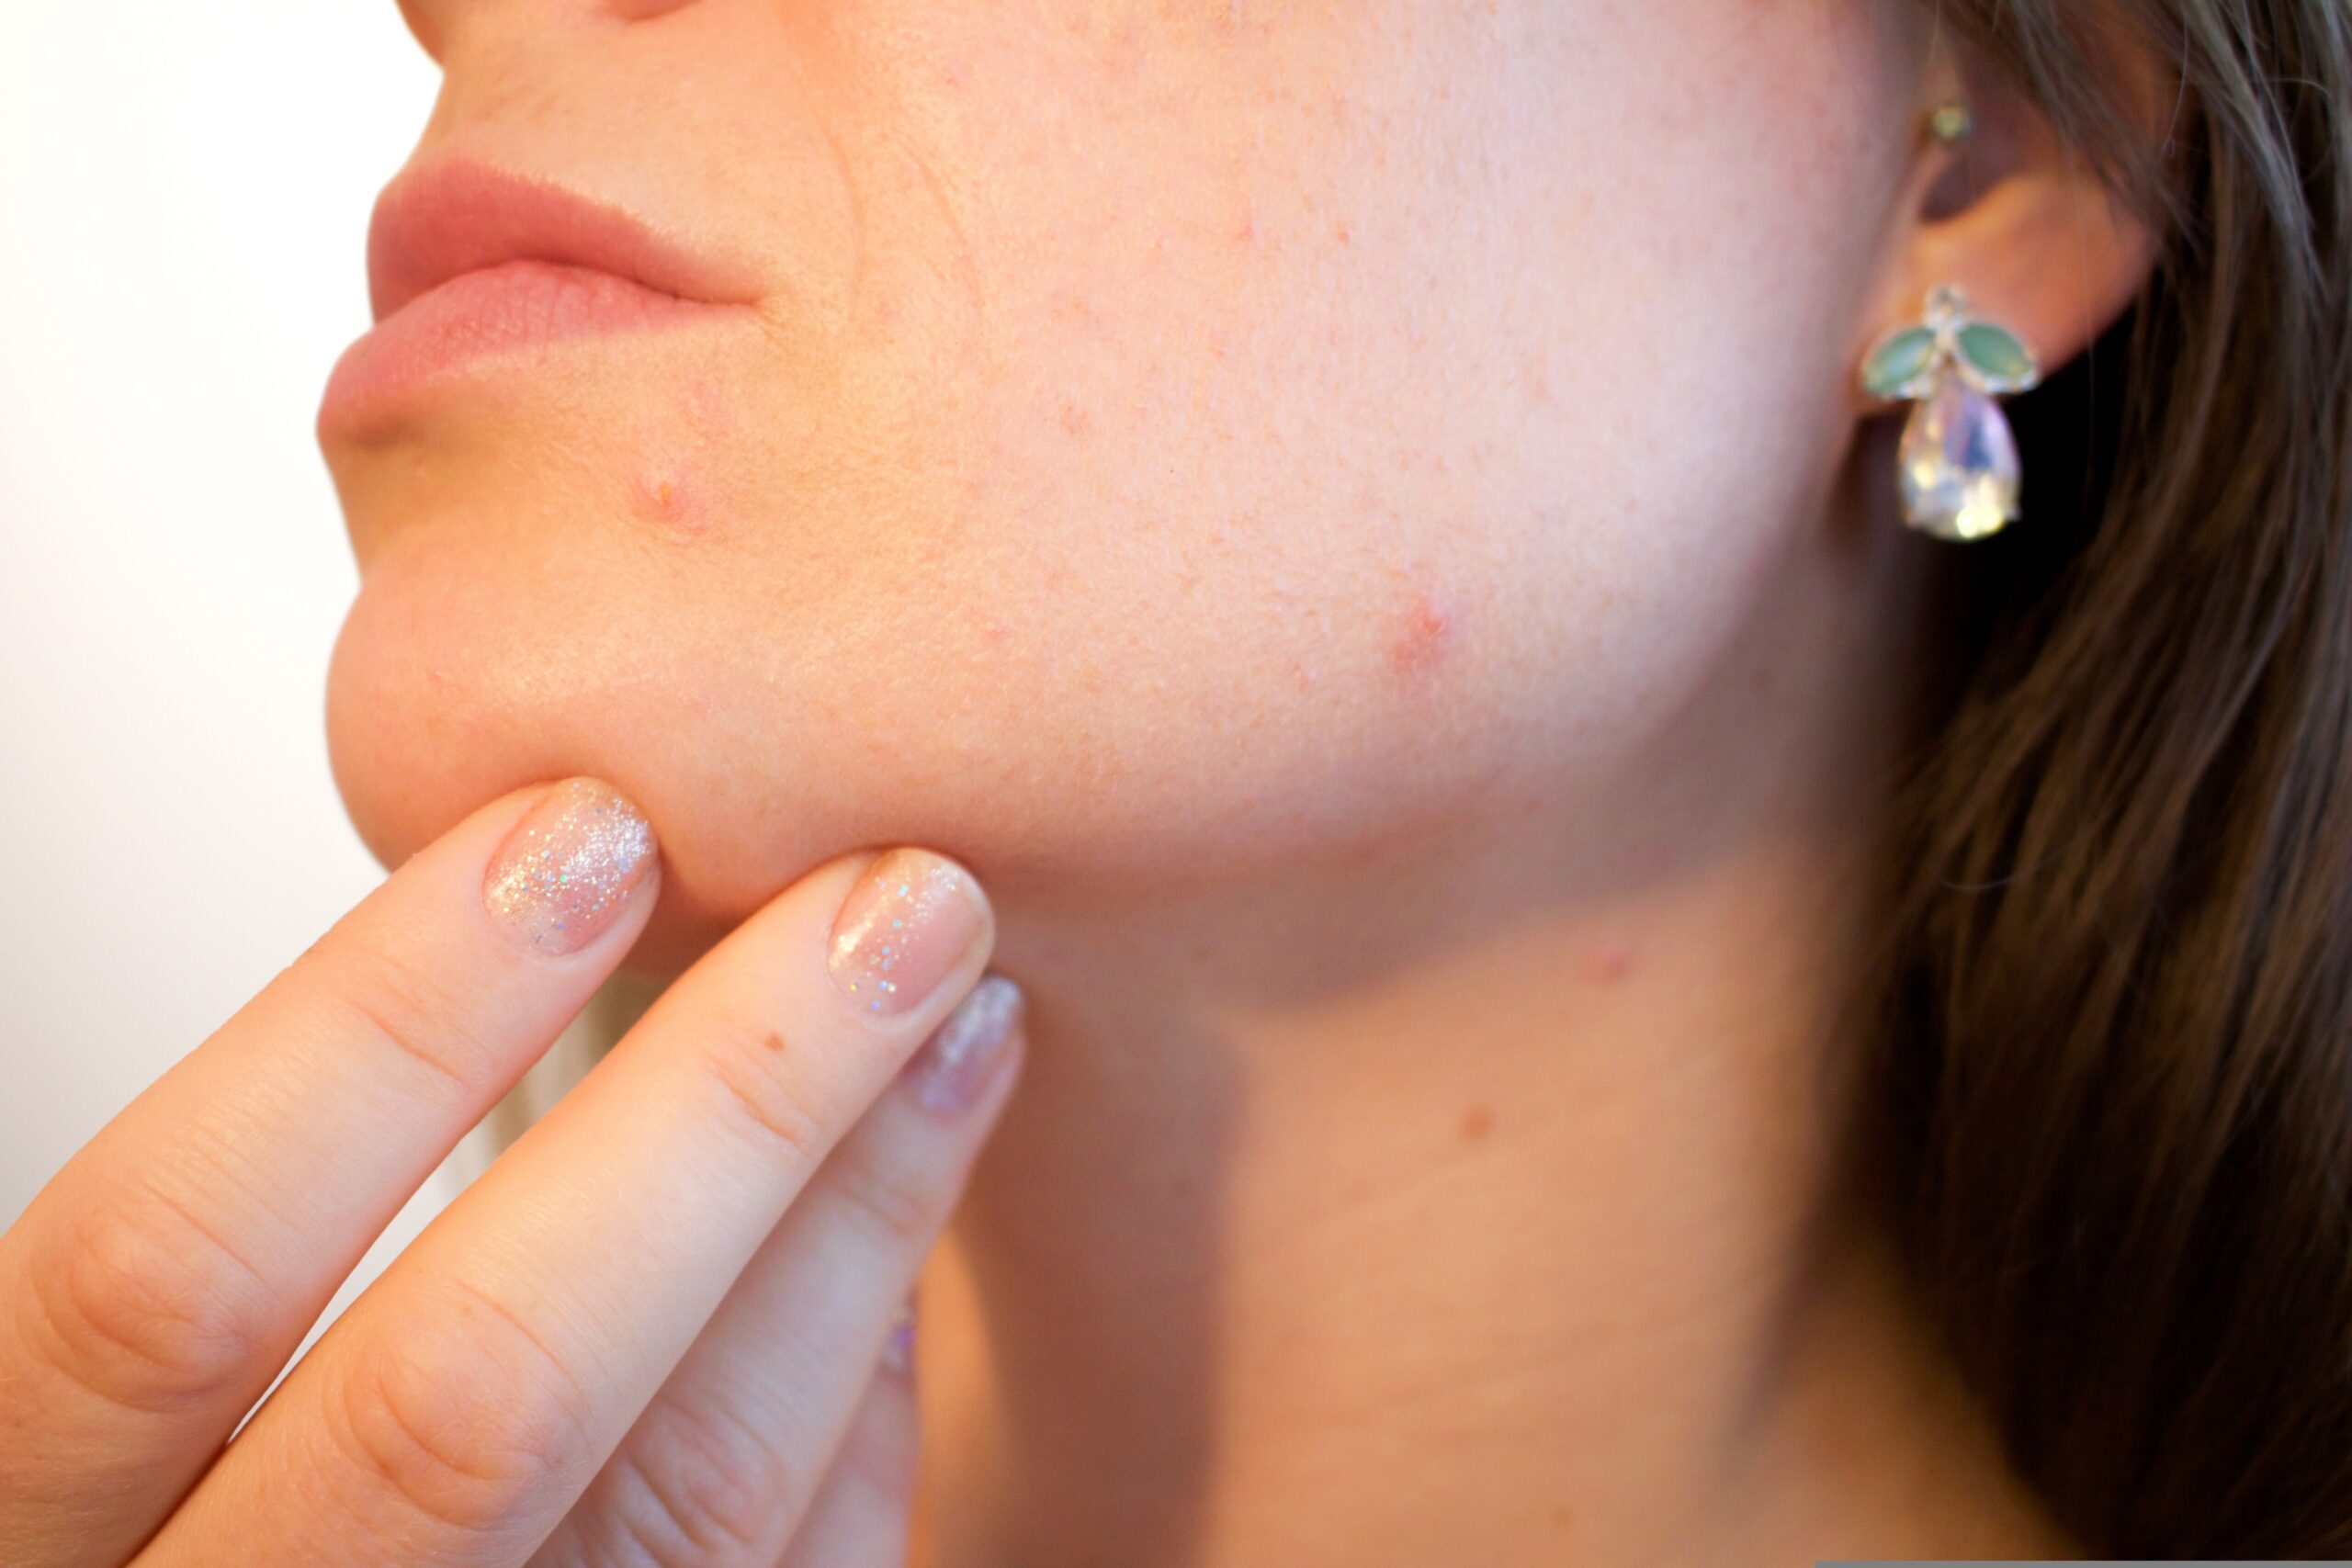
    Mistake #4: Ignoring the Warning Signs of Skin Barrier Damage

    Your skin communicates constantly. The problem is that most people don’t recognize what skin barrier damage actually looks and feels like — so they respond to the warning signs by making things worse.

    Classic signs of skin barrier damage include:

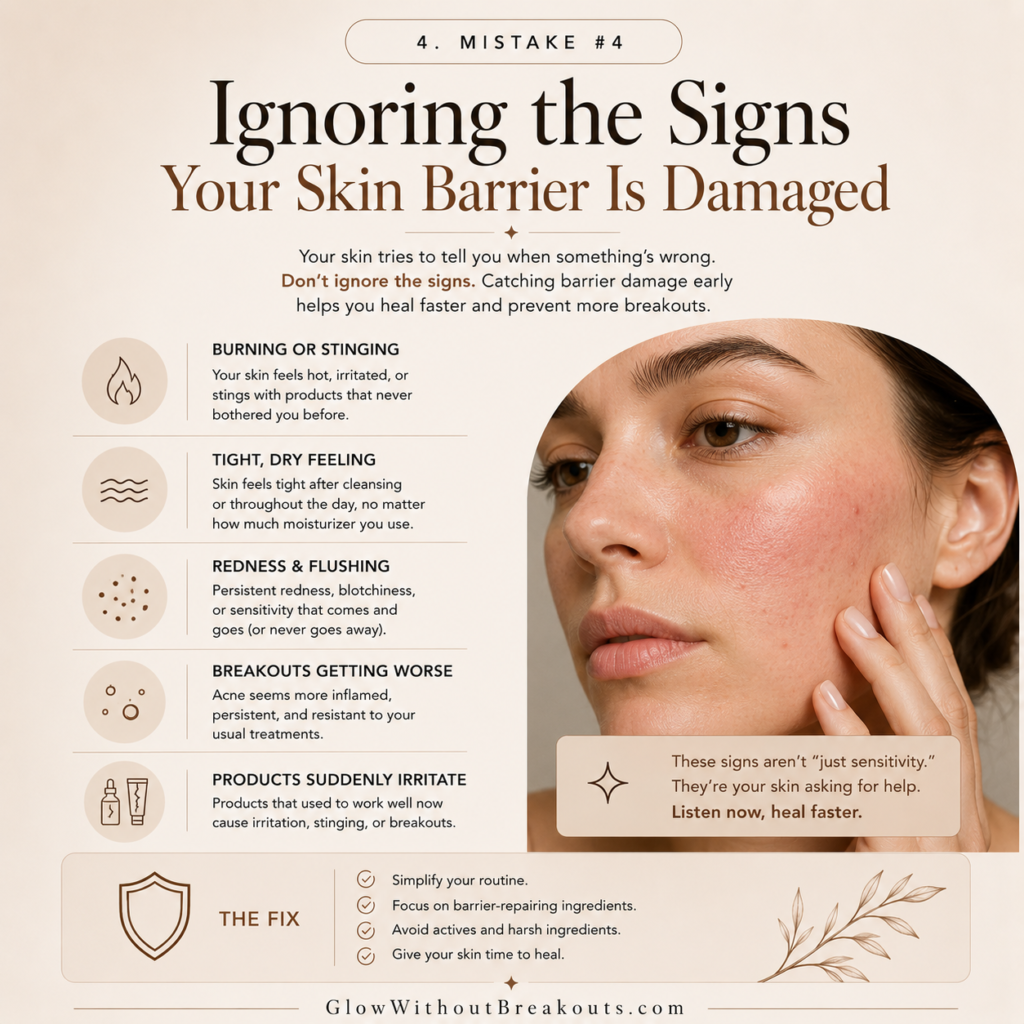
    • Products that never bothered you before now sting or burn
    • Skin feels tight and uncomfortable even after moisturizing
    • Increased redness or flushing after applying products
    • Itching or a rough, bumpy texture
    • Acne that’s worsening despite consistent treatment

    That last point is what derails people most often. When acne flares, the instinct is to reach for stronger treatments. But if that flare is being driven by skin barrier damage, adding more actives is exactly the wrong response. You’re treating the symptom while accelerating the underlying problem.

    I’ve worked with people who had signs of skin barrier damage for months before addressing it — rationalizing the sensitivity, dryness, and breakouts as their treatments “working.” By the time they tackled the root cause, recovery took far longer than it needed to.

    The fix: When these signs appear, simplify immediately. The earlier you catch skin barrier damage, the faster it heals.


    Mistake #5: Not Actively Rebuilding During Skin Barrier Damage Recovery

    This is the mistake that turns a 4-week recovery into a 4-month one.

    Let’s say you’ve stopped over-exfoliating and cut back on actives. Good start. But if you’re still using a stripping cleanser, or your moisturizer doesn’t contain the lipids your skin needs to rebuild, you’re just slowing the harm — not reversing it.

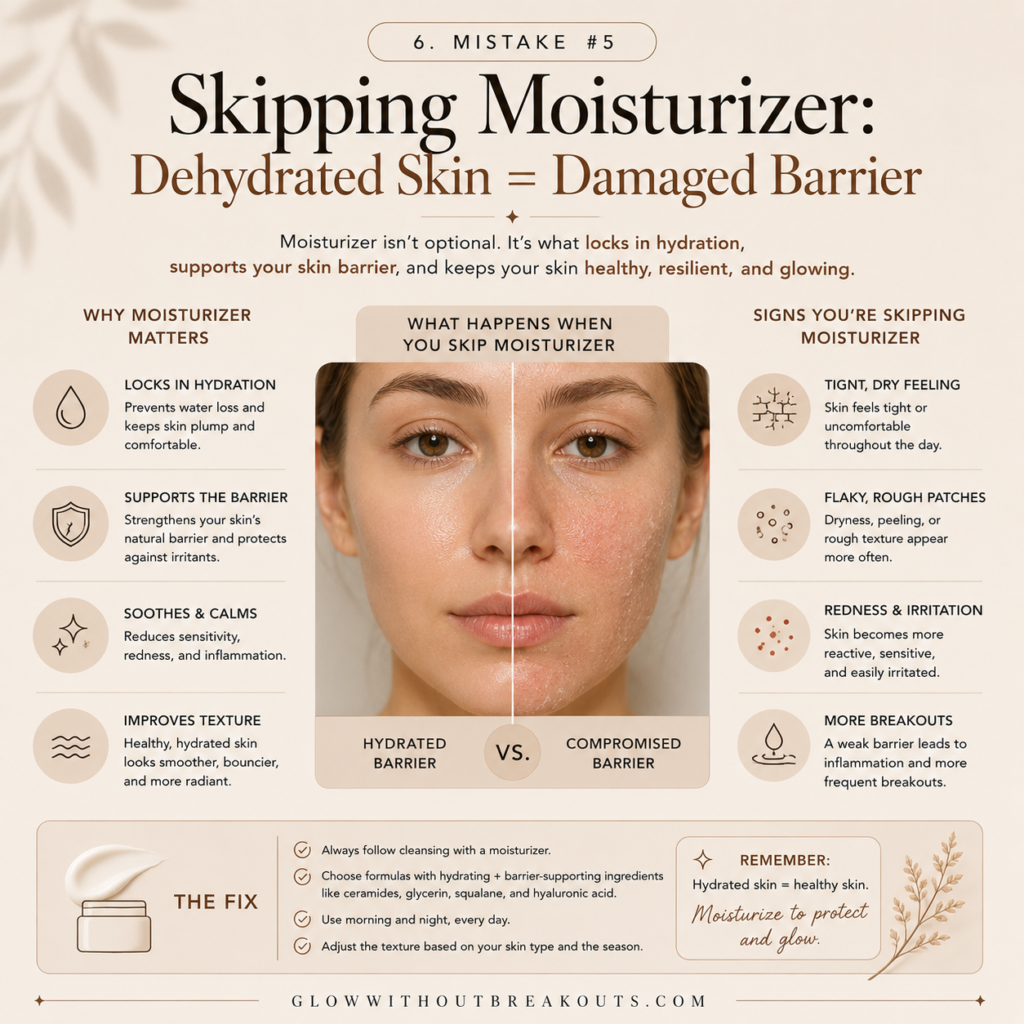
    Recovering from skin barrier damage is not a passive process. Your barrier is made of ceramides, cholesterol, and fatty acids. When those are depleted, you have to actively replenish them. Stopping the harm is step one. Rebuilding is step two.

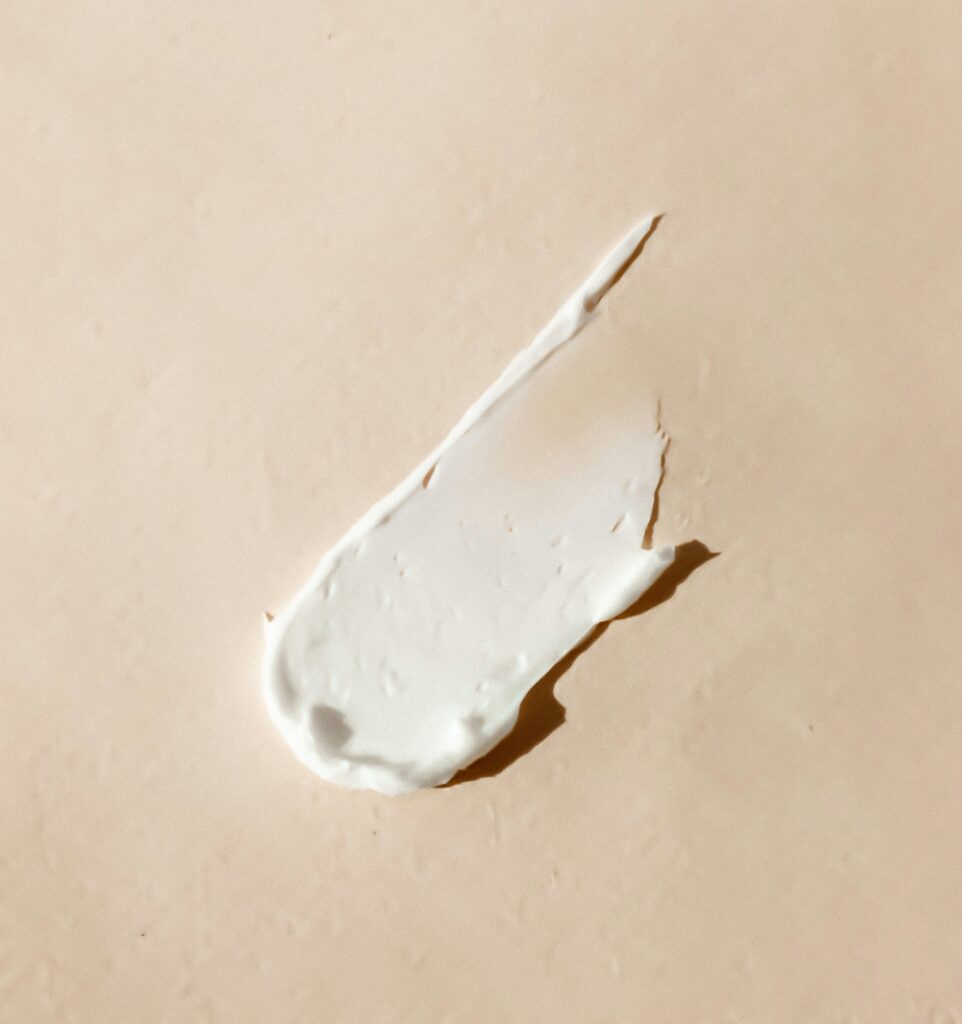
    Here’s where most people go wrong: they reach for a lightweight hydrating moisturizer with glycerin or hyaluronic acid. It sounds right, but it doesn’t address the structural problem. Humectants pull water into your skin, but if there’s no lipid layer to hold it there, it evaporates right back out. To properly repair skin barrier damage, you need a barrier-repair moisturizer — something with ceramides, cholesterol, or fatty acids that rebuilds the structure rather than just temporarily plumping it.

    The fix: During skin barrier damage recovery, use products formulated specifically for barrier repair. Three solid options:

    • CeraVe Moisturizing Cream — formulated with three essential ceramides and developed with dermatologists specifically to restore the skin barrier
    • La Roche-Posay Cicaplast Balm B5+ — a soothing multi-purpose balm with panthenol and madecassoside that actively helps repair dry, irritated skin
    • Aveeno Eczema Therapy — fragrance-free with colloidal oatmeal, accepted by the National Eczema Association

    Look for ceramides, cholesterol, or fatty acids high on the ingredient list.


    What’s Happening at the Cellular Level

    Understanding the science helps explain why skin barrier damage recovery takes as long as it does — and why you can’t rush it.

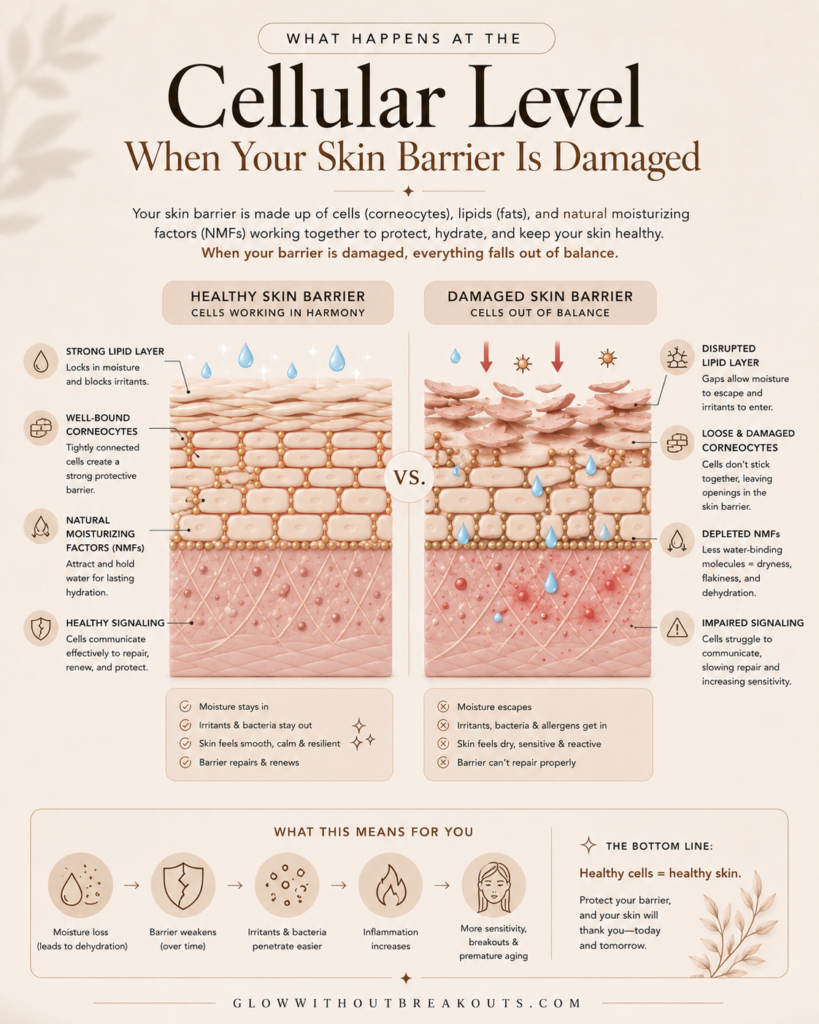
    The stratum corneum is only 10 to 20 micrometers thick, but it does all the heavy lifting. When skin barrier damage disrupts its “brick and mortar” structure, four things happen simultaneously:

    TEWL spikes. Healthy skin loses 10–15g of water per square meter per hour. With significant barrier damage, that can reach 50–100g. Your skin is leaking moisture constantly.

    pH rises. Healthy skin sits at 4.5–5.5. Skin barrier damage pushes pH toward neutral, creating conditions where harmful bacteria thrive.

    Ceramide synthesis slows. When skin barrier damage is severe, damage outpaces your skin’s natural repair process.

    Inflammation activates. Your skin releases cytokines that cause the redness, swelling, and sensitivity you feel.

    These processes don’t stop the moment you put down the irritating product. This is why recovery typically takes 4 to 8 weeks even when you do everything right. For a deeper look at the science, Healthline’s guide to skin barrier function is a well-researched overview worth bookmarking.


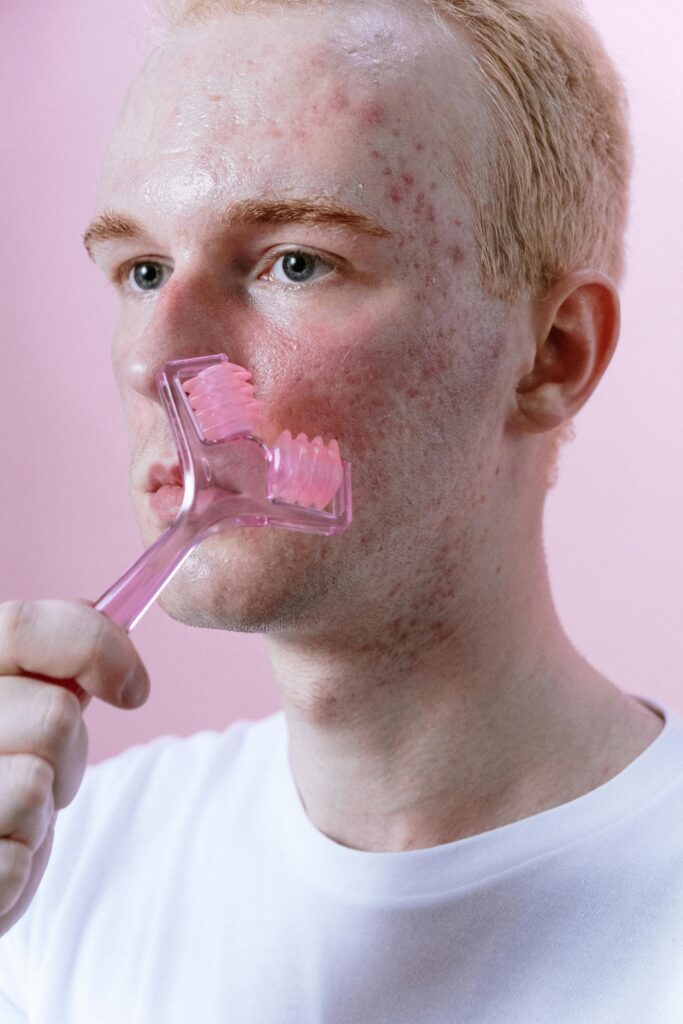
    How Severe Is Your Skin Barrier Damage?

    Mild: Increased sensitivity to familiar products, occasional tightness, some redness after actives that settles quickly. Your barrier is partially compromised but still functional.

    Moderate: Visible redness, burning or stinging with most products, rough texture, increased breakouts. Your natural defenses are struggling.

    Severe: Extreme reactivity, stinging from water, intense itching or flaking, eczema-like symptoms, significantly worsening acne. Your barrier can no longer protect you effectively.

    Recovery timelines:

    • Mild skin barrier damage: 2–3 weeks
    • Moderate skin barrier damage: 4–6 weeks
    • Severe skin barrier damage: 8–12 weeks

    The 4-Week Skin Barrier Damage Recovery Protocol

    Week 1: The Reset

    Strip your routine down to three steps: a gentle cleanser, a hydrating toner, and a barrier-repair moisturizer. No exfoliants, no retinoids, no actives of any kind.

    • Cleanser: pH-balanced (around 5.5), oil-based or creamy non-foaming. Cleanse with your hands, not a cloth.
    • Toner/essence: Simple humectants — glycerin, hyaluronic acid, or panthenol.
    • Moisturizer: Ceramide-containing formula to begin repairing skin barrier damage. CeraVe Moisturizing Cream, La Roche-Posay Cicaplast Balm B5+, and Aveeno Eczema Therapy are all reliable options.

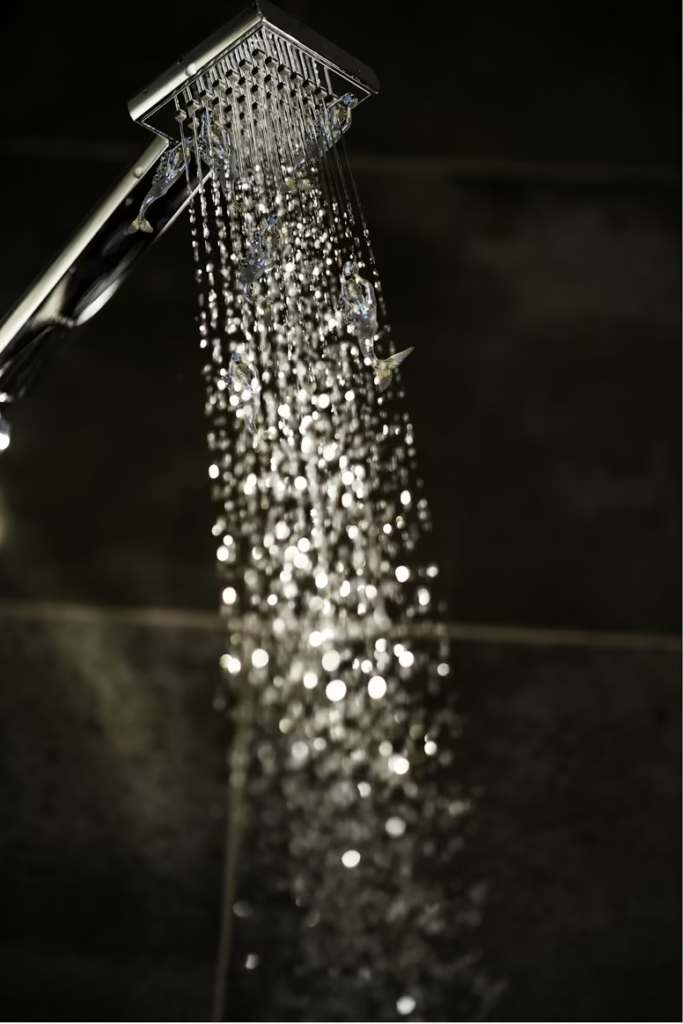
    Avoid hot showers, steam, and prolonged water exposure — all of which worsen skin barrier damage. Lukewarm water, brief contact, hands only.

    By the end of week one, the most acute symptoms — burning and stinging — should start to ease.

    Week 2: Introducing Active Repair

    Keep your week-one routine and add two things:

    • A niacinamide serum (4–5%). Particularly effective for skin barrier damage recovery because it helps your skin synthesize more of its own ceramides, rebuilding from the inside out.
    • An occlusive. A facial oil, balm, or thin layer of Vaseline or Aquaphor at night seals everything in and dramatically reduces moisture loss.

    Still no actives. By the end of week two, redness should be visibly decreasing.

    Week 3: Carefully Reintroducing Actives

    Your barrier is stabilizing. You can begin reintroducing one gentle active, conservatively:

    • BHA: 2% salicylic acid, once per week
    • AHA: 5–8% concentration, once per week
    • Retinoid: Lowest available concentration, once or twice per week. If you were on prescription tretinoin, start with an OTC retinol to avoid re-triggering skin barrier damage.
    • Benzoyl peroxide: 2.5%, spot treatment only

    One active. Low frequency. Two full weeks before considering any increase.

    Week 4: Gradual Progression

    You can increase your active to twice per week if symptoms haven’t returned. You can introduce a second gentle active if needed — but keep them on separate days to avoid fresh skin barrier damage.

    Recovery isn’t perfectly linear. If your skin flares when you increase something, dial it back. That’s not failure — that’s the process.

    By the end of week four, your skin barrier damage should be substantially repaired. Once you’re healed and ready to build a long-term routine, our Best Skincare Routine for Acne-Prone Skin gives you a practical step-by-step framework to follow.


    The Bottom Line

    Most acne treatment fails because people unknowingly cause skin barrier damage in the process of fighting breakouts. The acne worsens. They treat it harder. The barrier damage deepens. The cycle continues.

    Once you understand skin barrier damage, everything changes. Healing your barrier isn’t a detour from treating acne — it is the treatment. You cannot build clear, resilient skin on a compromised foundation.

    The recovery protocol works. I’ve seen it work hundreds of times. But it only works if you commit to it, resist the urge to speed things up with stronger products, and trust that your skin knows how to heal once you stop getting in its way.

    Give it what it needs. It will show you.


    FAQ

    How do I know if I have skin barrier damage or irritant contact dermatitis? The distinction is largely semantic. Irritant contact dermatitis is the inflammatory response to skin barrier damage — two sides of the same coin. The treatment is identical: remove the irritant and rebuild the barrier.

    Can I use serums during skin barrier damage recovery? It depends. Avoid anything with actives or fragrance for the first two weeks. In weeks three and four, a gentle niacinamide serum at 4–5% is genuinely helpful. Skip anything with essential oils or exfoliating ingredients until you’re fully healed.

    Is my cleanser causing skin barrier damage? If your skin feels tight or immediately dry after cleansing, almost certainly yes. The right cleanser leaves skin feeling clean but comfortable — not stripped.

    How long does recovery actually take? Mild skin barrier damage: 2–3 weeks. Moderate: 4–6 weeks. Severe: 8–12 weeks. This assumes you follow the protocol consistently and stop using the products that caused the problem.

    Can I use sunscreen during recovery? Absolutely — sun protection is even more important when you have skin barrier damage, since compromised skin is more vulnerable to UV. Choose a mineral formula (zinc oxide or titanium dioxide). Not sure which sunscreen won’t clog your pores? Our roundup of the Best Sunscreens for Acne-Prone Skin covers the top non-comedogenic options.

    What if I see improvement and want to return to my full routine early? Don’t. Visible improvement in week two or three means your skin is healing — not that skin barrier damage is fully repaired. Going back to a full active routine prematurely will re-damage what you’ve rebuilt and restart the clock. And if you’re dealing with an active breakout while recovering, our post on Best Ways to Make a Pimple Go Away Fast covers science-backed methods that are safe to use even on sensitive skin.


    Still unsure whether skin barrier damage is behind your breakouts? Read our post — The Worst Skincare Mistake I Made (And How It Took 7 Years to Fix) — it might sound very familiar.

  • 4 Week Over-Exfoliation Recovery: How to Fix Damaged Skin

    4 Week Over-Exfoliation Recovery: How to Fix Damaged Skin

    The barrier damage is real. Here’s the 4-week protocol I used for over-exfoliation recovery, and how to avoid over-exfoliation in the first place.


    Introduction

    Over-exfoliation is one of the easiest skincare mistakes to make because exfoliation feels productive. You’re removing dead skin, unclogging pores, and revealing fresh skin underneath. It feels like progress. But when you do it too much or too aggressively, you cross a line. Your skin barrier (the outermost layer designed to protect you) becomes compromised. You get increased breakouts, persistent redness, sensitivity to everything, and a desperate feeling that your skin has permanently turned against you.

    I’ve been there. I over-exfoliated my skin badly enough that it took a full month of intentional recovery to get back to baseline. I’m sharing exactly what I did during that month, the science behind why over-exfoliation causes acne, and how to exfoliate safely without damaging your skin barrier. If you’re currently dealing with skin over-exfoliation, this protocol works. If you’re thinking about upping your exfoliation game, read this first so you don’t have to learn the hard way.

    Table of Contents


    SIGNS Of OVER-EXFOLIATION

    How Do You Know If You’ve Damaged Your Barrier?

    Over-exfoliation doesn’t always announce itself dramatically. Sometimes it’s a slow creep where your skin gets progressively more irritated, and sometimes it’s a sudden shift after one aggressive session. Here are the signs that you’ve crossed the line:

    Persistent redness and flushing. Your face is red even when you’re not active, not exercising, and not in a heated environment. The redness doesn’t fade after a few minutes of cool air. This is inflammation from barrier damage.

    Everything irritates your skin now. Products that never bothered you before, such as your moisturizer, your sunscreen, even plain water, suddenly sting or burn. This is a sign that your skin barrier is compromised and can’t tolerate even gentle products.

    Increased breakouts, even with perfect hygiene. You’re breaking out more than usual, and these breakouts feel different. They’re often concentrated in areas you exfoliate most aggressively. This is because a damaged barrier can’t protect against bacteria and irritants.

    Extreme dryness and tightness. Your skin feels tight even right after moisturizing. You might see flaking or peeling in unexpected areas. This is barrier damage that prevents your skin from retaining moisture.

    Sensitivity to touch. Your skin feels raw or tender. Even gently rubbing your face with a soft cloth feels uncomfortable. This is inflammation and nerve irritation from damaged skin.

    Your usual treatments stopped working. Acne treatments, serums, or other actives that used to work are now making your skin worse. This is because a compromised barrier can’t handle active ingredients—it needs time to recover first.

    If you’re experiencing three or more of these signs, you’ve likely over-exfoliated. The good news is that skin is resilient. It will recover, but it needs the right protocol.


    WHY OVER-EXFOLIATION CAUSES ACNE

    The Science of Barrier Damage and Acne

    Your skin barrier is a waxy, lipid-rich layer made up of dead skin cells and sebum. It’s not glamorous, but it’s critical. This barrier protects you from bacteria, viruses, and environmental irritants. It also regulates water loss, keeping your skin hydrated from the inside out.

    When you over-exfoliate—whether with physical scrubs, chemical exfoliants, or even too-frequent gentle exfoliation—you’re essentially stripping away this protective layer. As a result of over-exfoliation, you’re removing the very cells and lipids designed to keep your skin safe.

    Here’s what Happens from Over-Exfoliation:

    Your skin barrier is compromised, so bacteria can penetrate more easily. Cutibacterium acnes (formerly known as Propionibacterium acnes) is a bacterium that lives on everyone’s skin. It’s not inherently bad, but when your barrier is damaged, these bacteria can burrow deeper into your skin and trigger more intense inflammatory responses. Result: more breakouts, often worse than what you were dealing with before.

    Your skin loses water rapidly, and dehydration triggers more sebum production. When your barrier is damaged, your skin can’t retain moisture properly. Water evaporates faster. Your skin, sensing this dehydration, compensates by producing more sebum to try to seal in moisture. More sebum + damaged barrier + increased bacterial penetration = the perfect storm for acne.

    Inflammation increases, worsening existing acne and creating new breakouts. A compromised barrier triggers your immune system to go into overdrive. Your skin produces more inflammatory molecules, which makes everything worse. Existing breakouts get angrier, and new breakouts appear in places you don’t normally break out.

    Your skin becomes sensitized to ingredients it normally tolerates. Without a healthy barrier, even gentle ingredients can trigger reactions. Your skin feels raw, stings easily, and becomes unpredictable. This is why people often make the mistake of cutting out all skincare during over-exfoliation—their skin has become so sensitive that even basic moisturizers feel irritating.

    The recovery process is about rebuilding this barrier. You need to stop further damage, hydrate aggressively, calm inflammation, and slowly reintroduce your skin to normal function. This takes time, but it works.


    THE 4-WEEK OVER-EXFOLIATION RECOVERY PROTOCOL

    Week 1: Immediately Stop Exfoliating

    The most important thing you can do right now is stop exfoliating. No physical scrubs, no chemical exfoliants, no manual exfoliation of any kind. This includes:

    • Washcloths (even soft ones)
    • Exfoliating gloves or devices
    • Chemical exfoliants (AHAs, BHAs, retinoids)
    • Microdermabrasion tools
    • Physical scrubs
    • Sonic cleansing brushes

    You’re done with exfoliation until your barrier recovers. Your skin needs to stop being aggressed so it can rebuild.

    Simplify your routine dramatically. Use only:

    1. A gentle, non-stripping cleanser (cream or oil-based)
    2. A hydrating toner or essence (optional, but helpful)
    3. A heavy moisturizer (preferably with ceramides, niacinamide, or glycerin)
    4. Sunscreen during the day (Learn more for which sunscreens to use here: Sunscreen Recommendations for Acne-Prone Skin)
    5. An occlusive treatment at night (thick moisturizer, occlusive balm, or hydrating mask)

    That’s it. No serums, no actives, no treatments. Just the basics. Your job this week is to stop the bleeding and let your barrier start to stabilize.

    Hydration is critical. Use products with hydrating ingredients like:

    • Hyaluronic acid
    • Glycerin
    • Ceramides
    • Niacinamide
    • Peptides

    These ingredients help your skin retain water and start repairing the barrier. Avoid anything stripping, astringent, or irritating.

    Be gentle with your skin. Don’t rub your face when cleansing. Use lukewarm water, not hot. Pat dry gently instead of rubbing. Treat your skin like it’s recovering from an injury because it is.


    Week 2: Hydrating Skin to Repair Over-Exfoliation Damage

    By week two, your skin should start feeling slightly less angry. The redness might still be there, but the stinging should reduce. This is when you can introduce hydration-focused treatments.

    Add a hydrating serum or essence. Choose one with:

    • Hyaluronic acid
    • Glycerin
    • Amino acids
    • Peptides

    Apply this before your moisturizer. It adds an extra layer of hydration that your compromised skin desperately needs.

    Use a hydrating mask 2-3 times per week. Look for masks that are hydrating rather than purifying or clay-based. Sheet masks with hyaluronic acid, glycerin, or honey are excellent. Sleep masks (leave-on masks) are also great for overnight barrier recovery.

    Consider adding a hydrating toner if you haven’t already. A good hydrating toner adds water and humectants to your skin before moisturizing. This layering approach—toner → serum → moisturizer → occlusive—is perfect for barrier repair.

    Keep everything else the same. No exfoliation, no actives, no new products. Stick with your simplified routine and add only hydration.

    Pay attention to how your skin responds. By the end of week two, you should notice:

    • Less redness
    • Less stinging or sensitivity
    • Skin that feels less tight
    • More resilience (products don’t irritate as easily)

    If you’re not seeing improvement, extend week two for another week before moving forward.


    Week 3: Soothing Actives to Help Over-Exfoliation

    Once hydration stabilizes your barrier, you can introduce gentle, anti-inflammatory ingredients. These are actives that calm rather than strip.

    Niacinamide (vitamin B3). If you haven’t used this already, introduce it now. Niacinamide reduces inflammation, strengthens the barrier, and regulates sebum production. It’s one of the most skin-barrier-friendly actives out there.

    Centella asiatica (cica). This plant extract is incredibly soothing and has been shown to strengthen the skin barrier and reduce redness. Look for it in serums, toners, or creams.

    Azelaic acid. If you’re dealing with post-inflammatory hyperpigmentation or stubborn breakouts from over-exfoliation, azelaic acid is gentle enough to use during recovery and effective enough to address the damage. Start with a lower concentration (10%) and use it 2-3 times per week.

    Snail mucin or fermented extracts. These are gentle, hydrating, and anti-inflammatory. They’re a good option if you want something soothing without active ingredients.

    Avoid these during recovery:

    • Retinoids (even gentle ones)
    • Vitamin C serums (can be irritating)
    • Strong actives like benzoyl peroxide
    • Any exfoliating ingredients

    The goal of week three is calm, not treatment. You’re giving your barrier breathing room while introducing ingredients that actively support healing.


    Week 4: Gently Reintroducing Exfoliation

    By week four, your skin should be noticeably better. The barrier is rebuilding, inflammation is down, and your skin is tolerating products better. This is when you can start slowly reintroducing your normal routine—but carefully.

    Reintroduce one product at a time, spaced 3-4 days apart. Don’t add everything back in at once. Pick one product (a serum, a treatment, whatever). Use it for 3-4 days, and see how your skin responds. If it’s fine, wait another 3-4 days and introduce the next product.

    When reintroducing exfoliation, start extremely gently. You do not want your skin to be damaged from over-exfoliation again and start at square 1. If you want to use exfoliants again, wait until week four. And when you do:

    • Start with the gentlest option (oil cleansing, a gentle physical exfoliant like Cetaphil SA, or a low-concentration chemical exfoliant)
    • Use it only once per week.
    • Pay close attention to how your skin responds.
    • If there’s any irritation, redness, or increased breakouts, stop and wait another week.

    Do not rush back into your old exfoliation routine. If you over-exfoliate once, you’re likely to do it again without being intentional about frequency and intensity.

    By the end of week four:

    • Your redness should be significantly reduced.
    • Your skin should tolerate your normal products again.
    • You should be able to introduce one or two of your regular treatments.
    • Your barrier should be mostly recovered.

    Recovery doesn’t end at week four, but four weeks is the critical window. From week four onward, continue using barrier-supporting products (hydrating serums, moisturizers with ceramides) alongside your normal routine. Think of barrier repair as ongoing maintenance, not a temporary protocol.


    HOW TO EXFOLIATE SAFELY (SO YOU NEVER OVER-EXFOLIATE AGAIN)

    The Rules of Exfoliation

    Now that you understand what over-exfoliation does, here’s how to exfoliate safely without damaging your barrier.

    Exfoliate less frequently than you think you need to.

    Most people exfoliate too often. The skin naturally sheds dead cells every 28-30 days. You don’t need to force this process more than once a week, and for sensitive or acne-prone skin, once every 10-14 days is often better.

    Use a gentle method, not an aggressive one.

    Physical scrubs with large, jagged particles, sonic brushes, and microdermabrasion are all high-risk for over-exfoliation. Chemical exfoliants are gentler, but they still require restraint.

    Lower concentration is always better than higher concentration.

    If you’re using a chemical exfoliant like a BHA or AHA, start with a lower concentration and work your way up if needed. A 2% BHA is plenty for most people. An 8% AHA is strong; a 5-7% AHA is gentler. Higher concentration does not mean better results; in fact, higher concentration exfoliants are often the leading cause of over-exfoliation. Over-exfoliation of the skin can happen when a product that is too strong is used even just once, or when a gentler exfoliant is used too frequently. It’s always better to start with a gentler exfoliant and increase it to what’s tolerable to your skin over time: this way, you can minimize the risk of over-exfoliation, and save your skin the extra trouble.

    Don’t combine exfoliants.

    If you’re using a chemical exfoliant, don’t also use a physical scrub on the same day. This will put your skin at risk for over-exfoliation. If you’re using retinol, don’t exfoliate on retinol nights. Pick one exfoliation method and stick with it. Mixing methods is how you accidentally over-exfoliate.

    Stop if your skin is already irritated.

    If your skin is already red, sensitive, or breaking out, don’t exfoliate. Wait until your skin is calm again before introducing exfoliation.

    Listen to your skin, not a routine.

    Just because you exfoliated once a week for months doesn’t mean your skin will always tolerate that frequency. Seasons change, hormones shift, and your skin evolves. Adjust exfoliating frequency based on what your skin is actually telling you, not what a routine says you should do.


    WHAT ACTUALLY WORKED FOR MY SKIN – RETINOL OVER CHEMICAL EXFOLIANTS

    Finding the Right Exfoliation Method for Your Skin

    Here’s the truth: chemical exfoliants didn’t work well for my skin, even when I was using them gently and infrequently. I followed all the rules: low concentrations, once per week, and proper hydration, but my skin would still respond with irritation and increased breakouts. For some people, chemical exfoliants are just too much, even at their gentlest.

    That’s when I discovered that retinol was the game-changer for me. Retinol works differently from chemical exfoliants. Instead of dissolving the bonds between dead skin cells, retinol accelerates your skin’s natural cell turnover and boosts collagen production. It’s exfoliation without the active stripping, which means less irritation and more sustainable results over time.

    But here’s what nobody tells you: retinol causes a purge. Before you see the smooth, clear skin benefits, your skin will likely get worse first. You’ll see increased breakouts, some flaking, and temporary texture changes in your skin. This isn’t your skin rejecting retinol, instead, this is your skin speeding up cell turnover and pushing out everything that was trapped in your pores.

    The Huge Retinol Mistake I made that I Learned from:

    The first time I used retinol, I made big mistakes. I applied it without buffering, used it multiple times per week right out of the gate, and when the purging started, I panicked. My skin looked worse, felt drier, and seemed angrier than it had been in months. I decided retinol wasn’t for me and cut it out of my routine entirely. That was a mistake. But here’s the good news: I eventually decided to give retinol another shot, and this time I actually did the research. Once I understood that the purge was temporary and normal, and once I learned how to introduce retinol slowly and thoughtfully, everything changed.

    My Protocol for Reintroducing Retinol with Sensitive Skin:

    The moisture-sandwich method was the breakthrough for me. Apply a thin layer of moisturizer to clean, dry skin first. Then apply a pea-sized amount of retinol. Finally, apply another layer of moisturizer on top. This buffering technique significantly reduces irritation and the severity of the purge, while still allowing retinol to work effectively.

    During week one, use retinol only twice. That’s it. Maybe Monday and Thursday, with several days of break in between. This sounds conservative, but it’s intentional. You’re not trying to shock your skin with retinol if you’ve never used it before. You’re introducing it gradually so your skin has time to adapt.

    Pay close attention to how your skin responds during this first week. If you’re seeing mild purging (some new breakouts, slight flaking) but no severe irritation or excessive dryness, you’re on the right track. This is your skin adjusting, not rejecting.

    In week two, you can increase to three uses if your skin tolerated week one well. At week three, move to four uses. In week four, you might move to five uses, depending on how your skin is feeling. Continue this slow progression, listening to your skin the entire time. If at any point your skin becomes severely irritated, red, or experiences significant sensitivity, dial it back.

    If you are interested in trying a solid retinol for acne-prone skin or sensitive skin, I recommend you try the Cerave Resurfacing Retinol Serum. I use this exact product with the moisture-sandwich method on my skin, and within the first 2 months, I noticed visible results. My skin appeared smooth, and my overall complexion was very even.

    A Change in Perspective:

    Here’s the part that changed my perspective: you need to be patient with retinol and really give it a couple of months to see a difference. This isn’t a product that delivers instant results like a good cleanser or a targeted acne treatment. Retinol is a long-term commitment. The purge typically lasts two to four weeks, but the real transformation—smoother texture, fewer breakouts, more resilient skin—takes time. I noticed significant improvements around the eight-week mark, and by three months, my skin was noticeably different. Most people quit retinol too early because they don’t understand the timeline. They expect results in two weeks and bail when they see purging. Don’t do that. Push through the purge, keep buffering the retinol with moisturizer, and trust the process.

    Oil Cleansing for Gentle Exfoliation

    Another way to exfoliate without being rough on your skin is oil cleansing. Oil cleansing is the gentlest form of exfoliation because it’s not actually exfoliating at all—it’s dissolving. When you massage oil into your skin, it gently dissolves sebum and lifts away dead skin cells and debris that are trapped in your pores. You get that deep-clean feeling instantly, without the irritation or barrier damage that comes with physical or chemical exfoliants. If retinol feels too aggressive even with buffering, or if you want an exfoliation method that requires zero adjustment time, oil cleansing is your answer. (I’ve written a complete guide to oil cleansers here if you want to dive deeper: Oil Cleansing Guide)

    Oil cleansing is a great, gentle exfoliator that gives instant results

    The Cetaphil SA Gentle Exfoliating Lotion is also worth mentioning as another backup option. Despite being a physical exfoliant (which I generally recommend against), the formula is genuinely gentle. It has a very fine texture that doesn’t create micro-tears, and it includes salicylic acid, so you get both gentle physical and chemical exfoliation. I use it occasionally when I’m not using retinol, and it doesn’t trigger the sensitivity or increased breakouts that come with stronger exfoliants.

    A quick note: Just because chemical exfoliants didn’t work for me doesn’t mean they won’t work for you. I have acne-prone, combination, and sensitive skin—that’s my specific skin type. Chemical exfoliants might be perfect for your skin if you have oily skin that’s not sensitive, or if your barrier is naturally more resilient. The takeaway here isn’t “chemical exfoliants are bad.” It’s “exfoliation isn’t one-size-fits-all, and you need to experiment to find what works for your skin.”

    Don’t Quit on a Product to Soon:

    The takeaway here is that patience is part of the process. What works for most people might not work for you, and that’s okay. If chemical exfoliants don’t agree with your skin, try retinol with a slow, buffered approach. Don’t shock your system—introduce it gradually and give it time. If you quit the first time because of purging, give it another shot with better knowledge. And if you want something that works immediately with zero adjustment, oil cleanse. The goal is finding an exfoliation method that supports your skin without causing damage, and sometimes that means being willing to experiment, adjust, and trust the timeline.


    FAQ – OVER-EXFOLIATION & RECOVERY

    I’m in week two of recovery, and my skin is still really red. Should I extend the protocol?

    Yes. Recovery timelines aren’t one-size-fits-all. If your skin is still showing significant redness, stinging, or sensitivity in week two, extend for another week or two before moving to hydrating actives. Skin resilience varies, and pushing too fast is how you re-damage your barrier. There’s no prize for finishing the protocol on time. Listen to your skin.

    Can I use any exfoliant during recovery, or do I absolutely have to wait until week four?

    Absolutely wait until week four. Exfoliating before your barrier has recovered is like opening a wound before it’s healed. You’re extending the damage, not helping it. Week four is the minimum—and even then, start with the gentlest option available.

    What if I’m already using retinol? Does the recovery protocol change?

    Yes. Stop using retinol immediately if you’re in the middle of recovering from over-exfoliation. Retinol is an active ingredient that can irritate a compromised barrier. Once your barrier is mostly recovered (around week three or four), you can carefully reintroduce retinol using the slow, buffered approach I outlined. But during active recovery, stop all actives except gentle, soothing ingredients like niacinamide or cica.

    I over-exfoliated two weeks ago, and my breakouts are getting worse, not better. What’s happening?

    This is common and frustrating. When your barrier is damaged, acne often worsens before it gets better because bacteria can penetrate more easily. This is also why people think they need stronger acne treatments—but stronger treatments actually make things worse during barrier recovery. Stick with your recovery protocol. The breakouts will improve as your barrier rebuilds. Pushing actives or harsher treatments now is counterproductive.

    How often should I exfoliate once my skin is fully recovered?

    This depends on your skin type. If you have sensitive skin, as I do, exfoliate once per week or every 10 days. For oily skin that’s not sensitive, twice per week might be okay. If you have dry or very sensitive skin, every 10-14 days is better. Pay attention to how your skin responds. If you see signs of irritation (redness, sensitivity, increased breakouts), cut back on frequency. The goal isn’t maximum exfoliation—it’s optimal exfoliation for your skin without damage.

    Should I exfoliate before or after other treatments in my routine?

    Exfoliate on separate nights from actives like retinol, vitamin C, or azelaic acid. If you exfoliate on a Monday, don’t use actives on Monday night. Wait until Wednesday or Thursday. Combining exfoliation with other actives is how you accidentally over-exfoliate. Keep them separated.

    What’s the difference between a chemical exfoliant and retinol if they both exfoliate?

    Good question. Chemical exfoliants (AHAs and BHAs) dissolve the bonds between dead skin cells on the surface and upper layers of skin. Retinol works systemically—it accelerates your skin’s natural cell turnover at a deeper level and boosts collagen production. Chemical exfoliants are faster (you see results in days or weeks), but they’re harsher on the barrier if overused. Retinol is slower (it takes weeks or months to see results), but it’s gentler on the barrier because it doesn’t strip anything. Both are forms of exfoliation; they just work differently.


    What Exfoliants Work for Your Skin?

    Here’s what I want to know: Do exfoliants work for your skin? And if so, which method—physical, chemical, or retinol—has been the most effective without causing irritation?

    I’ve shared my experience with you, but every skin is different. Chemical exfoliants didn’t work for my acne-prone, combination, sensitive skin, and retinol became my go-to. But I know plenty of people whose skin absolutely thrives on chemical exfoliants and responds terribly to retinol.

    Drop a comment and tell me:

    • What’s your skin type?
    • What exfoliation method(s) have you tried?
    • Which one worked best without causing damage?
    • Have you ever over-exfoliated? What did you do to recover?

  • 3 Powerful Ways to Make a Pimple Go Away Fast: No Scarring

    3 Powerful Ways to Make a Pimple Go Away Fast: No Scarring

    You woke up, looked in the mirror, and there it is—a new pimple: whether it’s a whitehead, a stubborn cyst, or that angry red bump, you want it gone. Now.

    I’ve been there countless times. After years of trial and error with various treatments, I’ve discovered the best ways to make a pimple go away fast, and, more importantly, what prevents scarring and hyperpigmentation in the process.

    Here’s what I’ve learned works.

    The Reality: Speed Matters: And We Want Fast Results

    A pimple doesn’t just disappear overnight. But what you do in the first 24-48 hours matters a lot. The faster you treat it correctly, the faster it heals. The slower you treat it—or worse, if you pick at it—the longer it sticks around and the higher the chance it leaves a mark.

    Most people don’t realize that scarring isn’t inevitable. It’s a choice, and that choice happens right now: when the pimple is fresh.

    Understanding What Causes Scarring

    Before I get into treatment, you need to understand why some pimples scar and others don’t.

    A pimple is an inflammation beneath the skin which occurs when bacteria multiply in a pore and your immune system sends white blood cells to fight them. The resulting swelling is what you see on the surface. In most cases, this resolves cleanly, and your skin goes back to normal.

    When you squeeze, pick, or irritate a pimple, you’re doing two things:

    • Breaking the skin barrier and creating micro-tears
    • Pushing inflammation deeper into the dermis (the layer below the epidermis where collagen lives)

    If inflammation reaches the dermis, your body responds by laying down collagen to “repair” the damage, and unfortunately, collagen doesn’t always fill in evenly. Sometimes it creates an indentation (atrophic scar) or a raised bump (hypertrophic scar). Either way, it’s permanent without professional treatment.

    The good news: If you don’t pick, squeeze, or heavily irritate the pimple, most of the inflammation stays in the epidermis and resolves cleanly without scarring.

    That’s why early gentle intervention is so important.

    Different Pimple Types Require Different Approaches

    Not all pimples are created equal. Here’s how to identify what you’re dealing with and how to treat it:

    First, identify the pimple type, then decide the best ways to make your pimple go away fast

    Whiteheads (comedones): A visible white or yellowish head at the surface. The pore has opened slightly, and you can see pus/sebum.

    • Best treatment: Flat hydrocolloid pimple patch
    • Timeline: 6-12 hours to significant flattening

    Blackheads: A dark spot where the pore is open but oxidized (not dirt). Often on the nose or chin.

    • Best treatment: These don’t need patches—they’re not inflamed. Use a gentle exfoliant or leave them alone.
    • Note: Don’t squeeze these either. You’ll cause inflammation and create a pimple.

    Papules (red bumps): Inflamed, but no visible head. The infection is deeper, closer to the surface but not yet open.

    • Best treatment: Micro-needle pimple patch to bring it to a head faster
    • Timeline: 12-24 hours to whitehead formation, then another 12-24 hours to flattening

    Cystic/Nodular pimples: Large, painful, deep bumps under the skin. No head. Often sensitive to touch.

    • Best treatment: Micro-needle pimple patches for 6-8 hours, then switch to a flat patch once a whitehead forms.
    • Timeline: 24-48 hours to see a significant reduction
    • Note: These are most prone to scarring if picked. Leave them alone and let the patches do the work.

    Best Ways to Make a Pimple go Away Fast, Method 1: Pimple Patches (Hydrocolloid)

    What they are: Flat, sticky patches that adhere directly to the skin. The most common brands are Mighty Patch and Hero Cosmetics.

    Product links: pimple patches

    When to use them: Only when you can see a whitehead or the pore is visibly opening. If the pimple is under the skin, a regular patch won’t work because it needs direct contact with the head of the pimple.

    How they work: Hydrocolloid patches absorb the pus and oil from the pimple, flattening it and reducing inflammation. They also create a barrier so you’re not tempted to touch, pick, or squeeze it.

    My experience: I love these. They’re simple, they work, and I can wear them under makeup or just leave them on overnight. I’ve seen whiteheads flatten noticeably within 6-8 hours.

    Timeline:

    • Hours 0-2: The patch adheres and starts absorbing fluid
    • Hours 6-8: The pimple begins to flatten visibly
    • Hours 12-24: Most of the inflammation is gone; the patch turns white as it absorbs material
    • Day 2-3: The pimple is significantly smaller

    Cost: $8-15 for a pack of 20-30 patches. One pimple = one patch.

    Application Protocol for Hydrocolloid Patches

    This is critical, and most people get it wrong:

    1. Wash your face with a gentle, fragrance-free cleanser (like All Free Clear). Use lukewarm water.
    2. Dry your skin completely. This is non-negotiable. The patch will not adhere well to damp skin, and any residual moisture reduces its ability to absorb fluid. Be sure to pat dry with a clean towel and wait 1-2 minutes if needed.
    3. Do not apply moisturizer, serums, or any other products to the area where the patch will be placed. Although this may seem counterintuitive, moisturizer creates a barrier between your skin and the patch which prevents the hydrocolloid from making proper contact and significantly reduces its ability to pull out fluid and oil.
    4. Apply the patch directly to the clean, dry skin. Press firmly for 10-15 seconds to ensure full adhesion.
    5. After applying, wait 5-10 minutes before applying any other skincare. This allows the patch to fully set.
    6. Once the patch has set, you can apply moisturizer around it (not under it or on top of it). Apply your regular skincare to the rest of your face.
    7. Change the patch every 6-8 hours or once it turns white. A saturated patch won’t absorb anymore and becomes just a band aid. Remove it, wash the area, dry completely, and apply a fresh patch.
    8. Make sure to apply a fresh patch on clean, dry skin. Sleep on your back or the opposite side to avoid pressing the patch into the pillow.

    Why This Matters:

    Moisturizer sits on top of your skin and creates an occlusive layer. The patch needs direct contact with your skin to adhere and create the microenvironment that absorbs fluid. If there’s a barrier of moisturizer between the patch and your skin, it’s like trying to tape something through a sheet of plastic—it won’t stick, and it won’t work.

    Best Ways to Make a Pimple go Away Fast, Method 2: Micro-Needle Pimple Patches for Cystic Pimples

    What they are: Patches with tiny microneedles embedded in them. Brands like Mighty Patch and Hero Cosmetics make these too.

    Product links: mighty patch for cystic pimples

    When to use them: This is crucial—use these for cystic pimples or deep, under-the-skin pimples that a regular patch can’t touch. If it’s a whitehead, stick with the flat patch (Method 1).

    How they work: The microneedles penetrate the skin barrier and deliver active ingredients (usually salicylic acid or niacinamide) directly into the pimple. They also create tiny channels that help bring the inflammation to the surface faster.

    My experience: I love these for stubborn cystic pimples. In the event that I get one of those deep, painful bumps that won’t come to a head, a micro-needle patch is one of the best ways to make a pimple go away fast. I press firmly to ensure good contact and leave it on for 6-8 hours (or overnight).

    Timeline:

    • Hours 0-6: The microneedles penetrate; you might feel slight tingling or warmth
    • Hours 6-12: The pimple starts bringing inflammation to the surface
    • Day 2-3: The cyst flattens and may come to a whitehead (then you can switch to a regular patch)
    • Day 3-4: Significant reduction in size and pain

    Cost: $10-18 for a pack of 6-8 patches. Slightly pricier than flat patches, but worth it for cystic acne.

    Applying Micro-Needle Patches on a Cystic Pimple

    1. Wash your face with a gentle, fragrance-free cleanser. Use lukewarm water.
    2. Dry your skin completely. Again, this is essential. The patch needs direct contact with dry skin to work effectively.
    3. Do not apply any moisturizer, serums, or products to the area. The same reason as above: barriers (like moisturizer) prevent the needles from penetrating properly and reduce efficacy.
    4. Apply the patch directly to the clean, dry skin. Press firmly for 15-20 seconds. You want good contact so the microneedles can penetrate the skin barrier effectively. You may feel slight tingling or warmth—this is normal.
    5. Leave the patch on for 6 to 8 hours. Micro-needle patches work differently from flat hydrocolloid patches because they penetrate the skin to deliver active ingredients ,whereas flat hydrocolloid patches sit on top of the skin and absorb fluid. An overnight application is ideal for these micro-needle patches.
    6. After removing the patch, do not apply moisturizer immediately. Wait 10-15 minutes, then you can apply your regular skincare routine.
    7. The next day, assess the pimple. If it’s come to a whitehead, switch to a regular hydrocolloid patch (Method 1). If it’s still under the skin but noticeably smaller, apply another micro-needle patch.

    Why this matters: Micro-needle patches work by penetrating the skin barrier. Any barrier (moisturizer, serum, oil) on top of your skin prevents the needles from doing their job. You need direct skin contact for the active ingredients to be delivered and for the needles to penetrate effectively.

    Best Ways to Make a Pimple go Away Fast, Method 3: Silicone Scar Sheets

    What they are: Thin, flexible silicone sheets that adhere to the skin and create a microenvironment that hydrates and flattens scar tissue.

    Product links: silicone scar sheets

    When to use them: During the recovery phase of a pimple, specifically days 3-7 when the pimple is flattening but still visibly inflamed or textured.

    How they work: Silicone occludes the skin, increasing hydration and allowing collagen to remodel more evenly. This prevents the pimple from leaving behind texture or indentation.

    My experience: I rate these 7/10. They genuinely help even out texture during recovery, especially on pimples that were deep or cystic. I apply them for 24-48 hours during the healing window.

    Timeline:

    • Day 1-2 of application: The silicone hydrates the area; redness may look slightly worse (it’s just more visible)
    • Day 2-3: Texture noticeably evens out
    • Day 3-7: Continued flattening; hyperpigmentation fades faster
    • After removal: Your skin stays smoother than it would have without the sheet.

    Cost: $15-25 for a pack of 4-5 sheets.

    Important note: These aren’t a replacement for pimple patches in the active phase. Use pimple patches first (days 0-2), then switch to silicone sheets (days 3-7) once the pimple is flat.

    What are NOT the Best Ways to Make a Pimple go Away Fast:

    Let me be direct: Don’t squeeze, pick, or irritate the pimple. I know it’s tempting. I know you want to “get the stuff out.” But every time you touch it, you’re:

    • Pushing bacteria deeper into the skin
    • Creating micro-tears that lead to scarring
    • Extending the healing timeline
    • Increasing the chance of hyperpigmentation

    Your hands have bacteria on them. Your nails are sharp. A pimple is an open (or near-open) wound. The math doesn’t work.

    Also avoid:

    • Harsh scrubbing or exfoliating the area while it’s active
    • Applying multiple active ingredients (benzoyl peroxide + salicylic acid + retinol at the same time = irritation)
    • Sleeping on your face directly on the pimple (increases pressure and oil transfer)
    • Tight hats or headbands that trap sweat and bacteria on the pimple
    • Touching it with your hands (even just to check if it’s better)

    The Best Ways to Make a Pimple Go Away Fast- Hygiene and Environment:

    While you’re treating a pimple, being mindful of your environment and hygiene is one of the best ways to make a pimple go away fast.

    Cleanse twice daily, gently. Use a fragrance-free, sulfate-free cleanser (like All Free Clear, which I use). Don’t over-wash; twice daily is enough. More than that strips your skin and causes irritation.

    Change your pillowcase every 2-3 days while the pimple is active. Oil, bacteria, and dead skin cells accumulate on pillowcases and transfer to your face every night. By swapping it more frequently, you reduce the chances of re-infection and prevent the pimple from getting worse.

    Use clean hands only. If you’re applying a patch or sheet, wash your hands first. Don’t touch the pimple unnecessarily.

    Watch your water. Hard water can irritate healing pimples and contains minerals that can trap bacteria. If you have hard water at home, consider a filtered showerhead ($20-$40). Not only is a filtered showerhead great for filtering hard water, but it also helps with overall skin health, especially during healing phases. An investment in this is a must, and you can’t go wrong.

    Sleep position matters. If possible, sleep on your back or the opposite side from the pimple. Sleeping directly on the pimple increases pressure and transfers oil/bacteria from your pillowcase back to the skin.

    The Realistic Timeline: From Pimple to Clear

    Here’s what to expect if you follow the above methods:

    Active Phase (Day 0-2):

    Apply pimple patch (flat or micro-needle, depending on type) to freshly washed, dry skin.

    • Keep it clean and dry.
    • Don’t touch it
    • Change the patch every 6-8 hours.
    • Expected result: 30-50% flattening

    Transition Phase (Days 2-4):

    • If it’s a whitehead and fully flat, you’re done: just let it heal.
    • If it still has redness or slight texture, apply a silicone sheet.
    • Gentle cleansing only
    • Expected result: 70-80% flattening, redness decreasing

    Recovery Phase (Days 4-7):

    • Continue silicone sheets if needed.
    • Gentle cleansing only
    • Avoid makeup if possible (let skin breathe)
    • Apply moisturizer normally now.
    • Expected result: 90%+ flattening, hyperpigmentation starting to fade

    Post-pimple phase (Days 7-14):

    • No more patches or sheets needed
    • Focus on sun protection (hyperpigmentation gets worse with sun exposure)
    • Normal skincare routine resumes
    • Expected result: Pimple is essentially gone; mark fades over weeks

    Weeks 2-4:

    • Any remaining hyperpigmentation fades gradually.
    • If texture or indentation remains, that’s scarring (different treatment needed—see our full scar treatment guide)

    Common Mistakes People Make that are NOT the Best Ways to Make a Pimple Go Away Fast:

    Mistake #1: Applying moisturizer before the patch. This reduces adhesion and effectiveness by up to 50%. Clean, dry skin only.

    Mistake #2: Waiting too long to start treatment. The first 24 hours are critical. Start immediately when you notice the pimple.

    Mistake #3: Squeezing “just a little bit.” There’s no such thing. Any squeezing can cause inflammation and increase the risk for scarring. Let the patches do the work.

    Mistake #4: Mixing treatments aggressively. Don’t use benzoyl peroxide,salicylic acid, and a patch at the same time. The pimple is already inflamed. You’re just adding more irritation.

    Mistake #5: Not changing the patch when it’s saturated. Here’s the key: once a patch turns white, it’s done. Replace it with a fresh one, and continue this cycle until you apply a patch that stays clear after a full cycle; that’s your signal that the pimple has emptied completely.

    Mistake #6: Using the wrong patch type. Flat patches for whiteheads. Micro-needle patches for cystic/under-the-skin pimples. Using the wrong one wastes money and time.

    Mistake #7: Abandoning the routine too early. Even after the pimple looks “gone,” there’s still inflammation and hyperpigmentation risk. Stay consistent through day 7+.

    The Cost Breakdown

    If you want to be fully prepped for pimples:

    • Hydrocolloid patches: $8-15 for a pack of 20-30 (lasts months)
    • Micro-needle patches: $10-18 for a pack of 6-8 (lasts weeks)
    • Silicone sheets: $15-25 for a pack of 4-5 (lasts weeks)
    • Gentle cleanser (fragrance-free): $5-10 (lasts months)
    • Filtered showerhead: $20-40 (one-time investment)

    Total initial investment: $58-108 for a complete toolkit

    You don’t need all of these at once. Start with hydrocolloid patches ($10) and see how your skin responds. Add micro-needle patches if you’re prone to cystic acne. Add silicone sheets if you’re noticing texture or hyperpigmentation after pimples heal. Build your toolkit over time.

    Why I’m Telling You This

    I’ve wasted money on expensive treatments, fancy serums, and dermatologist visits for pimples that could have been prevented or minimized with the right early intervention. The methods above aren’t glamorous or Instagram-worthy. They’re just… effective.

    The pimple you have right now doesn’t have to leave a scar. The choice you make in the next 24 hours matters more than the choice you make in the next 24 days.

    The best ways to make a pimple go away fast are to treat it early and treat it right. Keep your skin clean. Don’t touch it. Don’t pick it. Use the tools that actually work.

    And if you do end up with scarring despite your best efforts, we’ve got you covered with a full guide on treatment options that actually work: from microneedling to chemical peels to subcision (releasing May, 2026). But ideally, you won’t need it.

    That’s how you make a pimple go away fast, and actually stay gone without the marks.

  • 7+ Powerful Habits That Actually Prevent Breakouts

    7+ Powerful Habits That Actually Prevent Breakouts


    I spent years fighting acne. Not just dealing with it, but actively at war with my skin. I tried everything: expensive treatments, dermatologists, prescription medications, you name it. After constant fighting, I learned what actually changed the game for me: prevention. Understanding how to prevent breakouts is much easier than trying to get rid of breakouts.

    The shift didn’t come from some miracle product or fancy skincare routine. It came from understanding what was actually triggering my breakouts in the first place. Once I figured that out, I stopped getting new ones. I was able to prevent breakouts on my skin that used to happen constantly.

    Let me walk you through what actually works, because these aren’t just random skincare tips I read online. These are lessons I learned the hard way, through trial and error, paying attention to my skin, and making changes that genuinely put a halt to my breakouts from coming back.


    Prevent Breakouts-The Laundry Detergent Reality Check:

    This one sounds ridiculous, I know. But it’s one of the most underrated acne triggers nobody talks about, and a simple way that you can prevent breakouts.

    About two years ago, my back was completely clear. No bacne whatsoever. I was proud of myself. I’d worked hard to get there after years of no luck. Then, out of nowhere, my back started breaking out again. It wasn’t my diet. I hadn’t changed my skincare routine. I was still exercising and managing stress. Nothing had shifted in my lifestyle.

    I was genuinely confused.

    Searching for an answer, I went back to basics and started analyzing everything. I asked myself if there were changes in my environment, routine, or products. And then it hit me: I’d switched laundry detergents a few weeks before the breakouts started. I wasn’t even thinking about it at the time. It was just a new bottle of something I grabbed at the store.

    So I switched back to my old detergent—the fragrance-free one I used to use—and within about two weeks, the bacne started clearing up. Now it’s almost completely gone again.

    Here’s the thing: your pillowcase, your sheets, and your clothes are touching your skin constantly. If your detergent is loaded with heavy fragrances and irritating chemicals, you’re basically washing your breakout triggers straight into the fabric that’s pressed against your face and body all night. It doesn’t matter how perfect your skincare routine is if your sheets are working against you.

    Switch to a fragrance-free, gentle detergent. That’s it. It sounds simple because it is. But it’s also a game-changer to prevent breakouts if this is your trigger.

    Tip: Switch to a fragrance-free, gentle detergent like Seventh Generation. This sounds simple, but it’s a game-changer if you want to prevent breakouts!


    Prevent Breakouts-The Water Quality Situation:

    I’ve moved a lot. Like, a lot a lot. And I noticed something weird every single time: I’d get breakouts within the first week or two of moving to a new place. Different house, different breakouts. It was consistent enough that I couldn’t ignore it.

    At first, I thought it was stress-related. Moving is stressful, after all. But then I realized the timing was too fast. Stress breakouts take a few weeks to appear. These were happening immediately.

    Then I realized it was probably the water.

    Different cities and neighborhoods have different water mineral content. Some water is harder (this means there are more minerals), some is softer, some have higher chlorine levels, some have other chemical treatments. Your skin can be sensitive to these differences, especially if you’re already prone to acne.

    So I invested in a filtered showerhead. Not just for my face, but for my whole shower. And honestly? It made a noticeable difference.

    When I changed environments again, instead of getting breakouts within days, my skin stayed mostly clear. The filtered showerhead removes a lot of mineral deposits and chlorine that can irritate and dry out your skin. Removing those irritants is key if you want to prevent breakouts, because your skin will start to overproduce oil to compensate for the lack of moisture, which in turn leads to more breakouts.

    If you’re getting random breakouts after moving, or if you’ve always struggled with acne and recently moved, try a filtered showerhead first. It’s more affordable than most skincare products, and it actually works. It’s also better for your skin in general—less harsh chemicals and less mineral buildup.

    Recommended Product: Check out Aquasana Shower Filter for an effective solution that helps prevent breakouts.


    Prevent Breakouts-The Skin Barrier Truth:

    This is where everything changed for me. Understanding that I was destroying my own skin barrier was the moment I stopped getting constant acne and was able to prevent breakouts.

    I used to think that if I had acne, I needed to destroy it with harsh cleansers to prevent breakouts. Stronger is better, right? Wrong. So wrong.

    When you over-wash your face or use overly harsh cleansers multiple times a day, you’re stripping away your skin’s protective barrier. Your skin barrier is basically your skin’s defense system. The barrier keeps good things in (moisture, healthy oils) and bad things out (bacteria, irritants). When you destroy it, your skin freaks out.

    As I mentioned previously, dry and irritated skin will start to overproduce oil to compensate if the skin lacks moisture. In other words, when you wash your skin too strongly, your body panics and produces excess oil to compensate. Now you’ve got dehydrated skin that’s also oily—which is the perfect environment for acne.

    I lived in this cycle for years. I’d wash my face with a strong acne cleanser in the morning, and at night, my skin would become stripped of essential moisture and hydration. As a result, my skin would be so oily and dry at the same time. I’d be using blotting sheets constantly… It was exhausting.

    Now here’s what I actually do:

    In the morning, I rinse my face with lukewarm water. That’s it. If I feel like I need a little extra, I use a gentle or hydrating cleanser: something that cleanses without destroying. This removes surface-level bacteria and any buildup from sleeping without stripping my skin. As someone who has acne-prone skin, you may be thinking, “I need to wash my face with a cleanser specific for acne, which has active acne-fighting ingredients.” I totally understand the hesitation; however, I found that doubling up on harsher cleansers only did more harm than good and damaged my skin barrier.

    I strongly suggest using a good acne cleanser once a day at nightime for a deep cleanse to really get into your pores and remove the day’s buildup, bacteria, and sebum, and to keep the mornings light.

    Once I implemented this change, my skin responded within a couple of days, and the oil production lessened. I stopped needing blotting sheets. And most importantly, I stopped getting constant breakouts.

    If you’re washing your face multiple times with strong cleansers, stop. Your skin barrier is suffering, and when this happens, it promotes more harm than good.


    Prevent Breakouts-Oil Cleansing:

    Cleansing with oil may sound counterintuitive when dealing with acne, but oil cleansing is a skin regimen I swear by.

    A few times a week, I’ll do an oil cleanse. You take an oil cleanser, massage it into your face for a minute or two, and then rinse it off with warm water. The oil breaks down the buildup in your pores: dead skin, sebum, and bacteria, and brings it to the surface where you can rinse it away.

    Rubbing oil on your face sounds like it would make your skin more oily. It doesn’t. Doing this actually helps prevent breakouts because you’re not letting that buildup accumulate inside your pores.

    Do this 2-3 times a week, and you’ll notice your skin feels clearer and less congested.


    Prevent Breakouts-Sunscreen Every Single Day:

    Non-negotiable. Daily sunscreen, every day, even when it’s cloudy.

    UV damage damages your skin barrier. A damaged skin barrier equals more breakouts. Furthermore, if you’re using any acne treatments (especially if you take prescribed medication for acne, such as Accutane), your skin will likely be more sensitive to sun damage.

    Make sure it’s non-comedogenic, though. Not all sunscreens are created equal. Some will absolutely clog your pores and cause breakouts. Look for a “non-comedogenic”sunscreen and test it out.

    This is one of the easiest prevention methods that people constantly skip. Don’t be that person.

    One product that I love is La Roche-Posay Anthelios spf 60 to help prevent breakouts by protecting my skin barrier.


    Prevent Breakouts-Birth Control (If It’s Hormonal):

    If your breakouts are hormonal—meaning they show up around your period or follow your cycle—birth control can legitimately help.

    Certain types of birth control pills can regulate the hormones that trigger acne. Not all of them, but some are specifically approved for acne and can help prevent breakouts. If you suspect your acne is hormonal, birth control might be worth talking to your doctor about.

    It’s not a cure-all, and it won’t work for everyone, but if hormones are your trigger, this can be a game-changer. Birth control pills are something that I was prescribed for acne as a teenager, and I’ve taken them on and off again throughout the years. In my experience, this medication did work for me and continues to help prevent breakouts caused hormonally.


    Prevent Breakouts-Face Masks and Deep Cleaning:

    Once a week, I do a deeper clean with a face mask. I like mud masks or ones with tea tree oil because they actually draw out impurities and don’t just sit on top of your skin.

    This isn’t about scrubbing your skin raw. It’s about a gentle deep clean once a week to help prevent buildup that can cause breakouts.

    After I use a face mask, I always moisturize. Morning and night, every day. Moisturizing is not optional if you want to prevent acne. Your skin needs hydration to function properly and maintain the skin barrier we talked about.


    Prevent Breakouts-Clean Your Makeup Brushes:

    If you wear makeup, this step is non-negotiable. Dirty brushes are basically spreading bacteria all over your face, and cleaning brushes is a quick fix to prevent breakouts.

    Wash your brushes at least once a week; more often if your skin is breaking out. It’s one of the easiest prevention methods that people constantly overlook.


    Prevent Breakouts-The Real Secret:

    Pay attention to your skin. Notice what actually changes things for you. Over the years, I’ve found that every tip shared with you in this post has worked on my acne-prone skin to prevent breakouts. If you’re struggling with acne and bad breakouts, I strongly encourage you to implement these tips. You might find something from this article that becomes a total game changer for your skin. And as someone who gets the struggle, someone who’s been there, covered in breakouts, wondering if it will ever get better, I want to share meaningful content with you that you can actually take away and use.

    Maybe it’s the detergent switch, the filtered showerhead, or maybe it’s finally protecting your skin barrier instead of destroying it. For you, it might be something different, but here’s what I know: once you can identify your actual triggers and address them, instead of just reacting to breakouts when they happen, you’ll finally stop getting them. And that’s a feeling worth fighting for.


    Commonly Asked Questions:

    A: Not necessarily. Water quality is one trigger among many. If you switched showerheads and nothing changed, it probably means water mineral content isn’t your main acne culprit. But that doesn’t mean the showerhead is a waste—it’s still good for your skin in general. Your breakouts might be triggered by something else on this list: your detergent, your skin barrier, hormones, or something completely different. That’s why I say pay attention to your skin and notice what actually changes things for you.

    Q: Can stress cause breakouts even if I’m doing everything else right?

    A: Yes. Stress is a real acne trigger because it affects your hormones, your immune system, and your skin barrier. You can have perfect habits—great detergent, filtered water, perfect skin barrier routine—and still get breakouts during stressful periods. That’s just how our bodies work. Managing stress is important for clear skin, even if it’s not always easy to do. Exercise, sleep, meditation, whatever helps you manage stress—do that. But also give yourself grace. If you’re doing everything right and you still get a breakout during a stressful time, it doesn’t mean you failed. It means you’re human. Once the stress passes, your skin usually settles back down.

    Q: How long does it take to see results from these prevention tips?

    A: This varies, but you should start noticing changes within 2-4 weeks if something is actually working for you. The detergent switch and sheet washing can show results surprisingly fast—sometimes within 1-2 weeks if that was your main trigger. The skin barrier stuff takes a little longer because your skin needs time to rebalance and stop overproducing oil. If you’re switching to a filtered showerhead after moving, you might notice improvement within the first week. The key is to implement one or two changes at a time, not everything at once. That way you can actually tell what’s working and what isn’t. If you change everything overnight, you won’t know which tip made the difference.

    Q: Do I really need to wash my sheets twice a week? That seems excessive.

    A: I get it. It’s a lot. But here’s the thing—if you’re breaking out on your face or back, your sheets are literally touching your skin for 8 hours a night. That’s a lot of time for bacteria, dead skin cells, and sebum to build up. At minimum, wash them once a week. If you’re actively dealing with breakouts, twice a week makes a noticeable difference.

  • THE WORST SKINCARE MISTAKE I MADE (AND HOW IT TOOK 7 YEARS TO FIX)

    THE WORST SKINCARE MISTAKE I MADE (AND HOW IT TOOK 7 YEARS TO FIX)

    The Beginning of My Skincare Journey

    I was fourteen when my dermatologist told me to strip my skin bare.

    Not in those exact words, obviously. But that’s what it felt like when she handed me a prescription for Neutrogena’s Oil-Free Acne Wash and said the magic words every acne-prone teenager wants to hear: “Don’t use moisturizer. You need to dry out the acne.”

    I left that office feeling like I finally had the answer—finally had permission to wage war on my skin. What I didn’t know was that skin barrier repair would be the key to having my dream skin.

    The Aggressive Approach

    So I did exactly what she said. Every morning and night, I’d scrub my face with that Neutrogena cleanser—the one that felt medicinal and made my skin feel tight immediately. Then I’d slather on topical benzoyl peroxide on every breakout I could find. No moisturizer. Just chemical warfare against my own face.

    The first week felt amazing. My skin felt dry, which I’d been told meant the acne was dying. Surely that meant it was working.

    The Painful Realization

    By week two, my skin felt like leather. Not just dry—actually painful. Tight in a way that made me hesitant to move my face too much. Talking hurt. Smiling hurt. I’d catch myself in the mirror, and my skin looked almost raw, like I’d been out in the sun without protection for hours. But I kept going because the acne was still there, so clearly, I just needed to be more aggressive.

    The Skin’s Rebellion

    By month three, I realized what was actually happening: my skin was rebelling.

    The dryness got worse, but so did the oil. Specifically, my T-zone became an absolute oil slick by midday. I’d use oil blotting sheets—multiple times a day, sometimes going through an entire pack. Those sheets would come away completely soaked. I’d think, “See? This proves I have oily skin.” But I was wrong about what that really meant.

    The Damaged Skin Barrier

    What I didn’t understand at fourteen was that my skin barrier was completely destroyed. A healthy skin barrier is supposed to be a protective wall that keeps moisture in and irritants out. Mine was shattered. So my skin did what any survival instinct would do: it panicked and started producing oil like crazy, trying to compensate for all the moisture I was stripping away.

    This is where the concept of skin barrier repair comes into play. When I realized my skin barrier was damaged, I understood I needed to shift my approach and focus on skin barrier repair.

    Caught in a Vicious Cycle

    I was caught in a vicious cycle. The drier my skin got from the cleanser and benzoyl peroxide, the more oil it produced. The more oil, the more breakouts. The more breakouts, the more I’d scrub and treat and dry out my skin. It was a loop I couldn’t escape, and I had no idea I was the one creating it.

    Years of Struggle

    This went on for years. Literally years.

    I didn’t really start seeing improvement until I was eighteen. That’s when something clicked. I started actually reading about skincare instead of just doing what I was told. I learned that moisturizer wasn’t the enemy—it was the solution. I learned about skin barrier repair and why it mattered. I discovered that oily skin isn’t always due to naturally oily skin; sometimes, it’s because your skin is desperately thirsty and overcompensating.

    A New Approach

    By the time I was twenty-one, I had done enough research to completely transform my approach. I ditched the Neutrogena cleanser, stopped the benzoyl peroxide routine, and actually invested in a good moisturizer. I began focusing on skin barrier repair, using gentle products instead of harsh treatments.

    Shocking Results

    The change was honestly shocking. When I finally started moisturizing consistently and emphasized skin barrier repair, the oil production normalized almost immediately. Not completely gone—I still have combination skin, which is just my skin type—but manageable. The oil blotting sheets that used to be soaked by noon? I don’t even carry them anymore.

    My Current Skin Journey

    Now, at my age, I get compliments on my skin all the time. People ask me what I do, assuming I have some complicated ten-step routine or expensive products. The answer is so much simpler: I listen to my skin instead of punishing it. Skin barrier repair is at the center of everything i do.

    The Real Mistake

    The biggest mistake I made wasn’t that I had acne—plenty of fourteen-year-olds do. The mistake was following advice from someone who didn’t explain why that advice worked, and then not questioning it when my skin started screaming that something was wrong. I spent seven years thinking I had naturally oily skin when really I just had a destroyed skin barrier.

    Final Thoughts

    If I could go back and tell fourteen-year-old me anything, it would be this: your skin barrier is everything. Acne sucks, but a broken barrier is worse. You can have clear skin and healthy skin, but you can’t have healthy skin by destroying it in the process.

    For more on the importance of skin barrier repair, check out this helpful resource from Healthline to understand how to take care of your skin effectively


    Conclusion

    Reflecting on my journey has solidified my understanding of skincare. Listening to my skin and focusing on skin barrier repair has not just changed my skin but transformed my entire approach to skincare. Emphasizing skin barrier health is the key to achieving not just clear, but healthy skin.

    The oily skin that made me miserable for seven years? It was just my skin asking for help in the only way it knew how.

    Best Skincare Routine for Acne

    Best Sunscreen for Acne-Prone Skin

  • Best Sunscreen for Acne-Prone Skin: Non-Comedogenic Options That Won’t Cause Breakouts

    Best Sunscreen for Acne-Prone Skin: Non-Comedogenic Options That Won’t Cause Breakouts

    Having sunscreen in your daily skin routine is a MUST. There ARE non-comedogenic sunscreens that work beautifully for acne-prone skin, you just need to know which ones. In this guide, I’m sharing the 4 best sunscreens I’ve personally tested, plus what makes a sunscreen “acne-friendly” so you can choose confidently.

    Sunscreen For Acne-Prone Skin:Why This is Non-Negotiable

    Here’s what nobody tells you about acne and sun exposure:

    UV rays make acne scars darker. When you have post-acne hyperpigmentation (those dark marks left behind), sun exposure makes them MORE visible. The UV rays trigger your skin to produce more melanin in those already-damaged areas, making scars look deeper and darker.

    Sun damage worsens inflammation. If you’re currently dealing with active acne, UV exposure can increase inflammation and actually trigger more breakouts.

    Hyperpigmentation becomes permanent without protection. As I’m sure my readers know, acne-prone skin is already sensitive. Without sunscreen, those temporary dark marks can become permanent discoloration that takes years to fade.

    The bottom line? Skipping sunscreen to avoid breakouts is like skipping antibiotics to avoid side effects. You’re creating a bigger problem to avoid a smaller one.

    The solution is finding the RIGHT sunscreen that protects your skin without triggering new breakouts.

    Sunscreen For Acne-Prone Skin: What Makes a Sunscreen “Acne-Friendly”? (The Science)

    Not all sunscreens are created equal, especially for acne-prone skin. Here’s what to look for:

    Non-Comedogenic Rating

    This is the most important factor when shopping for a sunscreen for acne-prone skin. “Non-comedogenic” means the formula has been tested and proven NOT to clog pores. Look for this label on the packaging, as this is a must if you are prone to acne.

    Oil-Free Formula

    Acne thrives in oily environments. Sunscreens with heavy oils (like coconut oil) or creamy textures can trap bacteria and sebum on your skin. Choose oil-free or gel-based formulas when shopping for a sunscreen for acne-prone skin.

    Matte or Semi-Matte Finish

    Sunscreens with a matte finish feel lighter on skin and don’t look shiny. They’re also less likely to trap heat and bacteria, which means fewer breakouts. Avoid sunscreens that leave a dewy, greasy sheen.

    Minimal Ingredients

    The fewer ingredients, the lower your risk of irritation. Fragrance, essential oils, and unnecessary additives can all trigger breakouts. Look for simple, straightforward formulas when shopping for a sunscreen for acne-prone skin.

    No Added Fragrance

    Fragrance is a common acne trigger. Even “natural” fragrance can irritate acne-prone skin. Choose a fragrance-free sunscreen for acne-prone skin.

    Sunscreen For Acne-Prone Skin:Top 4 Best Products

    #1: La Roche-Posay Anthelios Matte Fluid SPF 60

    Price: $35-40 | Finish: Matte

    This is my personal favorite sunscreen for acne-prone skin, and honestly, it’s a game-changer.

    The first time I applied this, I was shocked by how lightweight and matte it felt on my skin. It literally feels like you’re wearing a blurring matte primer for makeup on your face, not sunscreen. This product delivers zero shine, no greasiness, and no heavy feeling. Just a smooth, invisible layer of protection. And the best part- the matte feel stays all day. Most sunscreens tend to make my skin feel oily and melt off my face in a greasy mess in a couple of hours. This sunscreen? It truly won’t disappoint.

    What makes it a special sunscreen for acne-prone skin:

    -Dermatologist-tested specifically for acne and sensitive skin

    -Non-comedogenic rating, so it won’t clog pores

    -Lightweight formula absorbs in seconds.

    -Truly matte finish that doesn’t trap heat or bacteria

    -Fragrance-free, so no irritation

    I’ve been using this for 8 months now, and I haven’t had any breakouts caused by it. My hyperpigmentation has also visibly improved because I’m finally protecting my skin consistently.

    The only downside? It’s pricey. But if budget isn’t an issue, this is worth every penny.

    Best for: Anyone with acne-prone skin who wants the best matte finish available.

    2: Hero Cosmetics Force Shield Sunscreen SPF 50

    Price: $25-30 | Finish: Matte

    Hero Cosmetics is a brand built specifically for acne-prone skin, and it shows in their sunscreen formula.

    Force Shield is designed with acne sufferers in mind. It’s lightweight, matte, and doesn’t feel like you’re wearing anything at all. The texture is silky and absorbs quickly, which means it won’t sit on top of your skin and trap bacteria.

    What makes it a special sunscreen for acne-prone skin:

    -Specifically formulated for acne-prone skin (the brand’s whole mission)

    -Matte finish that controls shine without feeling cakey

    -Lightweight gel texture absorbs in seconds.

    -Non-comedogenic and dermatologist-tested

    -Mid-range price between budget and luxury options

    I’ve used this for 4 months, and it’s my second favorite after La Roche-Posay. The main difference is the finish. Hero Cosmetics is slightly less matte than La Roche-Posay, but it’s more affordable.

    Best for: People who want quality acne-focused skincare at a reasonable price.

    #3 CeraVe Face Lotion SPF 50

    Price: $15-18 | Finish: Lightweight

    CeraVe is the budget-friendly option that actually delivers.

    This was my first serious attempt at an acne-friendly sunscreen, and it surprised me. For the price, the quality is impressive. It’s lightweight, absorbs quickly, and doesn’t leave any residue on your skin.

    What makes it a good sunscreen for acne-prone skin:

    -Ceramides + hyaluronic acid hydrate without heaviness

    -Fragrance-free formula

    -Non-comedogenic, so safe for breakout-prone skin

    -Affordable, so you won’t skip reapplication

    -Widely available at most drugstores

    The texture is more of a lotion than a gel, so it’s not matte like other sunscreens, but it’s still lightweight and doesn’t feel greasy. For someone with moderately oily skin, this is perfect.

    I’ve used this for 2 months, and my skin was overall clear for this time.

    Best for: Budget-conscious people with acne-prone skin who want hydration + protection.

    #4: EltaMD UV Clear SPF 46

    Price: $35-40 | Finish: Lightweight (slightly dewy)*

    Full transparency: I haven’t personally tested this one, but it’s consistently rated the #1 dermatologist-recommended sunscreen for acne-prone skin, so it deserves a spot on this list.

    EltaMD is the dermatologist’s favorite for a reason. It’s a mineral sunscreen (which is rarer in the acne-friendly space), but it’s formulated to be lightweight instead of thick and pasty.

    What makes it a great sunscreen for acne-prone skin:

    -Mineral formula uses zinc oxide and titanium dioxide to reflect UV rays.

    -Less likely to irritate very sensitive or active acne

    -Non-comedogenic and hypoallergenic

    -Dermatologist recommended for acne-prone skin.

    -Available in a tinted version if you want light coverage

    If you have very sensitive, active acne or have reacted poorly to chemical sunscreens, this is worth trying.

    Best for: People with sensitive, active acne who prefer mineral sunscreen.

    Sunscreen For Acne-Prone Skin:What NOT to Use:

    Not all sunscreens are created equal. Here are the ones that caused me problems:

    Any sunscreen with coconut oil: Coconut oil is comedogenic (pore-clogging). Even though it’s natural, it’s not your friend if you have acne. Avoid any formula listing coconut oil in the first 5 ingredients.

    Heavy, creamy sunscreen lotions: if a sunscreen feels thick and creamy when you apply it, it’s probably too heavy for acne skin. Acne-prone skin needs lightweight, fast-absorbing formulas.

    Sunscreens with fragrance: Fragrance irritates acne. Even natural fragrance. Choose fragrance-free options only.

    How to Apply Sunscreen Without Triggering Breakouts

    Even the best sunscreen won’t work if you apply it wrong. Here’s the proper technique:

    Step 1: Start with clean, dry skin. Apply sunscreen to freshly cleansed skin. If your skin is damp, the sunscreen won’t bond properly.

    Step 2: Use enough product. You need a quarter-size amount for your entire face. Most people use way too little and compromise their protection. Don’t skimp.

    Step 3: Apply after your full skincare routine The order matters: Cleanser → Toner (if you use one) → Moisturizer → Sunscreen → Makeup

    Sunscreen should be the last step before makeup because it needs to sit on top of your skin to create a protective barrier.

    Step 4: Wait 15 minutes before applying makeup. Let the sunscreen fully set before layering anything else on top. This prevents pilling and ensures it bonds to your skin properly.

    Step 5: Reapply every 2 hours. If you’re outdoors, reapply sunscreen every 2 hours. For everyday use indoors, once in the morning is usually sufficient (though some dermatologists recommend reapplication mid-day even indoors).

    Frequently Asked Questions

    Q:Does sunscreen cause acne?

    A: No, the wrong sunscreen causes acne. Most commercial sunscreens are formulated for general skin, not acne-prone skin. They’re often too heavy, too oily, or contain ingredients that trigger breakouts. But non-comedogenic, lightweight sunscreen for acne-prone skin absolutely does NOT cause acne.

    Q: Can I wear matte sunscreen if I have oily skin?

    A: YES. Matte sunscreen is actually ideal for oily skin. It controls shine without adding extra oil. Look for “matte finish” or “oil-free” labels specifically.

    Q: What SPF should I use?

    A: SPF 30 is the minimum recommended by dermatologists. SPF 50 offers slightly more protection and is worth the upgrade. Anything above SPF 50 offers minimal additional protection, so you don’t need to go higher.

    Q: Can I use sunscreen under makeup?

    A: Absolutely. In fact, you should. Apply sunscreen, wait 15 minutes for it to set, then apply your primer and makeup as normal. Many makeup primers and foundations now include SPF, but it’s not enough on its own—you still need a dedicated sunscreen underneath.

    Q: Do I need sunscreen indoors?

    A: This is debated among dermatologists. UVA rays can penetrate windows, but the exposure is minimal compared to outdoor sun. If you spend most of your day indoors, you can skip it. But if you sit near windows or go outside at all, wear it.

    Q: Can I use the same sunscreen year-round?

    A: Yes, absolutely. Pick one that works for your skin and stick with it. Consistency is more important than switching products seasonally.

    What’s Your Experience?

    I want to know: What sunscreen works best for YOUR acne-prone skin? Have you tried any of these? Did they work, or did they cause breakouts?

    Drop a comment below—I would love to hear what’s working for you. Your experience might help someone else find their perfect sunscreen.

    And if you haven’t found an acne-friendly sunscreen yet, start with one of these four. Your skin is worth the investment.

    Best Oil Cleansers For Acne-Prone Skin

    Best Cleansers For Acne-Prone Skin: Tested and Ranked

    Best Skincare Routine: Step by Step Guide