Tag: skin health

  • 5 Essential Steps to Glowy Summer Skin (Acne-Prone Edition)

    5 Essential Steps to Glowy Summer Skin (Acne-Prone Edition)

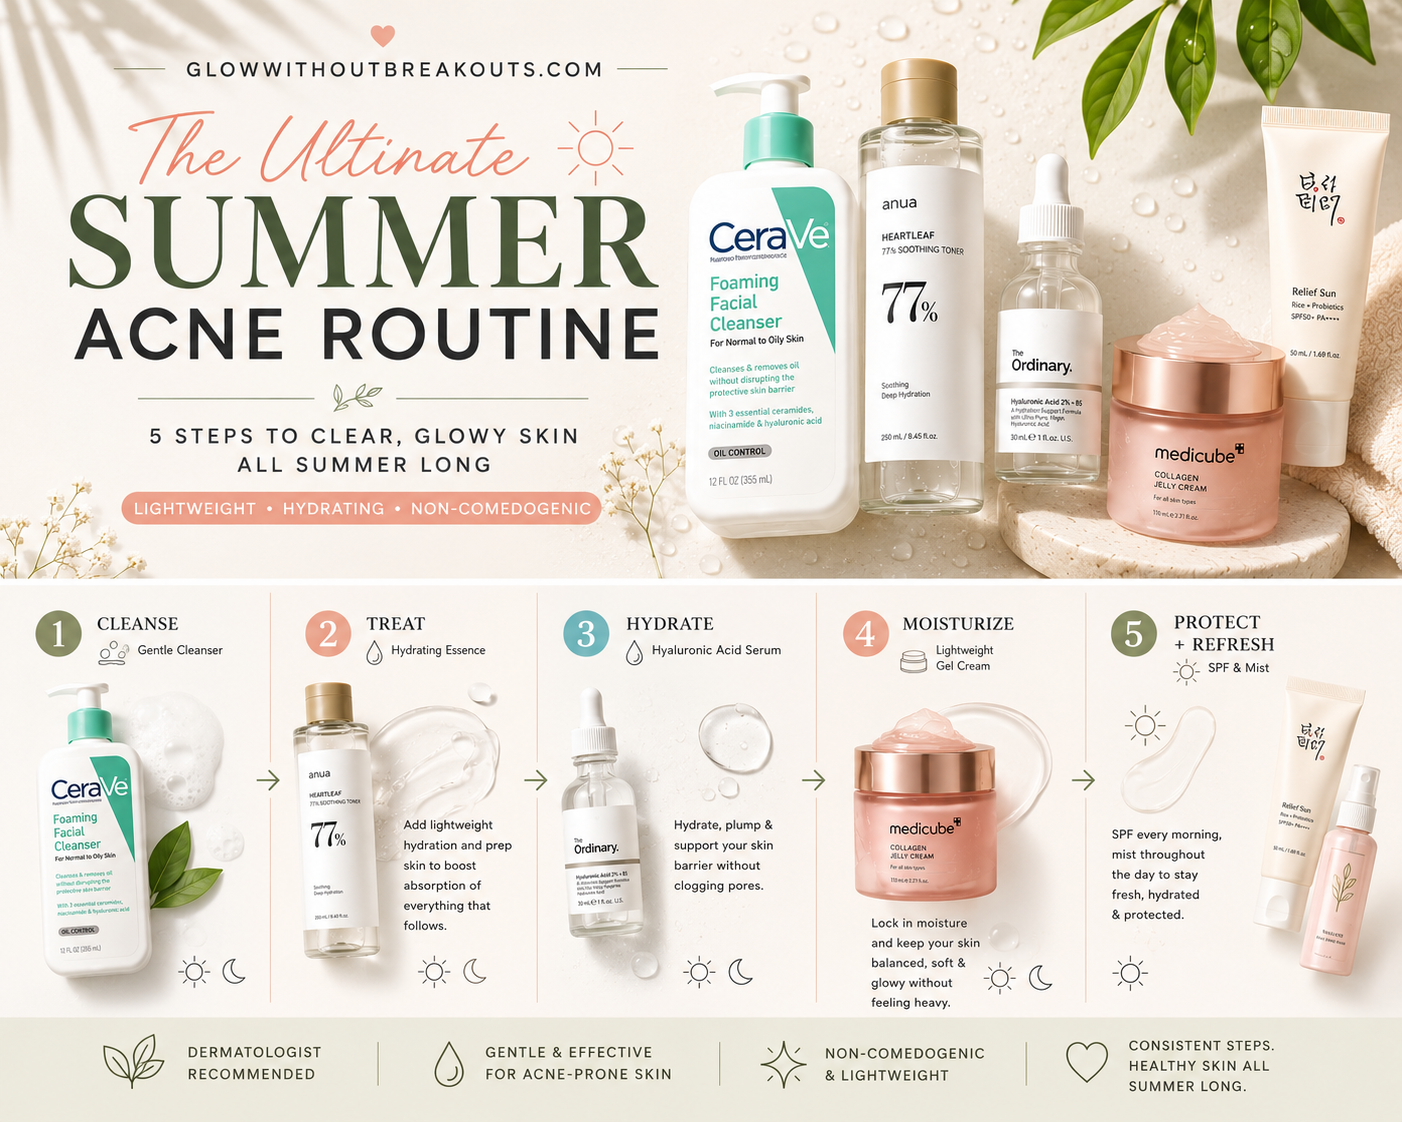
    GlowWithoutBreakouts.com • Summer Skincare Routine • Updated 2026

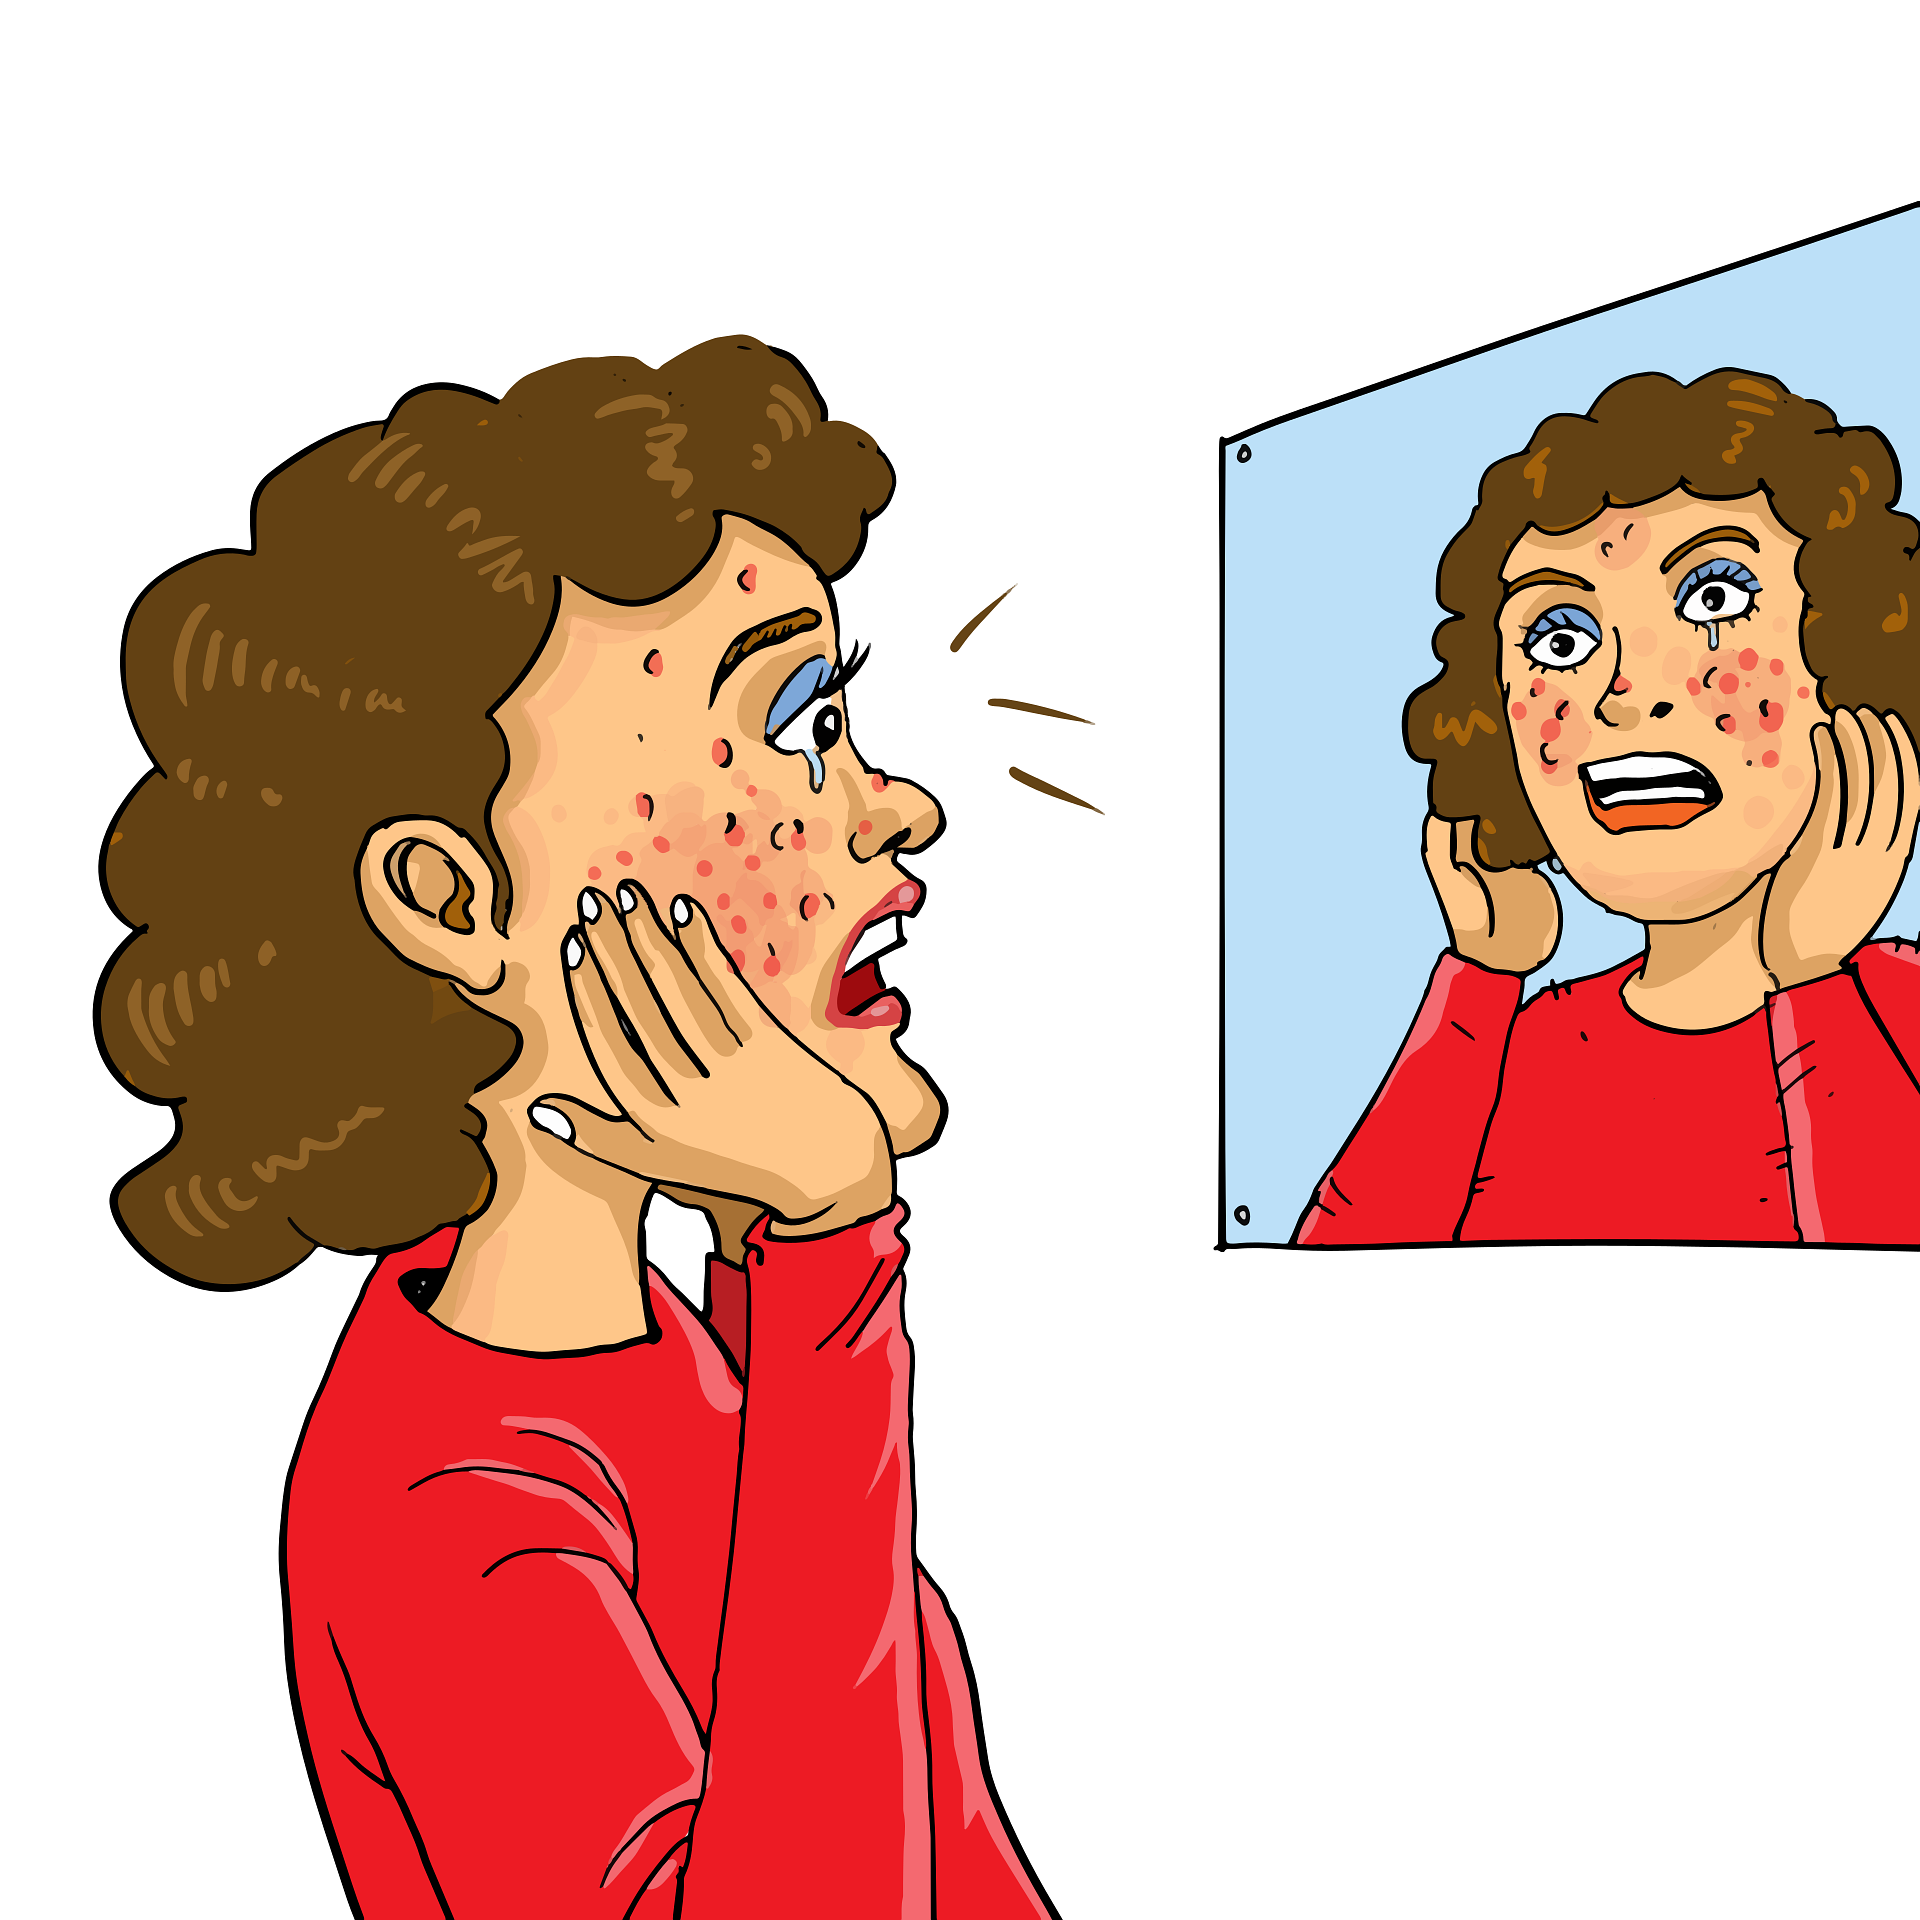
    Summer changes everything for acne-prone skin. The humidity, the heat, the sweat: your go-to routine from February suddenly stops working in July. Your skin feels greasier, more reactive, and somehow more dehydrated at the same time. If your summer skincare routine for acne prone skin has ever felt like it was working against you instead of for you, you are not alone and you are not doing anything wrong. Your skin just needs a seasonal reset.

    These 5 steps are your summer skincare routine for acne prone skin, built specifically to keep you glowy, clear, and comfortable when the temperature rises. No heavy products, no stripping your skin, no sacrificing hydration for the sake of oil control. Just a routine that actually makes sense for what summer does to acne-prone skin.

    GWB Skin Quiz

    Not sure what skin type you have?

    Take the free quiz before building your summer skincare routine.

    Take the GWB Skin Quiz →

    Step 1: Start With a Gentle Cleanser (With a Boost Option for Active Breakouts)

    Step 1 Cleanse: Start your summer skincare routine for acne prone skin with a gentle cleanser.

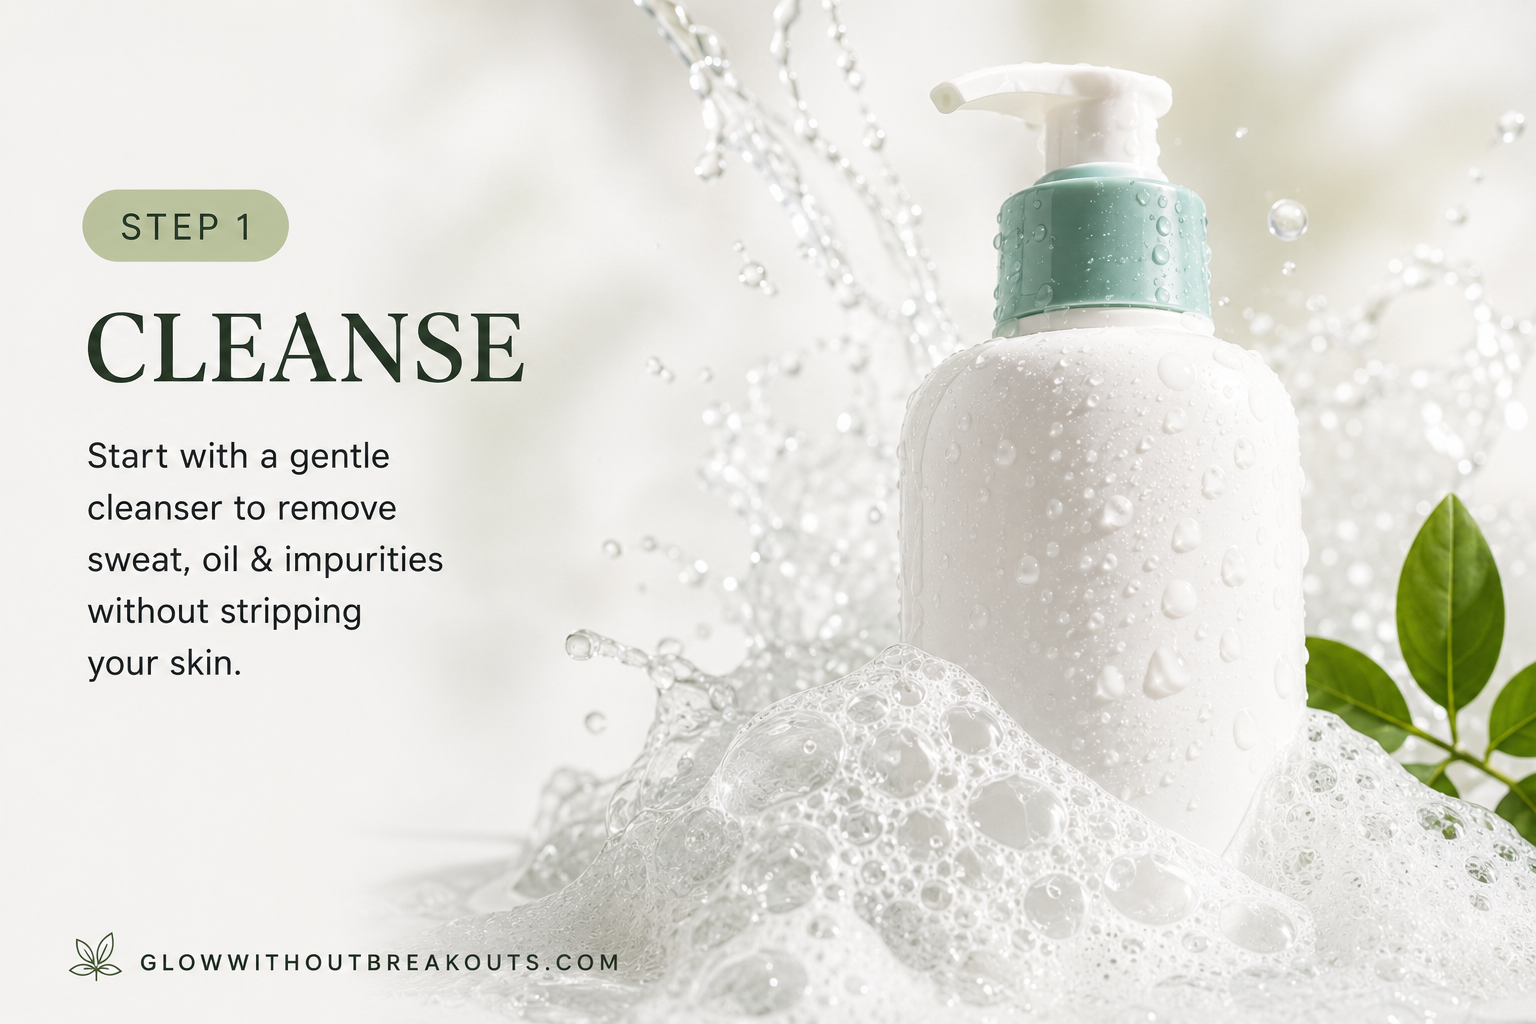
    Summer heat strips your skin differently than winter cold does. You might think your skin needs a stronger cleanser because it feels oilier, but the opposite is usually true. Heat and humidity make your skin more reactive, which means a harsh cleanser in July can trigger more breakouts than it prevents. Your summer skincare routine for acne prone skin starts with the gentlest cleanser that still actually cleans, and if you have active breakouts, there is a simple boost option to add without overwhelming your skin.

    For most skin types, the Cetaphil Daily Facial Cleanser | Cetaphil Official Site is the move in summer. It removes sweat, sunscreen, and excess oil without stripping a single drop of moisture from your barrier. If you have sensitive acne-prone skin and want something even gentler, the Beplain Mung Bean Cleanser | Beplain Official Site is a summer favorite for reactive skin. The powder-to-cream formula is incredibly soothing and leaves skin clean without any tightness. For oily or combination acne-prone skin, the CeraVe Foaming Facial Cleanser | CeraVe Official Site gives you that deeper clean while keeping ceramides and niacinamide in the formula to protect your barrier.

    If you want a cleanser that actively treats acne while cleansing, the Paula’s Choice RESIST Perfectly Balanced Foaming Cleanser | Paula’s Choice Official Site is the best option. It has 2% salicylic acid but is formulated gently enough that it does not strip or over-dry, which is exactly what you need in a summer skincare routine for acne prone skin.

    The Boost Option: If you are dealing with active breakouts, swap in the Cetaphil Gentle Clear Clarifying Acne Cream Cleanser | Cetaphil Official Site two to three times a week. It has 2% salicylic acid with aloe and white tea to target breakouts without the harshness of a full BPO wash in the summer heat. Use your gentle cleanser on the other nights to give your skin a break.

    💡 Pro Tip: In summer, cleanse twice a day without fail: once in the morning to remove overnight sweat and once at night to remove SPF, oil, and everything your skin picked up during the day. Skipping your morning cleanse is one of the fastest ways to clog pores in humid weather.

    🛒 Shop Step 1: Cleansers
    Cetaphil Daily Facial Cleanser
    Beplain Mung Bean Cleanser (sensitive skin)
    CeraVe Foaming Facial Cleanser (oily skin)
    Paula’s Choice RESIST Perfectly Balanced Foaming Cleanser
    Cetaphil Gentle Clear Clarifying Acne Cream Cleanser (boost option)

    Related reading

    Best Cleansers for Acne-Prone Skin: Tested & Ranked

    Read the post →

    Step 2: Skip the Toner — Use a Hydrating Essence Instead

    Step 2 Treat: Use a hydrating essence in your summer skincare routine for acne prone skin.

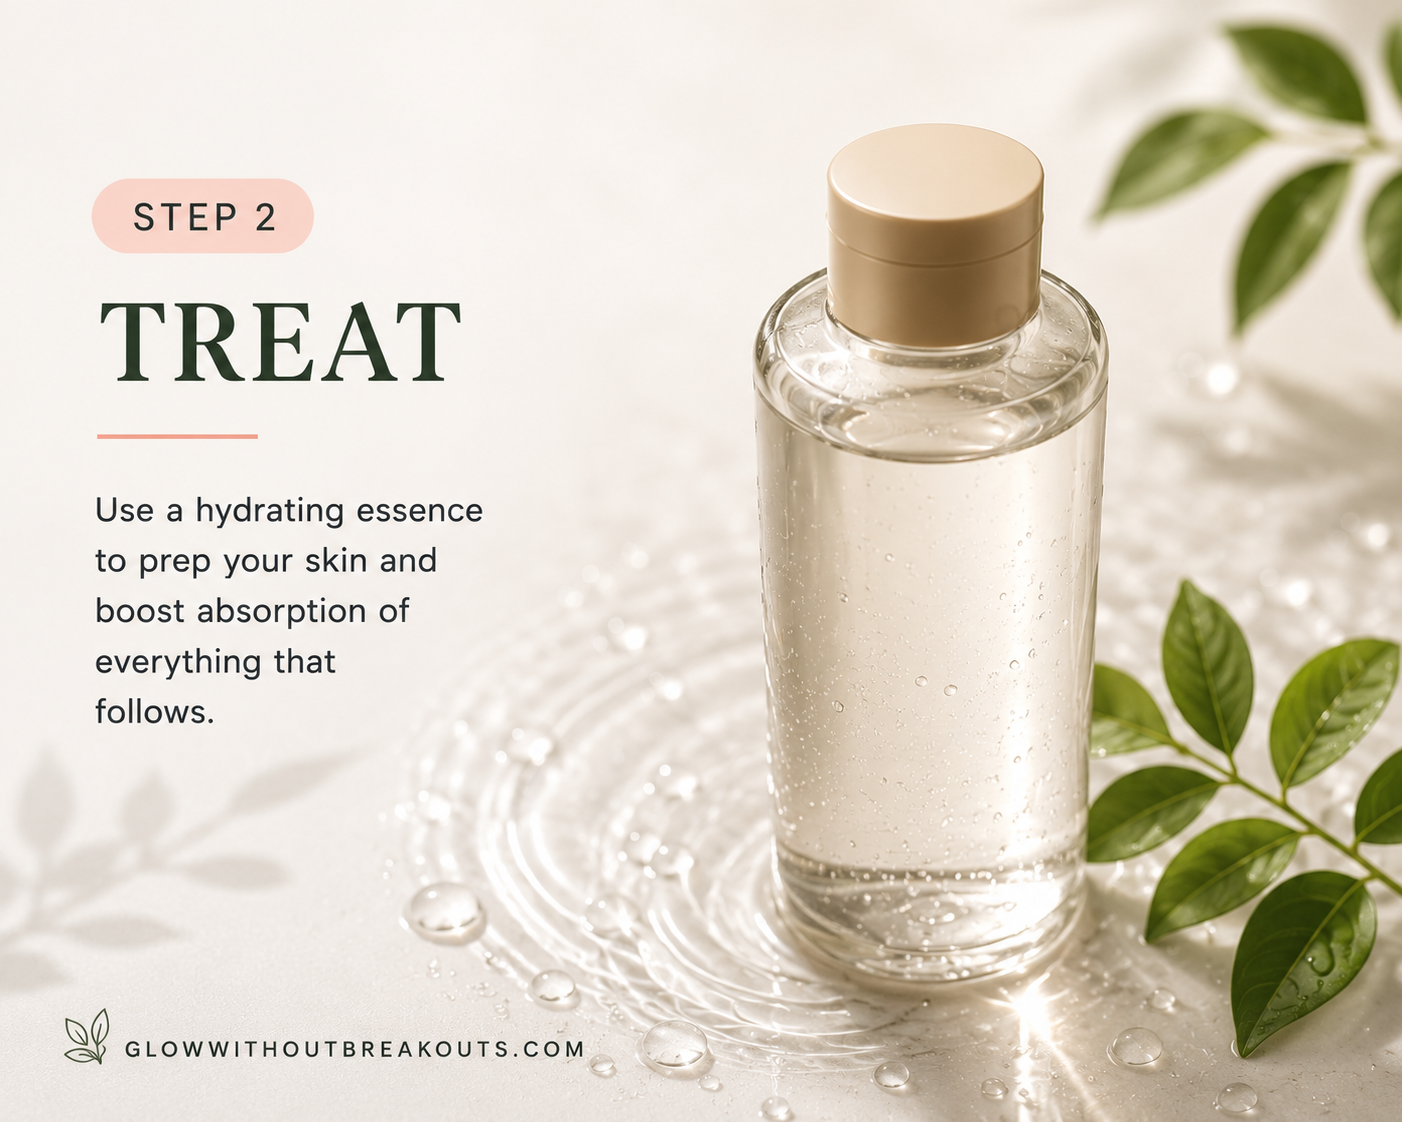
    Most toners, even the ones marketed for acne-prone skin, are too stripping for summer. Alcohol-based toners evaporate fast, which feels refreshing in the moment but strips your moisture barrier right when it is already being challenged by heat and sweat. Astringent toners can also trigger rebound oiliness, which is the last thing you want in your summer skincare routine for acne prone skin. An essence does the complete opposite: it floods skin with lightweight hydration before anything else, priming your barrier to absorb everything you put on top of it.

    The The Ordinary Multi-Active Delivery Essence for Hydration | The Ordinary Official Site is the one I personally use and it has completely changed my summer skincare routine for acne prone skin. It layers under everything and your skin absorbs it immediately. There is no heaviness, no residue, just an instant plumpness that makes everything else in your routine work better. In summer especially it is the step that gives you that glow without any greasiness.

    💬 My Review: I was skeptical about essences for a long time because I thought they were just fancy toners. The Ordinary Multi-Active Delivery Essence completely changed my mind. I press a few drops into clean damp skin and it absorbs instantly. My skin looks visibly more hydrated within minutes and everything I layer on top just sits better. It has become the non-negotiable step in my summer skincare routine for acne prone skin.

    Apply on clean damp skin right after cleansing. Press it in gently with clean hands rather than wiping — this helps it absorb faster and means you are not dragging anything across skin that might be a little sensitive from summer heat.

    💡 Pro Tip: Apply your essence on damp skin for maximum absorption. Pat it in with clean hands rather than a cotton pad — you lose less product and it absorbs more evenly. Wait 30 seconds before moving to your next step.

    🛒 Shop Step 2: Essence
    The Ordinary Multi-Active Delivery Essence for Hydration

    Step 3: Hyaluronic Acid Serum for Lightweight Glow

    Step 3 Hydrate: Apply hyaluronic acid serum in your summer skincare routine for acne prone skin.

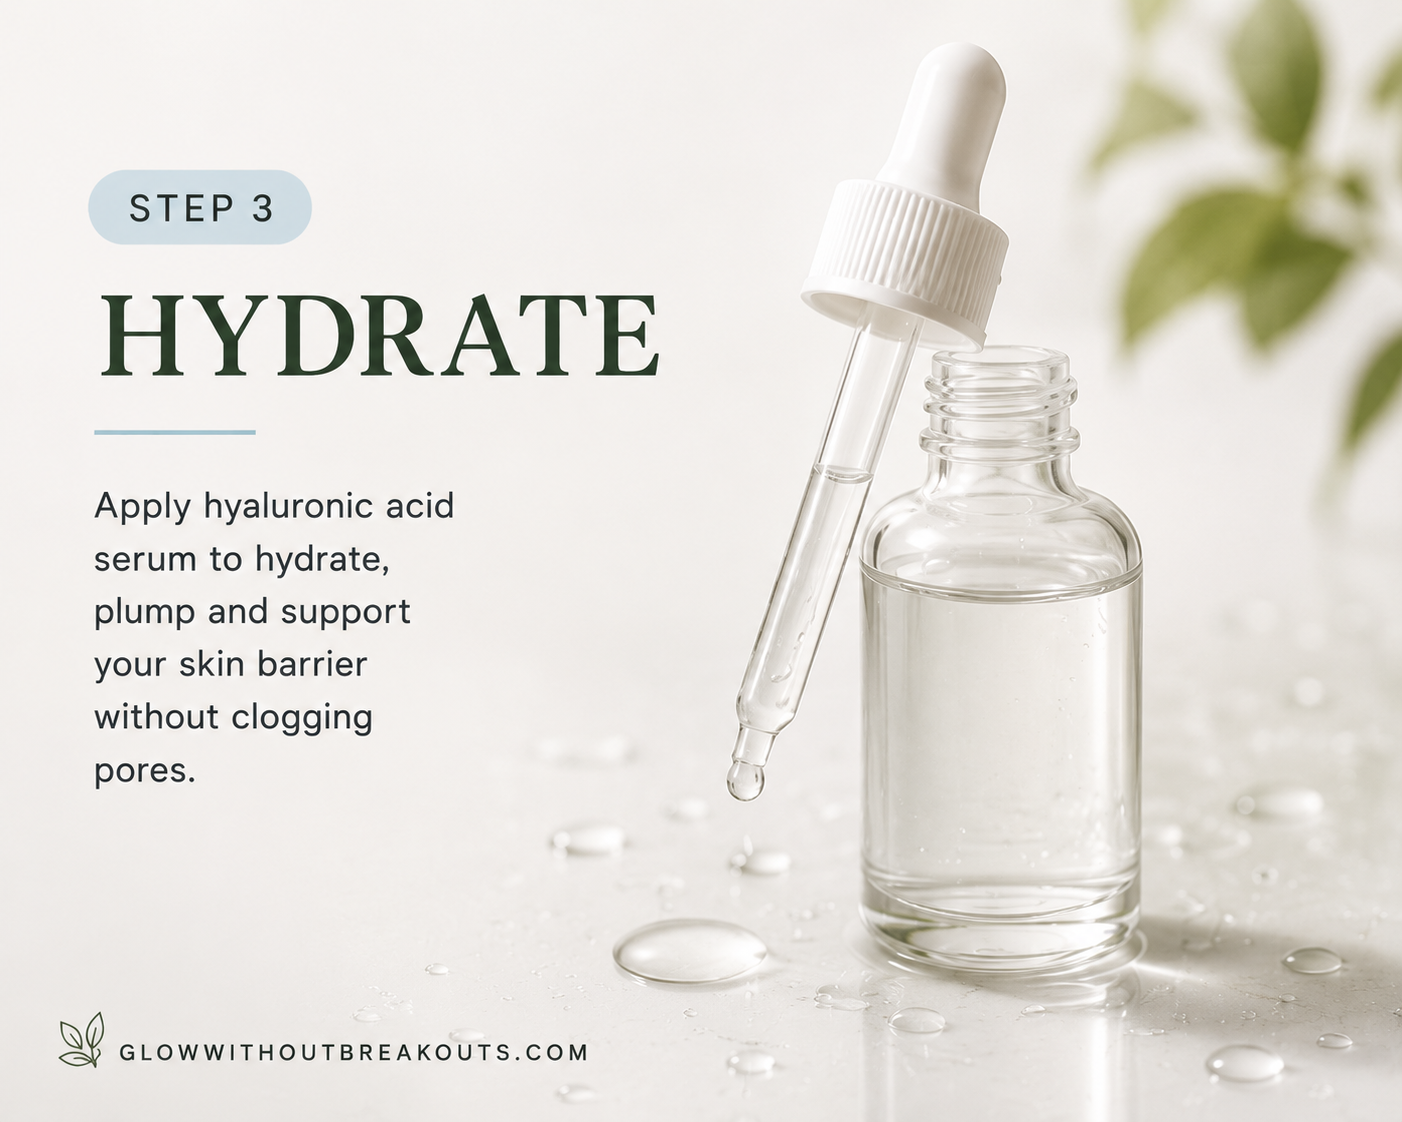
    Hyaluronic acid is the one serum that works for every acne-prone skin type in summer. It pulls moisture into the skin without adding any oil, which means you get that plump glowy look without the greasiness. If you have been skipping serum in summer because everything felt too heavy, hyaluronic acid is the answer. It is water-based, weightless, and completely non-comedogenic, which makes it a perfect fit for a summer skincare routine for acne prone skin.

    The The Ordinary Hyaluronic Acid 2% + B5 | The Ordinary Official Site is one of the most affordable options that genuinely delivers. The 2% HA pulls hydration from the air into your skin and the added B5 helps repair any barrier damage from summer sun and sweat. Apply a few drops on top of your essence and press it in before it fully dries.

    If you want something with a slightly richer feel, the The Inkey List Hyaluronic Acid Serum | The Inkey List Official Site is another solid pick at a similar price point. Both are lightweight enough for humid summer days and both work beautifully for acne-prone skin that needs hydration without congestion.

    💡 Pro Tip: Apply hyaluronic acid on slightly damp skin — it needs some water present to pull moisture into your skin. If you apply it on completely dry skin it can actually pull moisture out instead. A light spritz of your hydrating mist on the skin first makes a real difference.

    🛒 Shop Step 3: Hyaluronic Acid Serums
    The Ordinary Hyaluronic Acid 2% + B5
    The Inkey List Hyaluronic Acid Serum

    Related reading

    5 Critical Mistakes That Shattered Your Skin Barrier

    Read the post →

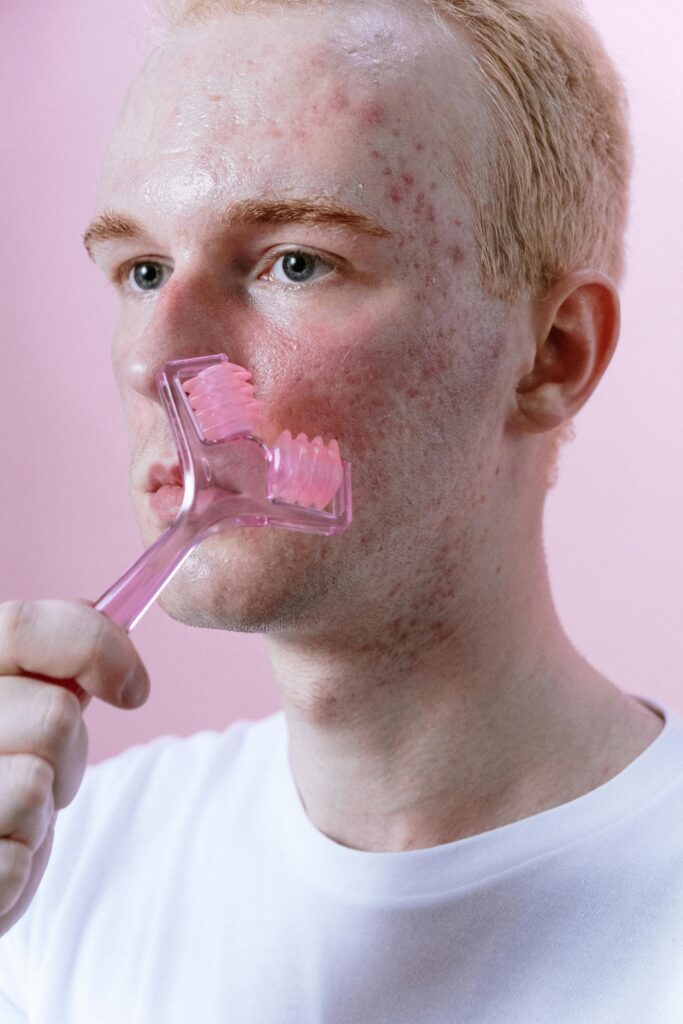
    Step 4: Moisturizer and SPF — How to Choose in Summer

    Step 4 Moisturize and Protect: Lock in moisture and never skip SPF in your summer skincare routine.

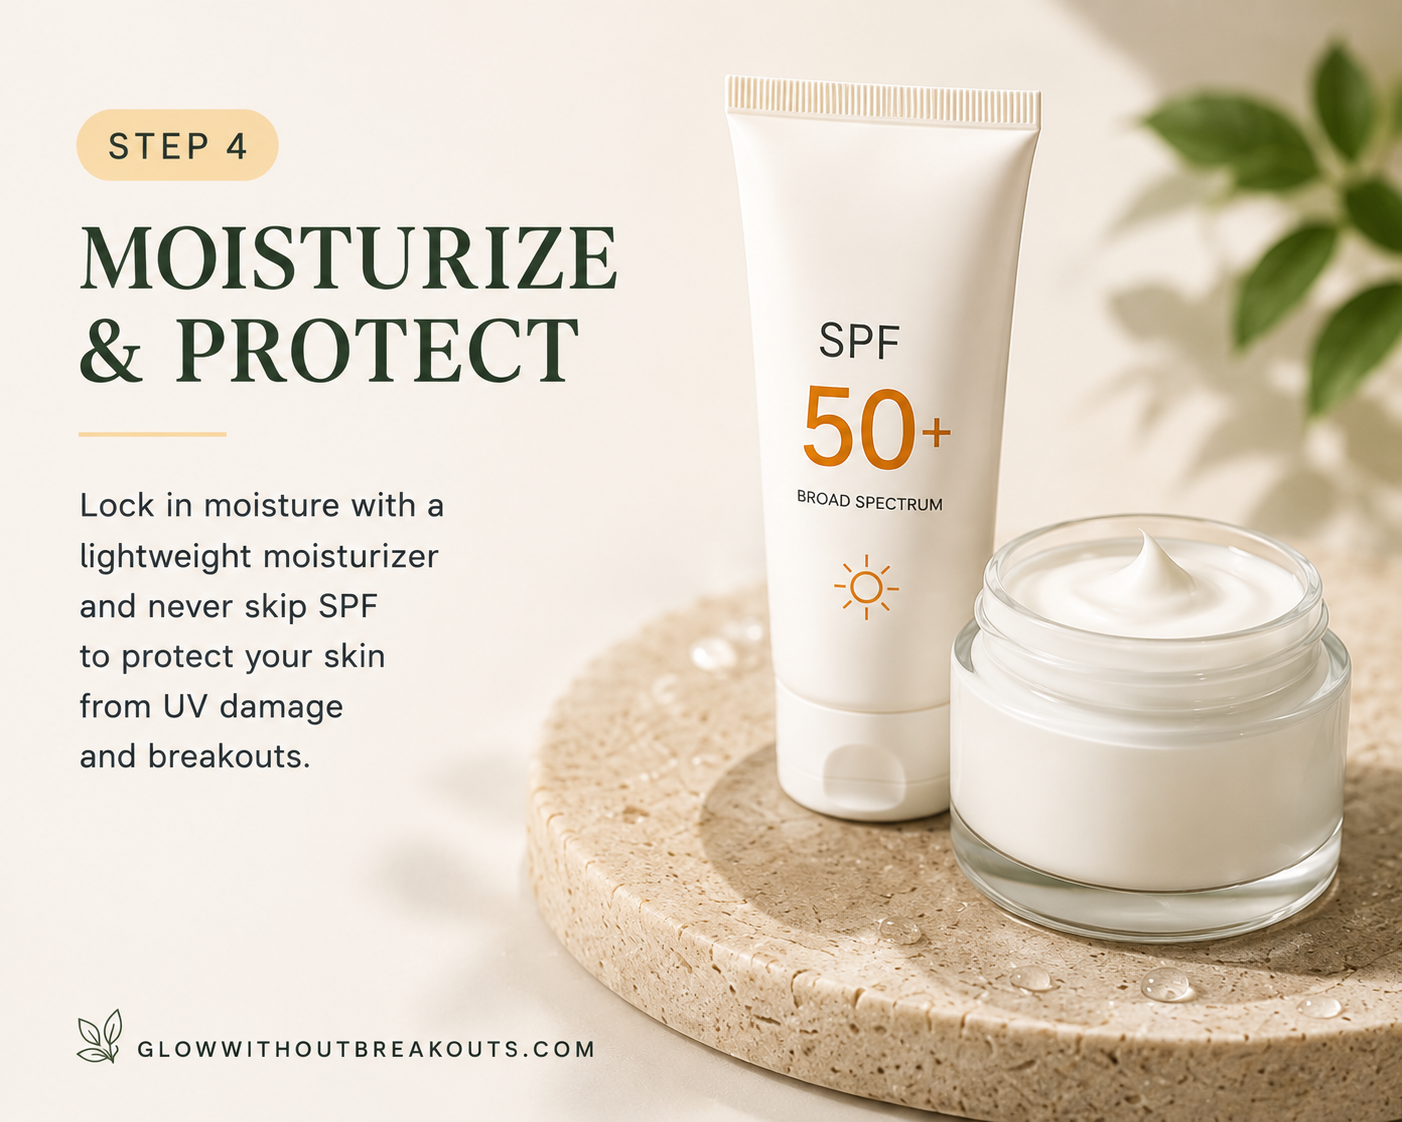
    SPF is non-negotiable in your summer skincare routine for acne prone skin. Sun exposure makes post-acne dark marks significantly darker, slows down skin healing, and breaks down the actives you are using to clear your skin. Skipping SPF in summer is one of the most counterproductive things you can do for acne-prone skin: you are undoing all the work your other products are doing. The question is not whether to wear SPF, it is whether to use a 2-in-1 SPF moisturizer or keep them separate.

    Option A, The 2-in-1: The CeraVe AM Facial Moisturizing Lotion SPF 50 | CeraVe Official Site is the easiest summer option. One step covers both hydration and sun protection. It has a dewy finish that looks beautiful for glowy summer skin and it is non-comedogenic and ceramide-rich for barrier support. For oily skin that wants shine control, the Cetaphil DermaControl Oil Absorbing Moisturizer SPF 30 | Cetaphil Official Site gives you SPF 30 with a matte finish that controls shine all day.

    Option B, Separate Products: If you want stronger SPF protection, pair a lightweight moisturizer like the CeraVe PM Facial Moisturizing Lotion or CeraVe Daily Moisturizing Lotion with a dedicated acne-safe SPF on top. The best options I have personally tested are the La Roche-Posay Anthelios Matte Fluid SPF 60 — my personal favorite for a truly matte finish that lasts all day — and the Hero Cosmetics Force Shield SPF 50 for a more affordable option specifically designed for acne-prone skin. If you prefer mineral sunscreen, the EltaMD UV Clear SPF 46 is the dermatologist favorite for sensitive acne-prone skin.

    💡 Pro Tip: In summer, less moisturizer is more. Your skin retains moisture better in humid conditions, so a thin layer of a lightweight moisturizer is all you need. Save the richer formulas for your PM routine and let your SPF do the heavy lifting in the morning.

    🛒 Shop Step 4: Moisturizer and SPF
    CeraVe AM Facial Moisturizing Lotion SPF 50 (2-in-1)
    Cetaphil DermaControl Oil Absorbing Moisturizer SPF 30 (oily skin)
    CeraVe PM Facial Moisturizing Lotion
    La Roche-Posay Anthelios Matte Fluid SPF 60
    Hero Cosmetics Force Shield Sunscreen SPF 50
    EltaMD UV Clear SPF 46 (mineral option)

    Related reading

    Best Sunscreen for Acne-Prone Skin: Non-Comedogenic Options That Won’t Cause Breakouts

    Read the post →

    Step 5: Hydrating Mist Throughout the Day

    Step 5 Refresh: Use a hydrating mist throughout the day in your summer skincare routine for acne prone skin.

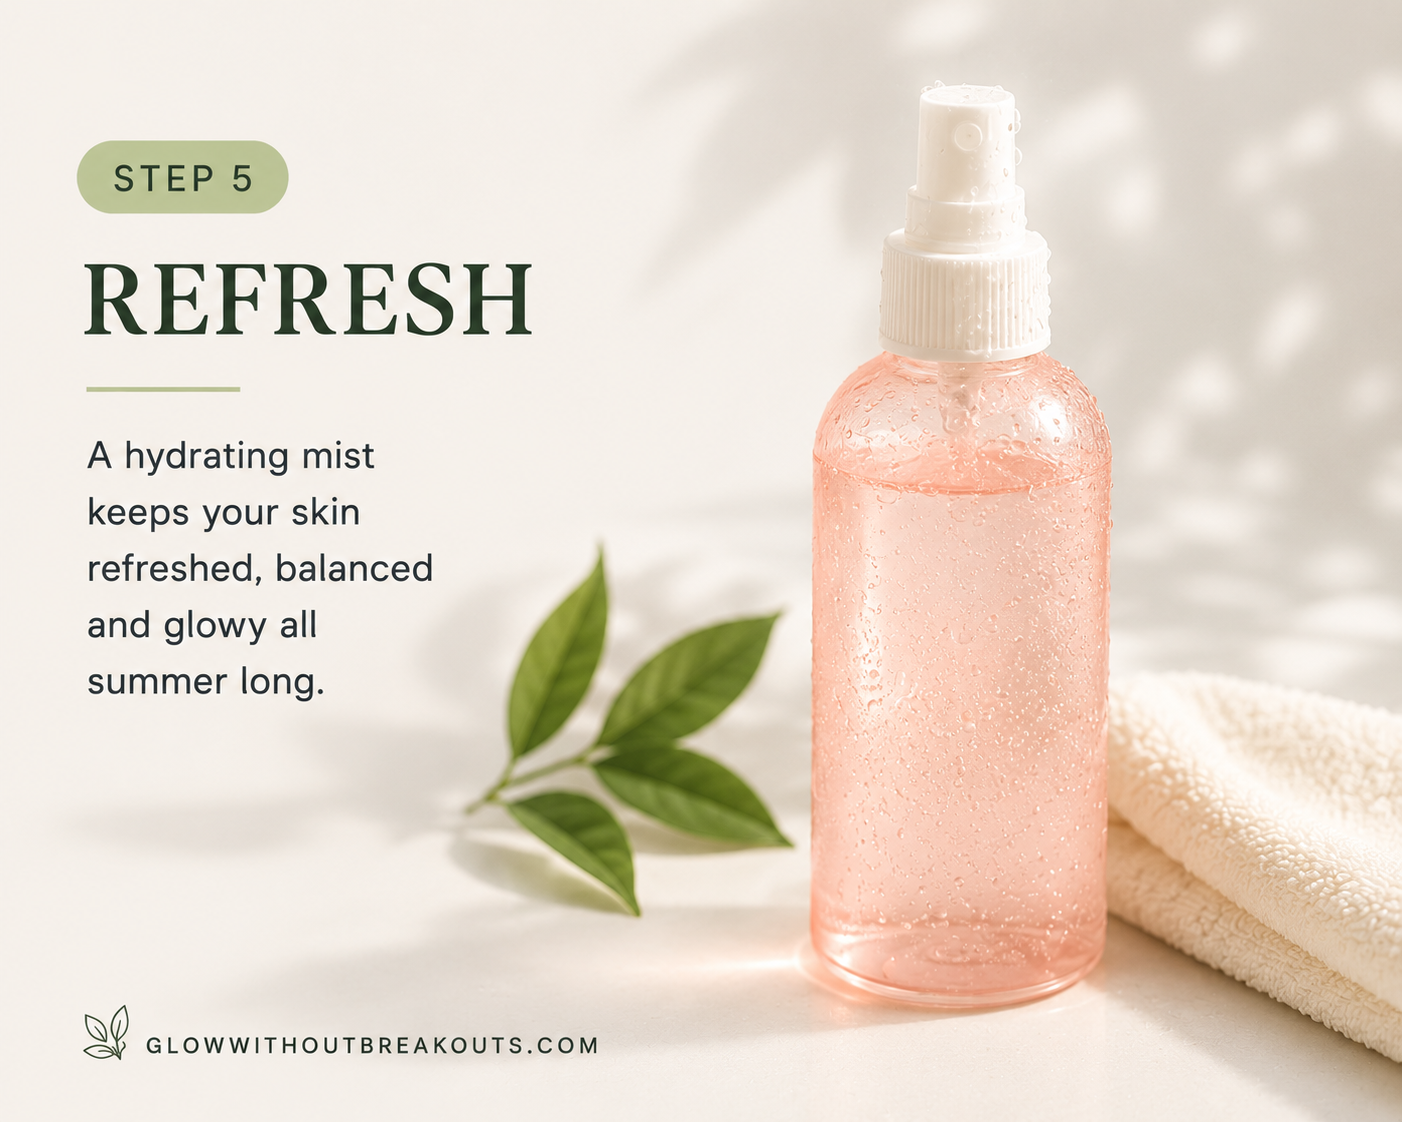
    This is the step most people skip and the one that makes the biggest visible difference in summer. Your skin loses hydration throughout the day through sweat and heat exposure, which is why that fresh glowy look from your morning routine fades by noon. A hydrating mist throughout the day keeps your skin looking dewy and fresh even when summer is working against you. It is also one of the most satisfying steps in a summer skincare routine for acne prone skin: a quick spritz whenever your skin feels tight or dull and you instantly look more awake and hydrated.

    The The Inkey List Hydro Surge Face Mist | The Inkey List Official Site is my personal pick and one I genuinely keep on my desk every summer. It gives the most beautiful glow mid-afternoon without any stickiness and it never breaks me out. It is lightweight, fast-absorbing, and works on top of makeup which means you can use it any time without disrupting your routine.

    💬 My Review: I keep The Inkey List Hydro Surge Face Mist at my desk all summer. A couple of spritzes at noon and my skin goes from looking flat and tired to visibly hydrated and glowy. It never feels sticky, never breaks me out, and it layers perfectly over SPF and makeup. It has become the most-used product in my summer skincare routine for acne prone skin and I genuinely do not know how I survived summer without it.

    Hold the mist about 8-10 inches from your face and spritz in a circular motion for even coverage. Let it absorb naturally rather than rubbing it in. Use it as many times throughout the day as your skin needs — it will not clog pores or cause breakouts.

    💡 Pro Tip: Keep your hydrating mist in the fridge for an even more refreshing feel on hot days. Cold mist on warm skin feels incredible in summer and the cooling effect also helps calm any redness or inflammation from heat exposure.

    🛒 Shop Step 5: Hydrating Mist
    The Inkey List Hydro Surge Face Mist

    Your Complete Summer Skincare Routine at a Glance

    Summer acne skincare routine at a glance infographic showing AM and PM summer skincare routine steps for acne prone skin.

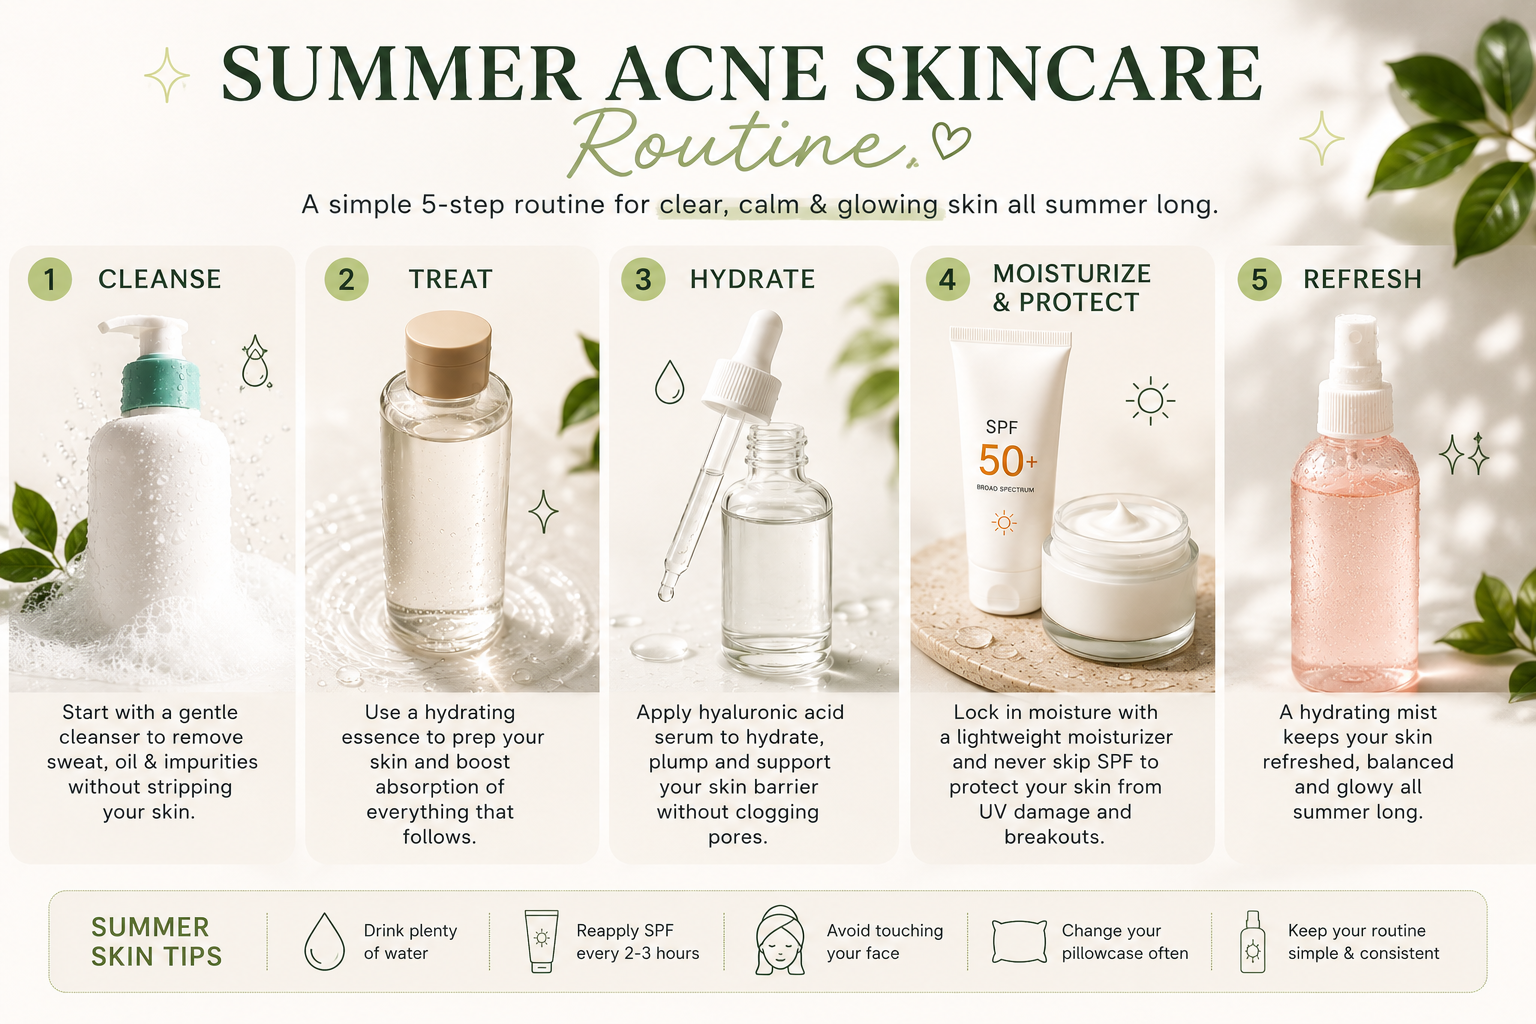
    Here is your full summer skincare routine for acne prone skin in order. Morning and evening together take under 5 minutes once you get the hang of it.

    ☀️ AM Summer Skincare Routine

    Step 1, Cleanse: Cetaphil Daily Facial Cleanser, Beplain Mung Bean Cleanser (sensitive skin), or CeraVe Foaming Facial Cleanser (oily skin)

    Step 2, Essence: The Ordinary Multi-Active Delivery Essence, pressed into damp skin

    Step 3, Serum: The Ordinary Hyaluronic Acid 2% + B5 or The Inkey List HA Serum

    Step 4, Moisturize and SPF: CeraVe AM SPF 50 as a 2-in-1, or lightweight moisturizer with La Roche-Posay Anthelios SPF 60, Hero Cosmetics SPF 50, or EltaMD UV Clear SPF 46

    Throughout the day, Mist: The Inkey List Hydro Surge Face Mist as needed

    🌙 PM Summer Skincare Routine

    Step 1, Cleanse: Cetaphil Daily Facial Cleanser or Cetaphil Gentle Clear Clarifying Cleanser 2-3x per week if breaking out, or Paula’s Choice RESIST if you want active BHA treatment

    Step 2, Essence: The Ordinary Multi-Active Delivery Essence

    Step 3, Serum: The Ordinary Hyaluronic Acid 2% + B5 or The Inkey List HA Serum

    Step 4, Moisturize: CeraVe PM Facial Moisturizing Lotion or CeraVe Daily Moisturizing Lotion


    More From GlowWithoutBreakouts

    GWB Skin Quiz

    Still not sure which summer skincare routine is right for your skin type?

    Take the free 9-question quiz and get matched to your routine.

    Take the GWB Skin Quiz →

    Stop Guessing: 3 Routines Based on Your Acne Skin Type
    7 Brutal Rounds: CeraVe vs Cetaphil — Advice From the Lab Rat
    Best Sunscreen for Acne-Prone Skin
    Best Cleansers for Acne-Prone Skin: Tested & Ranked
    5 Critical Mistakes That Shattered Your Skin Barrier
    Over-Exfoliation Recovery: How to Fix Damaged Skin
    7+ Powerful Habits That Actually Prevent Breakouts
    3 Powerful Ways to Make a Pimple Go Away Fast
    Does Stress Really Cause Acne?
    Best Pillowcase for Acne-Prone Skin
    The Worst Skincare Mistake I Made


    Disclaimer: This post contains affiliate links. If you purchase through these links, I may earn a small commission at no extra cost to you. All opinions are 100% my own and based on personal experience and honest research. This is not medical advice, please consult a dermatologist for persistent acne concerns.

  • 3 Powerful Ways to Make a Pimple Go Away Fast: No Scarring

    3 Powerful Ways to Make a Pimple Go Away Fast: No Scarring

    You woke up, looked in the mirror, and there it is—a new pimple: whether it’s a whitehead, a stubborn cyst, or that angry red bump, you want it gone. Now.

    I’ve been there countless times. After years of trial and error with various treatments, I’ve discovered the best ways to make a pimple go away fast, and, more importantly, what prevents scarring and hyperpigmentation in the process.

    Here’s what I’ve learned works.

    The Reality: Speed Matters: And We Want Fast Results

    A pimple doesn’t just disappear overnight. But what you do in the first 24-48 hours matters a lot. The faster you treat it correctly, the faster it heals. The slower you treat it—or worse, if you pick at it—the longer it sticks around and the higher the chance it leaves a mark.

    Most people don’t realize that scarring isn’t inevitable. It’s a choice, and that choice happens right now: when the pimple is fresh.

    Understanding What Causes Scarring

    Before I get into treatment, you need to understand why some pimples scar and others don’t.

    A pimple is an inflammation beneath the skin which occurs when bacteria multiply in a pore and your immune system sends white blood cells to fight them. The resulting swelling is what you see on the surface. In most cases, this resolves cleanly, and your skin goes back to normal.

    When you squeeze, pick, or irritate a pimple, you’re doing two things:

    • Breaking the skin barrier and creating micro-tears
    • Pushing inflammation deeper into the dermis (the layer below the epidermis where collagen lives)

    If inflammation reaches the dermis, your body responds by laying down collagen to “repair” the damage, and unfortunately, collagen doesn’t always fill in evenly. Sometimes it creates an indentation (atrophic scar) or a raised bump (hypertrophic scar). Either way, it’s permanent without professional treatment.

    The good news: If you don’t pick, squeeze, or heavily irritate the pimple, most of the inflammation stays in the epidermis and resolves cleanly without scarring.

    That’s why early gentle intervention is so important.

    Different Pimple Types Require Different Approaches

    Not all pimples are created equal. Here’s how to identify what you’re dealing with and how to treat it:

    First, identify the pimple type, then decide the best ways to make your pimple go away fast

    Whiteheads (comedones): A visible white or yellowish head at the surface. The pore has opened slightly, and you can see pus/sebum.

    • Best treatment: Flat hydrocolloid pimple patch
    • Timeline: 6-12 hours to significant flattening

    Blackheads: A dark spot where the pore is open but oxidized (not dirt). Often on the nose or chin.

    • Best treatment: These don’t need patches—they’re not inflamed. Use a gentle exfoliant or leave them alone.
    • Note: Don’t squeeze these either. You’ll cause inflammation and create a pimple.

    Papules (red bumps): Inflamed, but no visible head. The infection is deeper, closer to the surface but not yet open.

    • Best treatment: Micro-needle pimple patch to bring it to a head faster
    • Timeline: 12-24 hours to whitehead formation, then another 12-24 hours to flattening

    Cystic/Nodular pimples: Large, painful, deep bumps under the skin. No head. Often sensitive to touch.

    • Best treatment: Micro-needle pimple patches for 6-8 hours, then switch to a flat patch once a whitehead forms.
    • Timeline: 24-48 hours to see a significant reduction
    • Note: These are most prone to scarring if picked. Leave them alone and let the patches do the work.

    Best Ways to Make a Pimple go Away Fast, Method 1: Pimple Patches (Hydrocolloid)

    What they are: Flat, sticky patches that adhere directly to the skin. The most common brands are Mighty Patch and Hero Cosmetics.

    Product links: pimple patches

    When to use them: Only when you can see a whitehead or the pore is visibly opening. If the pimple is under the skin, a regular patch won’t work because it needs direct contact with the head of the pimple.

    How they work: Hydrocolloid patches absorb the pus and oil from the pimple, flattening it and reducing inflammation. They also create a barrier so you’re not tempted to touch, pick, or squeeze it.

    My experience: I love these. They’re simple, they work, and I can wear them under makeup or just leave them on overnight. I’ve seen whiteheads flatten noticeably within 6-8 hours.

    Timeline:

    • Hours 0-2: The patch adheres and starts absorbing fluid
    • Hours 6-8: The pimple begins to flatten visibly
    • Hours 12-24: Most of the inflammation is gone; the patch turns white as it absorbs material
    • Day 2-3: The pimple is significantly smaller

    Cost: $8-15 for a pack of 20-30 patches. One pimple = one patch.

    Application Protocol for Hydrocolloid Patches

    This is critical, and most people get it wrong:

    1. Wash your face with a gentle, fragrance-free cleanser (like All Free Clear). Use lukewarm water.
    2. Dry your skin completely. This is non-negotiable. The patch will not adhere well to damp skin, and any residual moisture reduces its ability to absorb fluid. Be sure to pat dry with a clean towel and wait 1-2 minutes if needed.
    3. Do not apply moisturizer, serums, or any other products to the area where the patch will be placed. Although this may seem counterintuitive, moisturizer creates a barrier between your skin and the patch which prevents the hydrocolloid from making proper contact and significantly reduces its ability to pull out fluid and oil.
    4. Apply the patch directly to the clean, dry skin. Press firmly for 10-15 seconds to ensure full adhesion.
    5. After applying, wait 5-10 minutes before applying any other skincare. This allows the patch to fully set.
    6. Once the patch has set, you can apply moisturizer around it (not under it or on top of it). Apply your regular skincare to the rest of your face.
    7. Change the patch every 6-8 hours or once it turns white. A saturated patch won’t absorb anymore and becomes just a band aid. Remove it, wash the area, dry completely, and apply a fresh patch.
    8. Make sure to apply a fresh patch on clean, dry skin. Sleep on your back or the opposite side to avoid pressing the patch into the pillow.

    Why This Matters:

    Moisturizer sits on top of your skin and creates an occlusive layer. The patch needs direct contact with your skin to adhere and create the microenvironment that absorbs fluid. If there’s a barrier of moisturizer between the patch and your skin, it’s like trying to tape something through a sheet of plastic—it won’t stick, and it won’t work.

    Best Ways to Make a Pimple go Away Fast, Method 2: Micro-Needle Pimple Patches for Cystic Pimples

    What they are: Patches with tiny microneedles embedded in them. Brands like Mighty Patch and Hero Cosmetics make these too.

    Product links: mighty patch for cystic pimples

    When to use them: This is crucial—use these for cystic pimples or deep, under-the-skin pimples that a regular patch can’t touch. If it’s a whitehead, stick with the flat patch (Method 1).

    How they work: The microneedles penetrate the skin barrier and deliver active ingredients (usually salicylic acid or niacinamide) directly into the pimple. They also create tiny channels that help bring the inflammation to the surface faster.

    My experience: I love these for stubborn cystic pimples. In the event that I get one of those deep, painful bumps that won’t come to a head, a micro-needle patch is one of the best ways to make a pimple go away fast. I press firmly to ensure good contact and leave it on for 6-8 hours (or overnight).

    Timeline:

    • Hours 0-6: The microneedles penetrate; you might feel slight tingling or warmth
    • Hours 6-12: The pimple starts bringing inflammation to the surface
    • Day 2-3: The cyst flattens and may come to a whitehead (then you can switch to a regular patch)
    • Day 3-4: Significant reduction in size and pain

    Cost: $10-18 for a pack of 6-8 patches. Slightly pricier than flat patches, but worth it for cystic acne.

    Applying Micro-Needle Patches on a Cystic Pimple

    1. Wash your face with a gentle, fragrance-free cleanser. Use lukewarm water.
    2. Dry your skin completely. Again, this is essential. The patch needs direct contact with dry skin to work effectively.
    3. Do not apply any moisturizer, serums, or products to the area. The same reason as above: barriers (like moisturizer) prevent the needles from penetrating properly and reduce efficacy.
    4. Apply the patch directly to the clean, dry skin. Press firmly for 15-20 seconds. You want good contact so the microneedles can penetrate the skin barrier effectively. You may feel slight tingling or warmth—this is normal.
    5. Leave the patch on for 6 to 8 hours. Micro-needle patches work differently from flat hydrocolloid patches because they penetrate the skin to deliver active ingredients ,whereas flat hydrocolloid patches sit on top of the skin and absorb fluid. An overnight application is ideal for these micro-needle patches.
    6. After removing the patch, do not apply moisturizer immediately. Wait 10-15 minutes, then you can apply your regular skincare routine.
    7. The next day, assess the pimple. If it’s come to a whitehead, switch to a regular hydrocolloid patch (Method 1). If it’s still under the skin but noticeably smaller, apply another micro-needle patch.

    Why this matters: Micro-needle patches work by penetrating the skin barrier. Any barrier (moisturizer, serum, oil) on top of your skin prevents the needles from doing their job. You need direct skin contact for the active ingredients to be delivered and for the needles to penetrate effectively.

    Best Ways to Make a Pimple go Away Fast, Method 3: Silicone Scar Sheets

    What they are: Thin, flexible silicone sheets that adhere to the skin and create a microenvironment that hydrates and flattens scar tissue.

    Product links: silicone scar sheets

    When to use them: During the recovery phase of a pimple, specifically days 3-7 when the pimple is flattening but still visibly inflamed or textured.

    How they work: Silicone occludes the skin, increasing hydration and allowing collagen to remodel more evenly. This prevents the pimple from leaving behind texture or indentation.

    My experience: I rate these 7/10. They genuinely help even out texture during recovery, especially on pimples that were deep or cystic. I apply them for 24-48 hours during the healing window.

    Timeline:

    • Day 1-2 of application: The silicone hydrates the area; redness may look slightly worse (it’s just more visible)
    • Day 2-3: Texture noticeably evens out
    • Day 3-7: Continued flattening; hyperpigmentation fades faster
    • After removal: Your skin stays smoother than it would have without the sheet.

    Cost: $15-25 for a pack of 4-5 sheets.

    Important note: These aren’t a replacement for pimple patches in the active phase. Use pimple patches first (days 0-2), then switch to silicone sheets (days 3-7) once the pimple is flat.

    What are NOT the Best Ways to Make a Pimple go Away Fast:

    Let me be direct: Don’t squeeze, pick, or irritate the pimple. I know it’s tempting. I know you want to “get the stuff out.” But every time you touch it, you’re:

    • Pushing bacteria deeper into the skin
    • Creating micro-tears that lead to scarring
    • Extending the healing timeline
    • Increasing the chance of hyperpigmentation

    Your hands have bacteria on them. Your nails are sharp. A pimple is an open (or near-open) wound. The math doesn’t work.

    Also avoid:

    • Harsh scrubbing or exfoliating the area while it’s active
    • Applying multiple active ingredients (benzoyl peroxide + salicylic acid + retinol at the same time = irritation)
    • Sleeping on your face directly on the pimple (increases pressure and oil transfer)
    • Tight hats or headbands that trap sweat and bacteria on the pimple
    • Touching it with your hands (even just to check if it’s better)

    The Best Ways to Make a Pimple Go Away Fast- Hygiene and Environment:

    While you’re treating a pimple, being mindful of your environment and hygiene is one of the best ways to make a pimple go away fast.

    Cleanse twice daily, gently. Use a fragrance-free, sulfate-free cleanser (like All Free Clear, which I use). Don’t over-wash; twice daily is enough. More than that strips your skin and causes irritation.

    Change your pillowcase every 2-3 days while the pimple is active. Oil, bacteria, and dead skin cells accumulate on pillowcases and transfer to your face every night. By swapping it more frequently, you reduce the chances of re-infection and prevent the pimple from getting worse.

    Use clean hands only. If you’re applying a patch or sheet, wash your hands first. Don’t touch the pimple unnecessarily.

    Watch your water. Hard water can irritate healing pimples and contains minerals that can trap bacteria. If you have hard water at home, consider a filtered showerhead ($20-$40). Not only is a filtered showerhead great for filtering hard water, but it also helps with overall skin health, especially during healing phases. An investment in this is a must, and you can’t go wrong.

    Sleep position matters. If possible, sleep on your back or the opposite side from the pimple. Sleeping directly on the pimple increases pressure and transfers oil/bacteria from your pillowcase back to the skin.

    The Realistic Timeline: From Pimple to Clear

    Here’s what to expect if you follow the above methods:

    Active Phase (Day 0-2):

    Apply pimple patch (flat or micro-needle, depending on type) to freshly washed, dry skin.

    • Keep it clean and dry.
    • Don’t touch it
    • Change the patch every 6-8 hours.
    • Expected result: 30-50% flattening

    Transition Phase (Days 2-4):

    • If it’s a whitehead and fully flat, you’re done: just let it heal.
    • If it still has redness or slight texture, apply a silicone sheet.
    • Gentle cleansing only
    • Expected result: 70-80% flattening, redness decreasing

    Recovery Phase (Days 4-7):

    • Continue silicone sheets if needed.
    • Gentle cleansing only
    • Avoid makeup if possible (let skin breathe)
    • Apply moisturizer normally now.
    • Expected result: 90%+ flattening, hyperpigmentation starting to fade

    Post-pimple phase (Days 7-14):

    • No more patches or sheets needed
    • Focus on sun protection (hyperpigmentation gets worse with sun exposure)
    • Normal skincare routine resumes
    • Expected result: Pimple is essentially gone; mark fades over weeks

    Weeks 2-4:

    • Any remaining hyperpigmentation fades gradually.
    • If texture or indentation remains, that’s scarring (different treatment needed—see our full scar treatment guide)

    Common Mistakes People Make that are NOT the Best Ways to Make a Pimple Go Away Fast:

    Mistake #1: Applying moisturizer before the patch. This reduces adhesion and effectiveness by up to 50%. Clean, dry skin only.

    Mistake #2: Waiting too long to start treatment. The first 24 hours are critical. Start immediately when you notice the pimple.

    Mistake #3: Squeezing “just a little bit.” There’s no such thing. Any squeezing can cause inflammation and increase the risk for scarring. Let the patches do the work.

    Mistake #4: Mixing treatments aggressively. Don’t use benzoyl peroxide,salicylic acid, and a patch at the same time. The pimple is already inflamed. You’re just adding more irritation.

    Mistake #5: Not changing the patch when it’s saturated. Here’s the key: once a patch turns white, it’s done. Replace it with a fresh one, and continue this cycle until you apply a patch that stays clear after a full cycle; that’s your signal that the pimple has emptied completely.

    Mistake #6: Using the wrong patch type. Flat patches for whiteheads. Micro-needle patches for cystic/under-the-skin pimples. Using the wrong one wastes money and time.

    Mistake #7: Abandoning the routine too early. Even after the pimple looks “gone,” there’s still inflammation and hyperpigmentation risk. Stay consistent through day 7+.

    The Cost Breakdown

    If you want to be fully prepped for pimples:

    • Hydrocolloid patches: $8-15 for a pack of 20-30 (lasts months)
    • Micro-needle patches: $10-18 for a pack of 6-8 (lasts weeks)
    • Silicone sheets: $15-25 for a pack of 4-5 (lasts weeks)
    • Gentle cleanser (fragrance-free): $5-10 (lasts months)
    • Filtered showerhead: $20-40 (one-time investment)

    Total initial investment: $58-108 for a complete toolkit

    You don’t need all of these at once. Start with hydrocolloid patches ($10) and see how your skin responds. Add micro-needle patches if you’re prone to cystic acne. Add silicone sheets if you’re noticing texture or hyperpigmentation after pimples heal. Build your toolkit over time.

    Why I’m Telling You This

    I’ve wasted money on expensive treatments, fancy serums, and dermatologist visits for pimples that could have been prevented or minimized with the right early intervention. The methods above aren’t glamorous or Instagram-worthy. They’re just… effective.

    The pimple you have right now doesn’t have to leave a scar. The choice you make in the next 24 hours matters more than the choice you make in the next 24 days.

    The best ways to make a pimple go away fast are to treat it early and treat it right. Keep your skin clean. Don’t touch it. Don’t pick it. Use the tools that actually work.

    And if you do end up with scarring despite your best efforts, we’ve got you covered with a full guide on treatment options that actually work: from microneedling to chemical peels to subcision (releasing May, 2026). But ideally, you won’t need it.

    That’s how you make a pimple go away fast, and actually stay gone without the marks.

  • Does Stress Really Cause Acne? Here’s What the Science Says (And What I Learned From My Own Skin)

    Does Stress Really Cause Acne? Here’s What the Science Says (And What I Learned From My Own Skin)

    Introduction: My Journey with Stress-Induced Acne

    I’ve spent three years obsessing over every variable that might trigger my acne: the products I use, the food I eat, the weather. But nothing has been as consistent as the connection between stress and stress-induced acne.

    Two weeks before a big deadline at work? Cystic acne on my jawline. Mid-semester during college? Angry clusters along my chin. A stressful family situation? Deep, painful breakouts that seemed to appear overnight.

    But here’s what I’ve learned: Yes, stress does cause acne. But not in the way you might think.

    This isn’t just about “oh, stress makes you break out.” The relationship between stress and acne is biological and hormonal, and surprisingly well documented by dermatologists. More importantly, understanding why it happens has helped me manage my acne better than any expensive serum ever could.


    The Science: How Stress Actually Triggers Acne

    It All Starts With Cortisol (The Stress Hormone)

    When you experience stress—whether it’s work pressure, relationship issues, financial worry, or even lack of sleep—your body releases a hormone called cortisol.

    Cortisol is your body’s natural “fight or flight” response. It’s supposed to help you deal with immediate danger. But in our modern world, we’re chronically stressed, which means we’re constantly releasing cortisol.

    Here’s where your skin comes in.

    Cortisol has a direct effect on your sebaceous glands (the glands that produce oil in your skin). When cortisol levels spike, your skin produces more sebum (oil). If you have acne-prone skin—which means your skin is already prone to clogged pores—excess oil is basically fuel for the bacteria that cause stress-induced acne.

    But that’s only the beginning.

    Stress Triggers Inflammation at the Cellular Level

    Beyond oil production, cortisol creates inflammation throughout your body. On your face, this inflammation can:

    • Weaken your skin barrier: The protective outer layer of your skin becomes compromised, making you more susceptible to bacteria and irritants.
    • Increase bacterial growth: The bacterium Cutibacterium acnes (formerly Propionibacterium acnes) thrives in oily, inflamed environments.
    • Impair your immune response: Ironically, while cortisol triggers inflammation, it also suppresses your immune system’s ability to fight bacteria effectively.

    This creates a perfect storm for stress-induced acne.

    The Gut-Brain-Skin Axis (Yes, It’s Real)

    Here’s something I didn’t know until I started researching: stress doesn’t just affect your skin directly—it affects your gut, which in turn affects your skin.

    When you’re stressed, your nervous system activates the “fight or flight” response, diverting blood flow away from your digestive system. This can:

    • Disrupt your gut microbiome: The balance of healthy bacteria in your gut gets thrown off.
    • Increase intestinal permeability: Your gut lining becomes more permeable (sometimes called “leaky gut”), allowing bacterial compounds to enter your bloodstream.
    • Trigger systemic inflammation: This inflammation can manifest as acne, especially deep stress-induced acne.

    I didn’t realize this was happening to me until I noticed that during high-stress periods, my digestive issues always preceded my worst stress-induced acne flares by about 3-5 days.

    Stress Disrupts Your Sleep (Which Makes Everything Worse)

    Here’s the vicious cycle I experienced firsthand:

    Stress keeps you up at night—your mind races, anxiety peaks, and sleep suffers. Poor sleep increases cortisol levels, leading to more oil production and inflammation, which worsens stress-induced acne. This then causes more stress, and the cycle repeats.

    During my most stressful periods, I was sleeping 5-6 hours a night. My skin reflected that immediately. The stress-induced acne would appear within 2-3 days of consistently poor sleep.

    Why Stress Causes Cystic Acne (Not Just Regular Breakouts)

    Not all acne is created equal. Cystic acne—those deep, painful bumps that feel like they’re under the surface—is typically caused by:

    • Severe inflammation deep in the skin
    • Hormonal fluctuations
    • Spikes in cortisol due to stress

    The reason stress triggers cystic acne specifically is because of where the inflammation occurs. When cortisol and stress hormones activate, they create deep, systemic inflammation—not just surface-level inflammation. This is exactly where stress-induced acne forms.

    What I Actually Experienced: A Real Timeline

    I want to be honest about my own stress-acne connection because it has helped me recognize the pattern.

    • Fall 2021: The Semester from Hell
      I was taking 18 credits, working 15 hours a week, and dealing with family stress. Over several weeks, I had 4 deep cystic bumps on my jawline and chin due to stress-induced acne.
    • Winter 2022: The Calm Period
      With reduced stress and better sleep, my stress-induced acne almost completely disappeared.
    • Spring 2022: Work Deadline Stress
      Under a 3-week project deadline, sleep dropped back to 6 hours per night, and stress-induced acne returned within 5 days.
    • Summer 2022: Testing My Theory
      I tracked stress levels and sleep, finding a clear correlation: when my stress reached 7+ for consecutive days and sleep dropped below 7 hours, stress-induced acne showed up.

    What Actually Helped (Beyond Just “Reduce Stress”)

    Saying “just reduce stress” is useless advice. We can’t always control our stress levels. But once I understood the mechanism, I could target specific interventions.

    1. Sleep Became Non-Negotiable
      I committed to 7-8 hours of sleep, even during stressful periods. High-quality sleep became my most powerful acne-fighting tool.
    2. Effective Stress Management Practices
      I incorporated activities that genuinely worked for me, such as non-negotiable 30-minute walks and guided yoga for stress
    3. Gut Health Support
      I added probiotics, increased fiber intake, and stayed hydrated, which helped stabilize my digestion during stress and reduced stress-induced acne severity.
    4. Strategic Skincare
      No product can cure stress-induced acne, but supportive skincare can help during high-stress times. Want more information on skincare routines? Read The Step-by-Step Skincare Routine Guide

    The Reality: You Can’t Product Your Way Out of Stress Acne

    Accepting this was hard for me. I used to think that finding the right product would solve everything. I learned instead to prioritize sleep and manage stress.

    When Stress-Induced Acne Might Indicate Something Else

    If you’re experiencing severe, persistent stress-induced acne that doesn’t improve even with better sleep and stress management, it might be worth talking to a dermatologist about possible hormonal causes or other underlying issues.

    The Takeaway

    Yes, stress causes acne—specifically the deep, inflammatory cystic type that’s hardest to treat. Understanding why it happens—cortisol, inflammation, gut disruption, sleep loss—gave me the power to address the condition effectively.

    If you’re dealing with stress-induced acne, consider tracking your patterns, prioritizing sleep, discovering stress management techniques that work for you, and using skincare strategically. Your skin may not become acne-free, but it can become manageable, and that’s worth something.