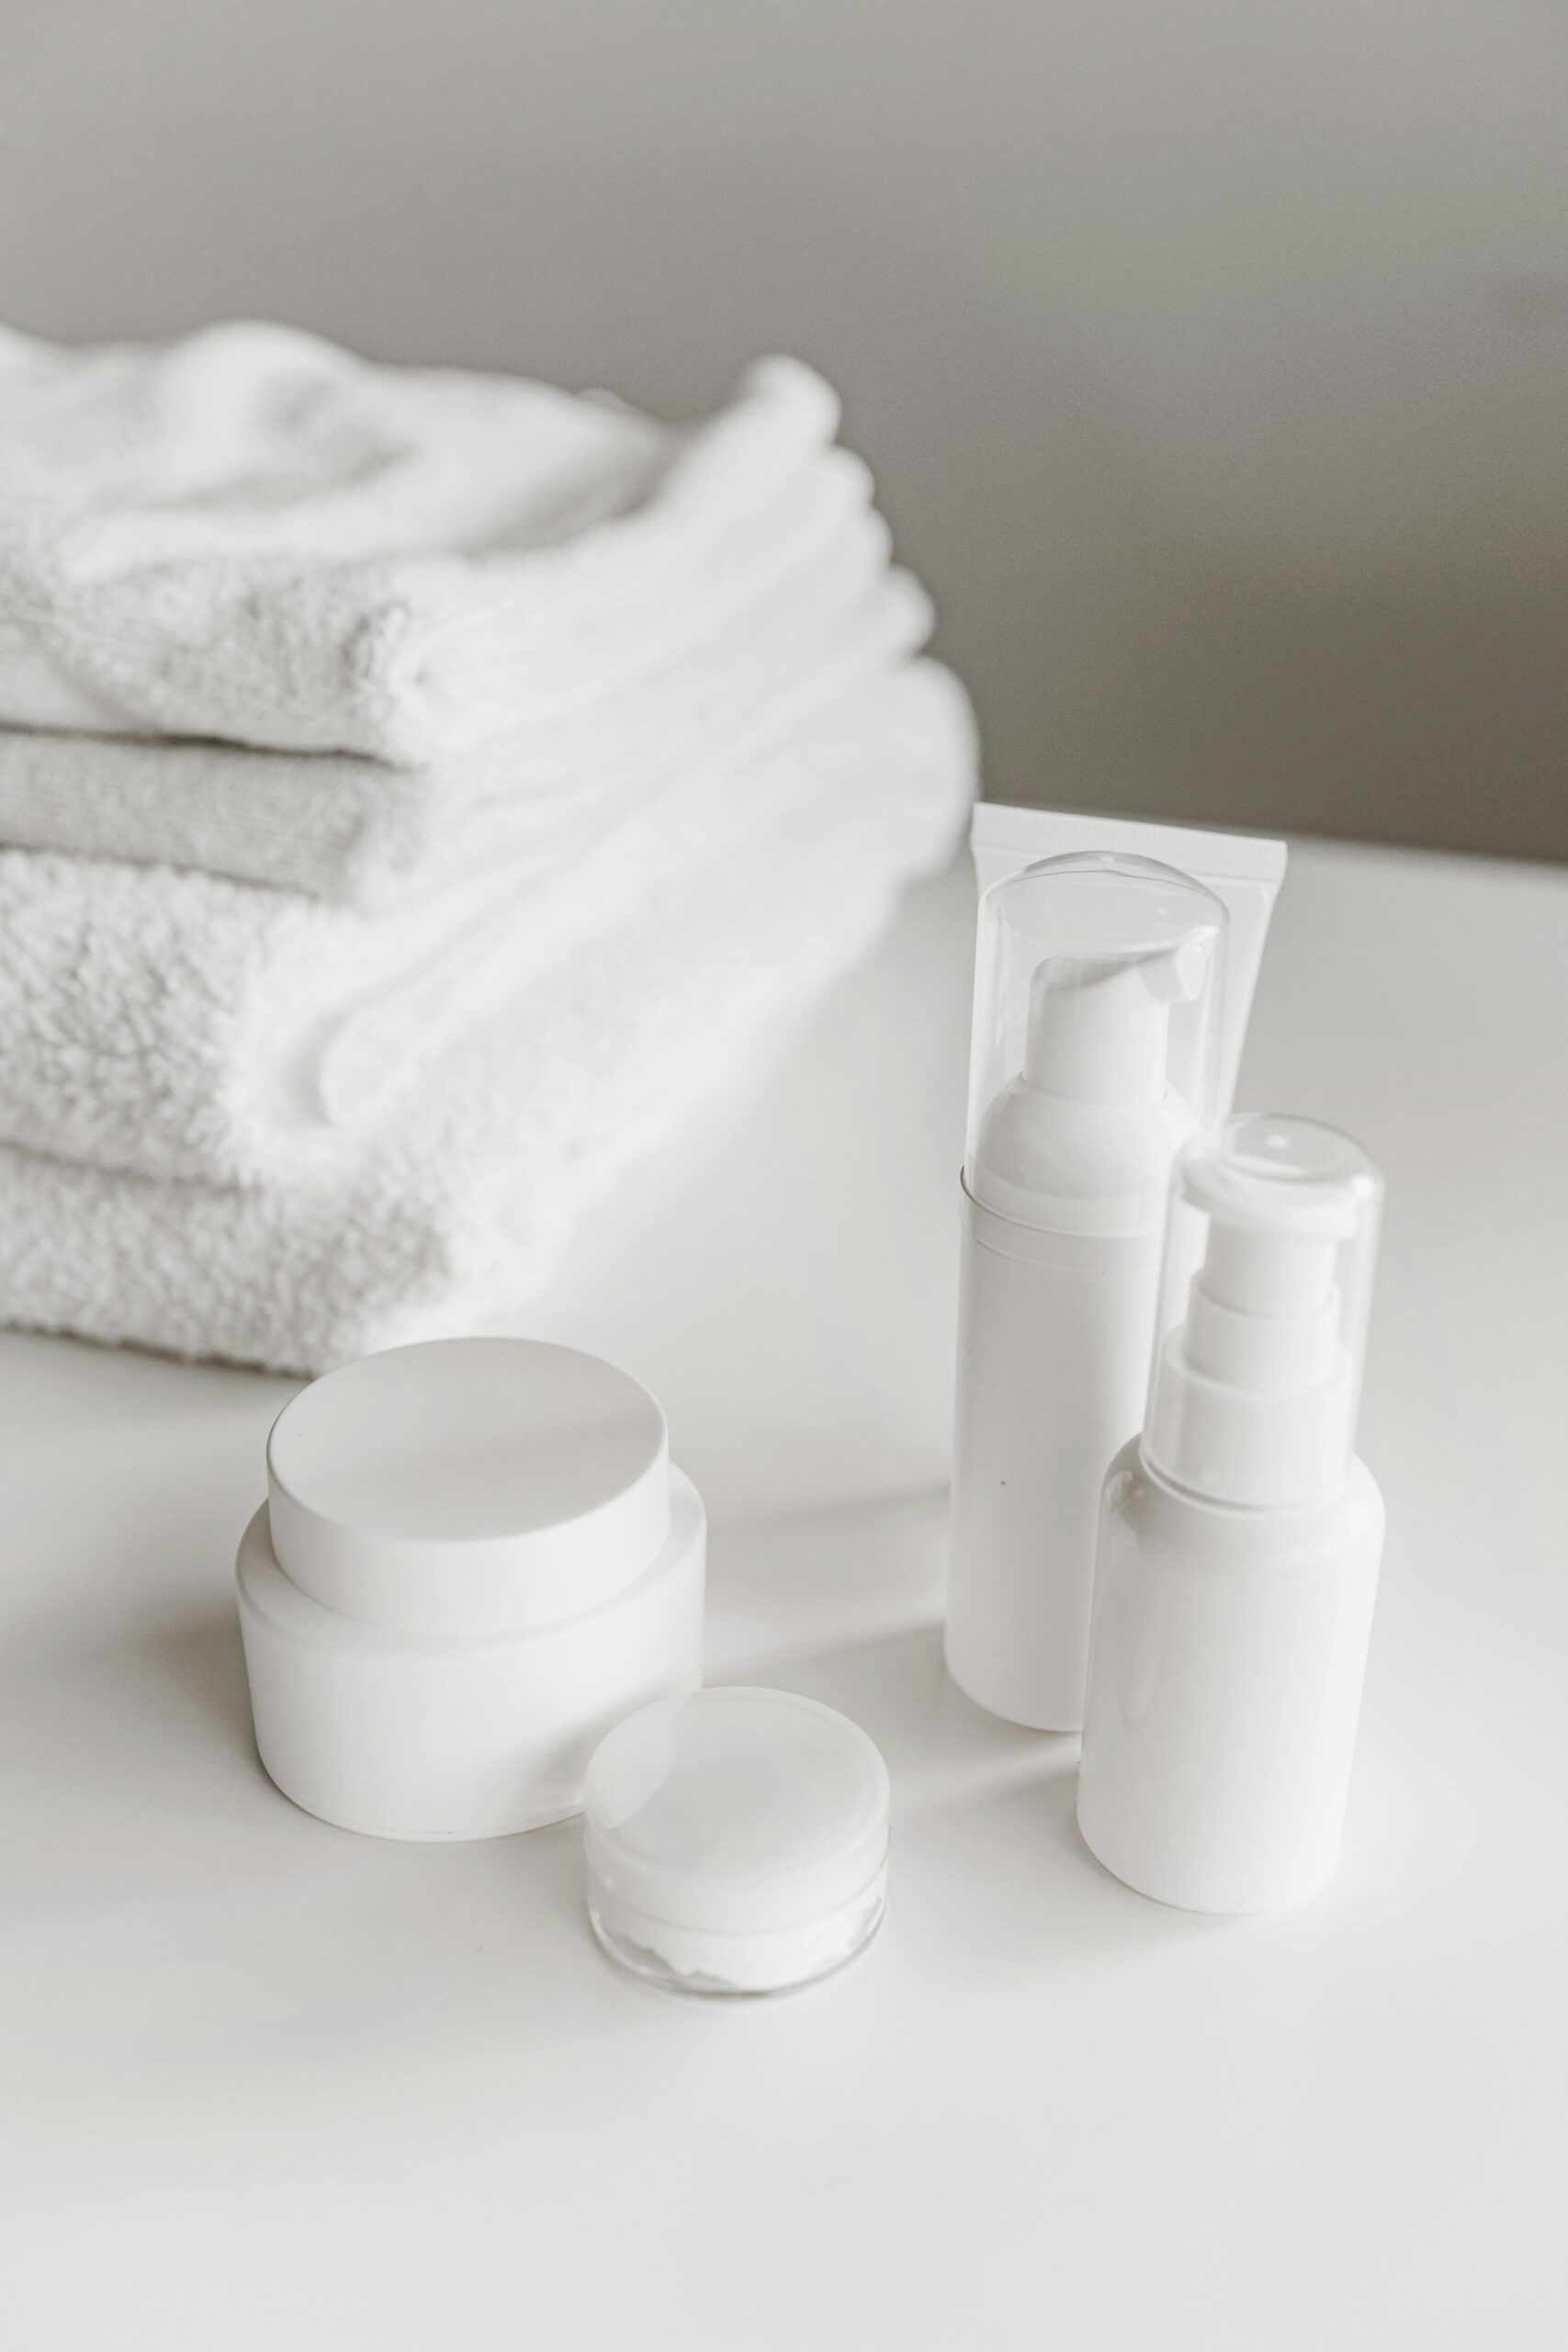
high stress acne-prone skinlow stress acne-prone skin
Introduction: My Journey with Stress-Induced Acne
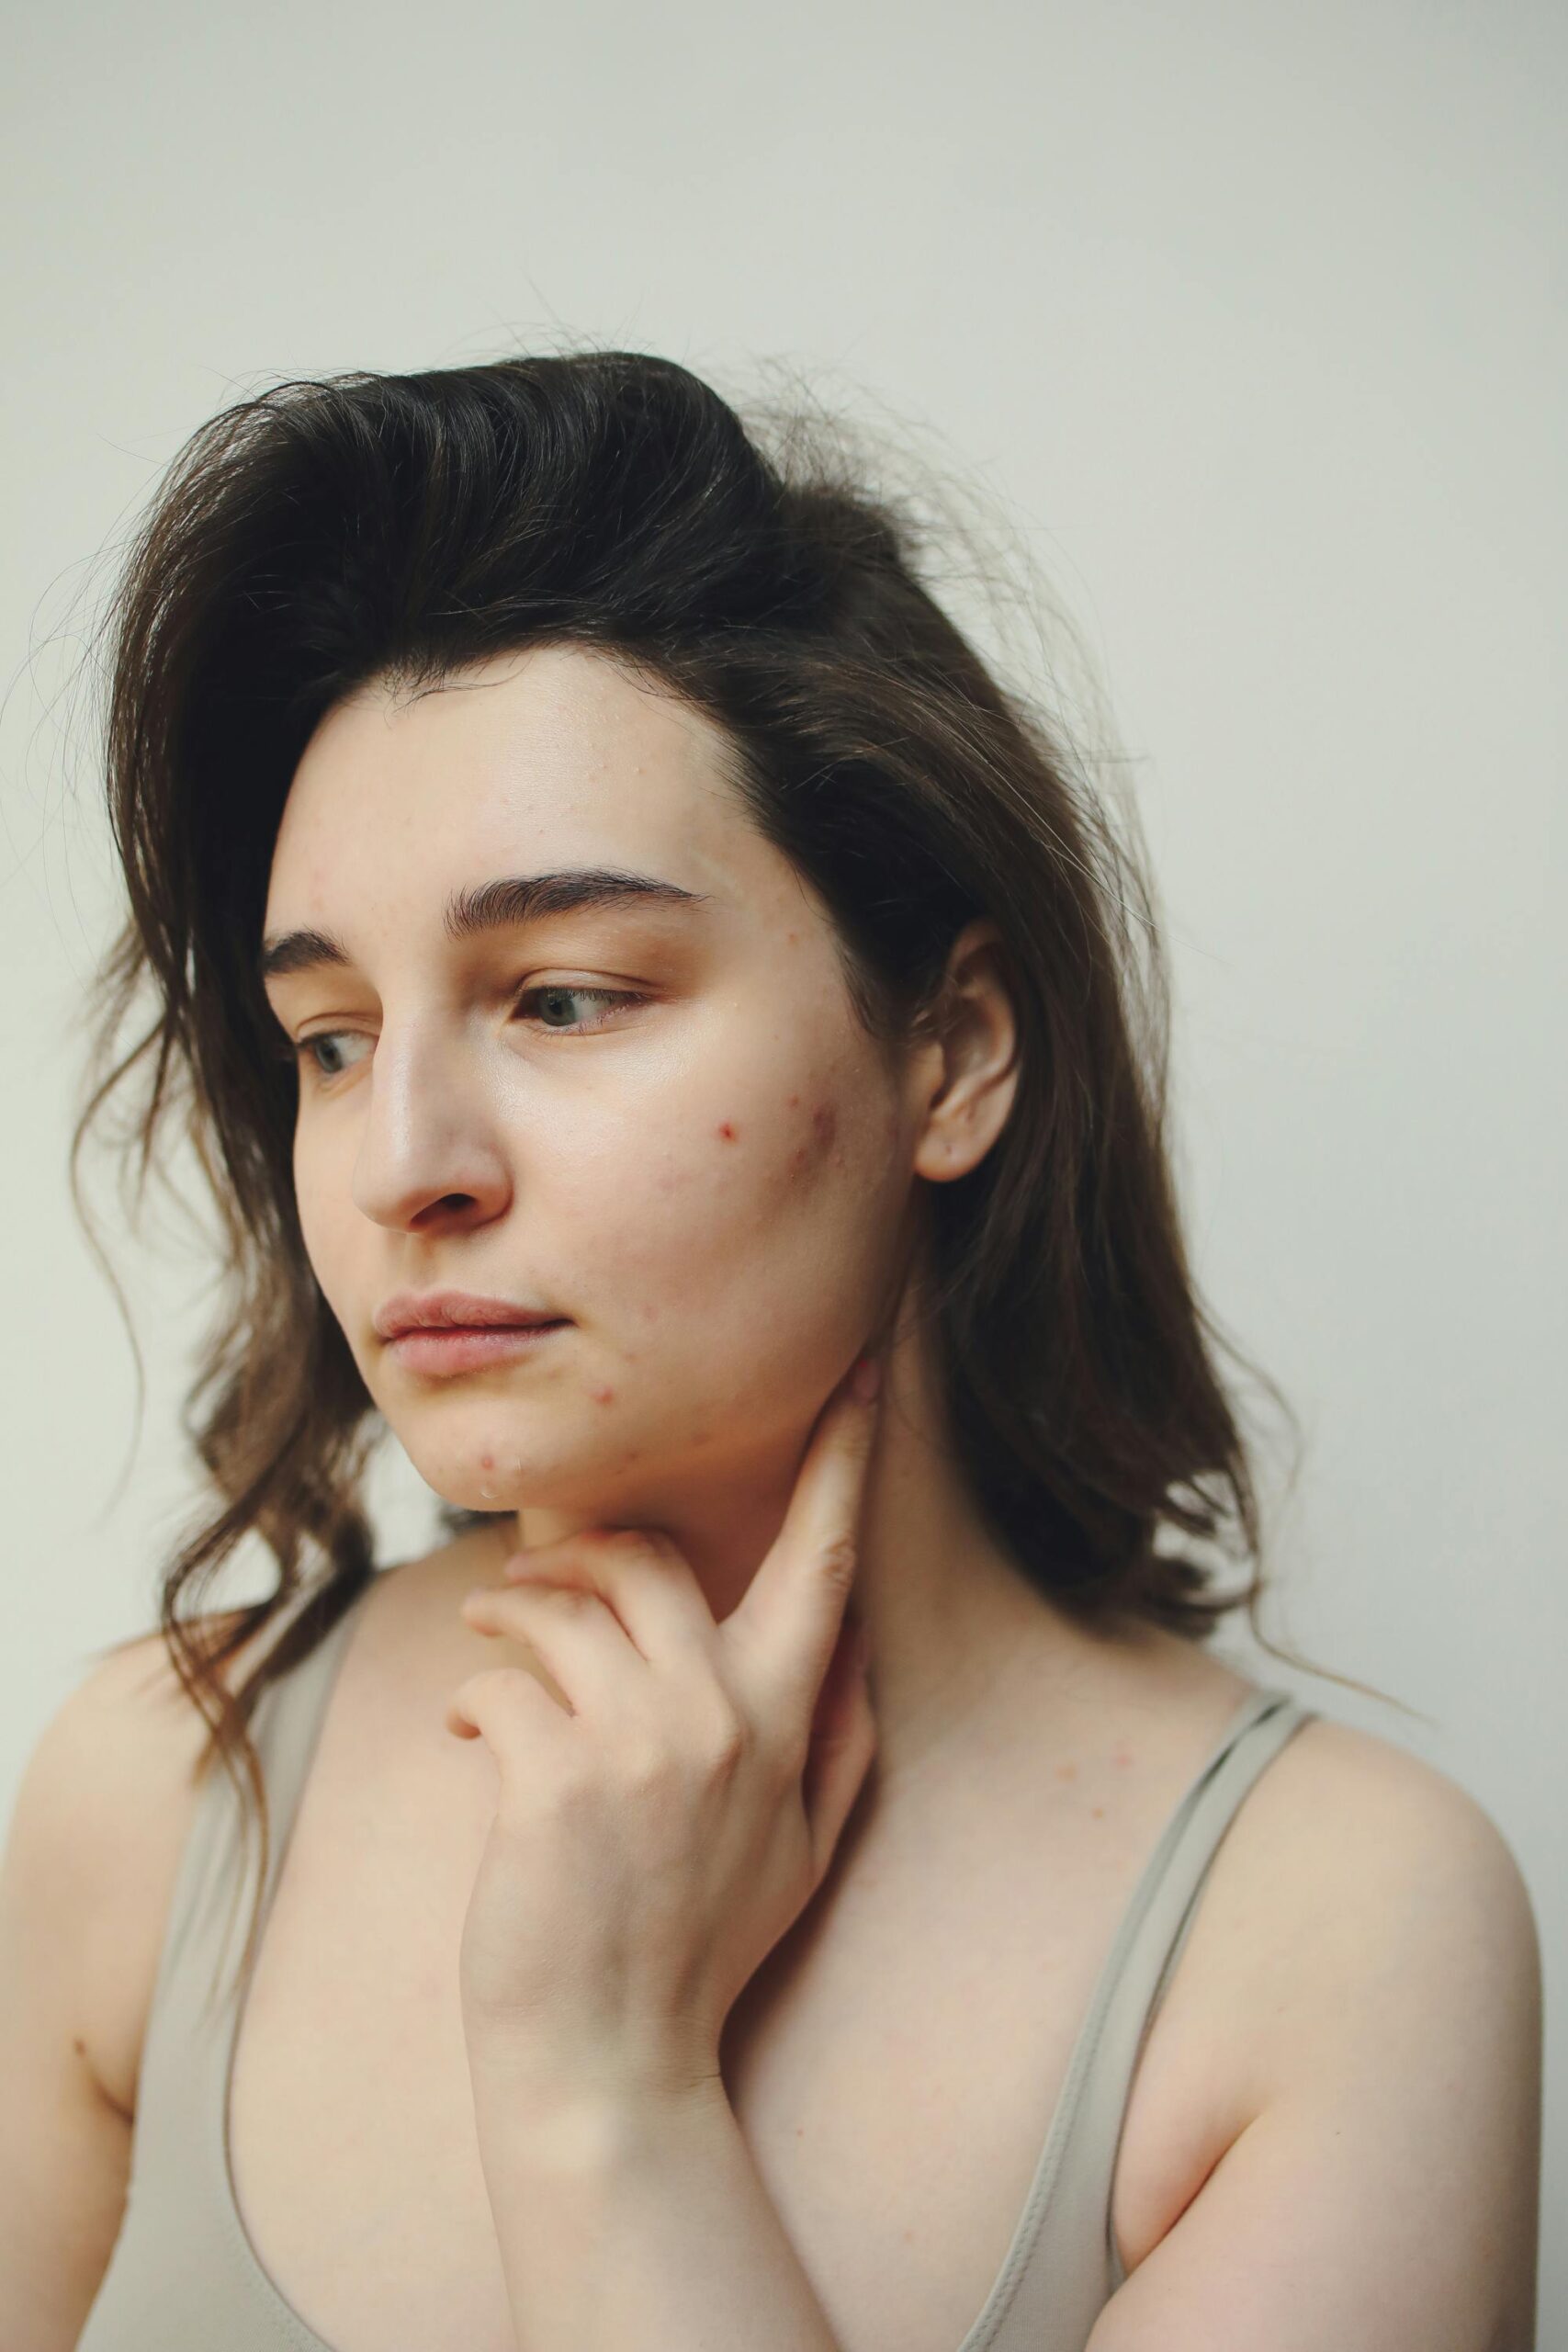
I’ve spent three years obsessing over every variable that might trigger my acne: the products I use, the food I eat, the weather. But nothing has been as consistent as the connection between stress and stress-induced acne.
Two weeks before a big deadline at work? Cystic acne on my jawline. Mid-semester during college? Angry clusters along my chin. A stressful family situation? Deep, painful breakouts that seemed to appear overnight.
But here’s what I’ve learned: Yes, stress does cause acne. But not in the way you might think.
This isn’t just about “oh, stress makes you break out.” The relationship between stress and acne is biological and hormonal, and surprisingly well documented by dermatologists. More importantly, understanding why it happens has helped me manage my acne better than any expensive serum ever could.
The Science: How Stress Actually Triggers Acne
It All Starts With Cortisol (The Stress Hormone)
When you experience stress—whether it’s work pressure, relationship issues, financial worry, or even lack of sleep—your body releases a hormone called cortisol.
Cortisol is your body’s natural “fight or flight” response. It’s supposed to help you deal with immediate danger. But in our modern world, we’re chronically stressed, which means we’re constantly releasing cortisol.
Here’s where your skin comes in.
Cortisol has a direct effect on your sebaceous glands (the glands that produce oil in your skin). When cortisol levels spike, your skin produces more sebum (oil). If you have acne-prone skin—which means your skin is already prone to clogged pores—excess oil is basically fuel for the bacteria that cause stress-induced acne.
But that’s only the beginning.
Stress Triggers Inflammation at the Cellular Level
Beyond oil production, cortisol creates inflammation throughout your body. On your face, this inflammation can:
Weaken your skin barrier: The protective outer layer of your skin becomes compromised, making you more susceptible to bacteria and irritants.
Increase bacterial growth: The bacterium Cutibacterium acnes (formerly Propionibacterium acnes) thrives in oily, inflamed environments.
Impair your immune response: Ironically, while cortisol triggers inflammation, it also suppresses your immune system’s ability to fight bacteria effectively.
This creates a perfect storm for stress-induced acne.
The Gut-Brain-Skin Axis (Yes, It’s Real)
Here’s something I didn’t know until I started researching: stress doesn’t just affect your skin directly—it affects your gut, which in turn affects your skin.
When you’re stressed, your nervous system activates the “fight or flight” response, diverting blood flow away from your digestive system. This can:
Disrupt your gut microbiome: The balance of healthy bacteria in your gut gets thrown off.
Increase intestinal permeability: Your gut lining becomes more permeable (sometimes called “leaky gut”), allowing bacterial compounds to enter your bloodstream.
Trigger systemic inflammation: This inflammation can manifest as acne, especially deep stress-induced acne.
I didn’t realize this was happening to me until I noticed that during high-stress periods, my digestive issues always preceded my worst stress-induced acne flares by about 3-5 days.
Stress Disrupts Your Sleep (Which Makes Everything Worse)
Here’s the vicious cycle I experienced firsthand:
Stress keeps you up at night—your mind races, anxiety peaks, and sleep suffers. Poor sleep increases cortisol levels, leading to more oil production and inflammation, which worsens stress-induced acne. This then causes more stress, and the cycle repeats.
During my most stressful periods, I was sleeping 5-6 hours a night. My skin reflected that immediately. The stress-induced acne would appear within 2-3 days of consistently poor sleep.
Why Stress Causes Cystic Acne (Not Just Regular Breakouts)
Not all acne is created equal. Cystic acne—those deep, painful bumps that feel like they’re under the surface—is typically caused by:
Severe inflammation deep in the skin
Hormonal fluctuations
Spikes in cortisol due to stress
The reason stress triggers cystic acne specifically is because of where the inflammation occurs. When cortisol and stress hormones activate, they create deep, systemic inflammation—not just surface-level inflammation. This is exactly where stress-induced acne forms.
What I Actually Experienced: A Real Timeline
I want to be honest about my own stress-acne connection because it has helped me recognize the pattern.
Fall 2021: The Semester from Hell I was taking 18 credits, working 15 hours a week, and dealing with family stress. Over several weeks, I had 4 deep cystic bumps on my jawline and chin due to stress-induced acne.
Winter 2022: The Calm Period With reduced stress and better sleep, my stress-induced acne almost completely disappeared.
Spring 2022: Work Deadline Stress Under a 3-week project deadline, sleep dropped back to 6 hours per night, and stress-induced acne returned within 5 days.
Summer 2022: Testing My Theory I tracked stress levels and sleep, finding a clear correlation: when my stress reached 7+ for consecutive days and sleep dropped below 7 hours, stress-induced acne showed up.
What Actually Helped (Beyond Just “Reduce Stress”)
Saying “just reduce stress” is useless advice. We can’t always control our stress levels. But once I understood the mechanism, I could target specific interventions.
Sleep Became Non-Negotiable I committed to 7-8 hours of sleep, even during stressful periods. High-quality sleep became my most powerful acne-fighting tool.
Effective Stress Management Practices I incorporated activities that genuinely worked for me, such as non-negotiable 30-minute walks and guided yoga for stress
Gut Health Support I added probiotics, increased fiber intake, and stayed hydrated, which helped stabilize my digestion during stress and reduced stress-induced acne severity.
Strategic Skincare No product can cure stress-induced acne, but supportive skincare can help during high-stress times. Want more information on skincare routines? Read The Step-by-Step Skincare Routine Guide
The Reality: You Can’t Product Your Way Out of Stress Acne
Accepting this was hard for me. I used to think that finding the right product would solve everything. I learned instead to prioritize sleep and manage stress.
When Stress-Induced Acne Might Indicate Something Else
If you’re experiencing severe, persistent stress-induced acne that doesn’t improve even with better sleep and stress management, it might be worth talking to a dermatologist about possible hormonal causes or other underlying issues.
The Takeaway
Yes, stress causes acne—specifically the deep, inflammatory cystic type that’s hardest to treat. Understanding why it happens—cortisol, inflammation, gut disruption, sleep loss—gave me the power to address the condition effectively.
If you’re dealing with stress-induced acne, consider tracking your patterns, prioritizing sleep, discovering stress management techniques that work for you, and using skincare strategically. Your skin may not become acne-free, but it can become manageable, and that’s worth something.
I wasn’t expecting oil cleansing to work this fast. As someone with acne-prone skin, I’ve gotten very used to the notion that clearing your skin takes time. Realistically, trying new products for your skin is a commitment that takes weeks-even months, to see a difference. So believe me when I say that I was absolutely shocked at how great oil cleansing worked for my skin.
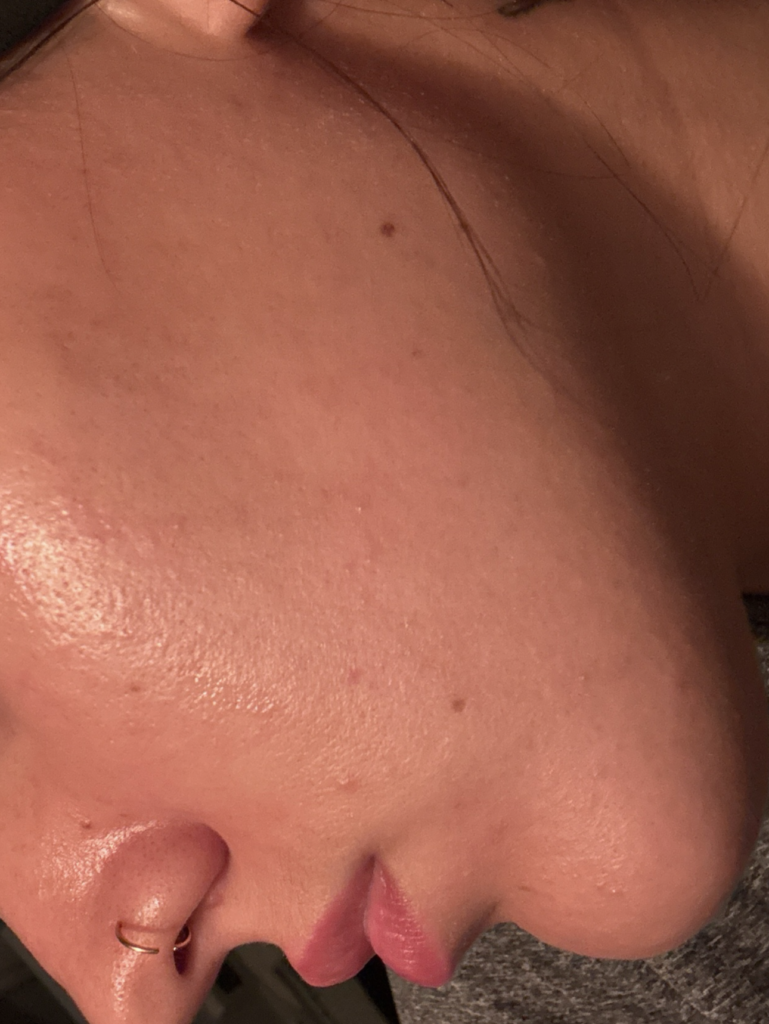
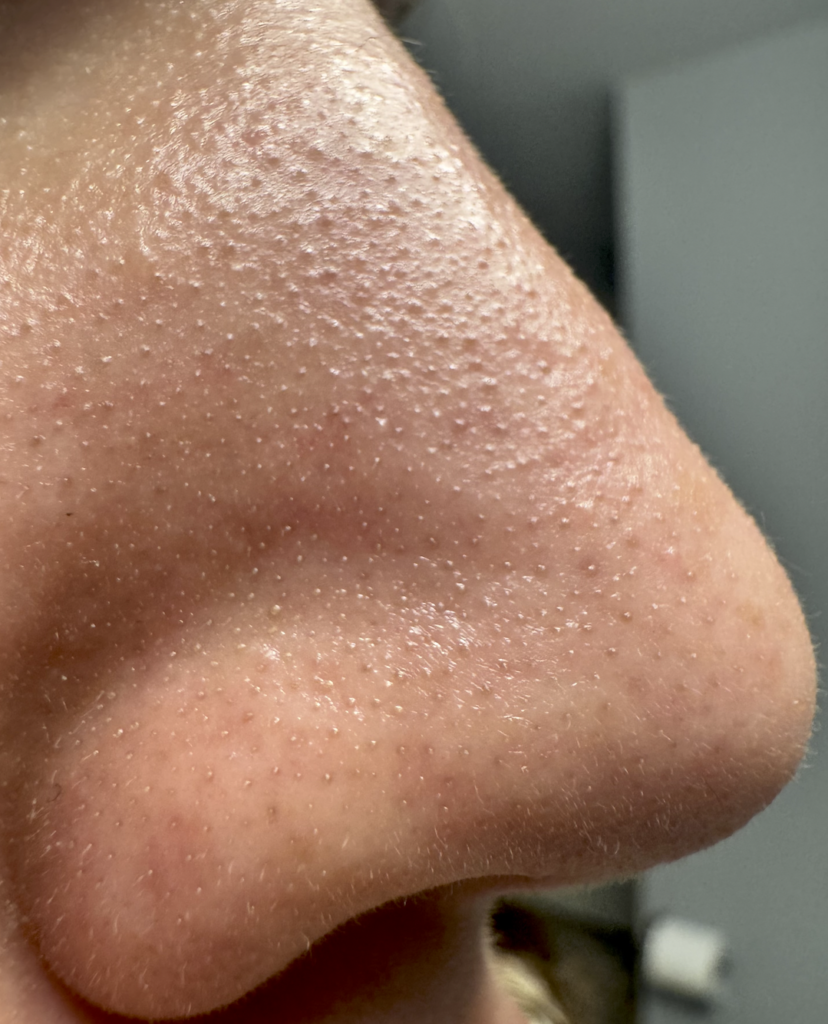
My nose right before an oil cleansing session
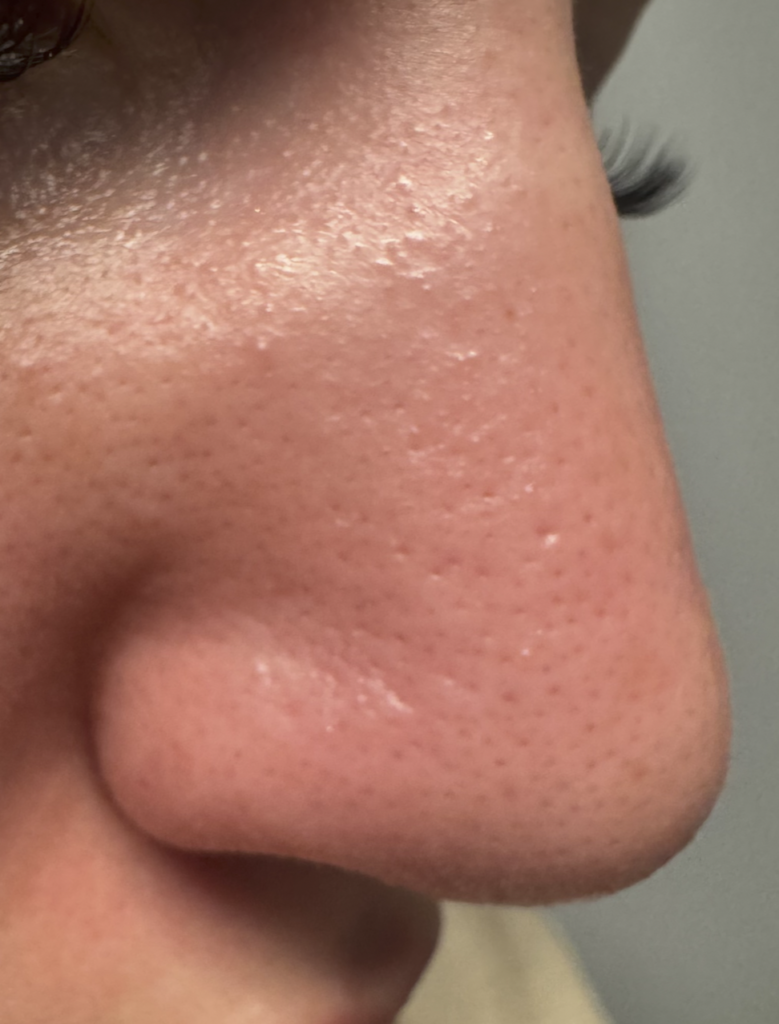
My nose immediately after 3 minutes of oil cleansing
INTRODUCTION
I used to think those dark spots on my nose were blackheads.
I was wrong.
For years, I scrubbed my nose with harsh exfoliants and used peel-off pore strips, thinking that I had deep blackheads on my nose and chin. One day, on my deep dive into skincare research, I discovered that those dark dots aren’t blackheads. They’re sebaceous filaments, and turns out every person has them. But mine? They were WAY more prominent and noticeable than anyone I knew. I needed a solution.
Then I discovered oil cleansing, and everything changed.
After my first oil cleanse, I felt hard little plugs of oil come loose on my fingertips. Immediately after, my nose looked smoother than it ever had. The congested oil was unclogged so easily without any rough extractions or squeezing, and my skin barrier was still intact.
The results were nonetheless jaw-dropping.
I’ve tested these products on myself and even my husband (who has normal skin). And if oil cleansing works on his nose, it’ll work on anyone’s.
Table of Contents
What are Sebaceous Filaments?
Sebaceous filaments are tiny tubes in your skin that deliver oil to the surface through your pores. They naturally contain oil: that’s their job. The problem starts when dead skin cells pile up inside these tubes, trapping the oil and preventing it from flowing smoothly. When that oil gets stuck, it oxidizes (turns dark) and looks like a huge clogged pore on your nose. Oil cleansing removes the dead skin buildup so the oil can flow freely again, making your skin look smoother.
The catch: Sebaceous filaments will always be there. BUT the bumpy texture and dark dots that cause that unwanted “clogged blackhead appearance” don’t have to be. The answer? Oil cleansing, oil cleansing, and.. oil cleansing.
Why Oil Cleaning Works and Delivers Instant Results
The Science: Oil dissolves oil; it’s that simple.
When you massage an oil cleanser onto your nose, the cleanser pulls out buildup you can literally feel on your fingertips.
Water-based cleansers can’t do this. They can’t dissolve oil effectively.
What Happens During Your First Oil Cleanse:
Minutes 1-2 (Massage): You feel little hard bumps coming loose—these are oil plugs (solidified sebum + dead skin cells). It’s incredibly satisfying. You’re literally feeling years of congestion finally dissolve.
Minute 2-3 (Emulsify): You add water, the oil turns milky-white, and rinses cleanly. Your pores feel open.
Right after rinsing, your nose feels smooth. Not bumpy. Not congested. Not rough. The tiny “plugs” on your nose are still there, but the difference is that all of the oil and dead skin buildup that was trapped IN those plugs is removed: THIS is what makes that noticeable difference you want.
This is my holy grail. I love how the product is a lightweight cleansing oil, fast-acting, and delivers instant visible results. You also don’t need to use much product to see results.
After my first deep cleanse (3 minutes), my nose felt smooth, and those dark dots looked significantly reduced. By the end of week 1, using it 3–4 times, my nose was noticeably more even in tone and texture. By week 2, the sebaceous filaments on my nose appeared smaller in size because they were no longer being stretched by buildup and congestion.
Why It Works So Fast:
Anua uses heartleaf extract (a Korean plant ingredient with natural antimicrobial + pore-minimizing properties). Combined with the lightweight oil, it dissolves sebum faster than other cleansers I’ve tested.
The Satisfying Feel
When you massage it in, you can feel those oil plugs loosening. Your fingertips feel the congestion coming loose. It’s so satisfying.
Safe for Acne-Prone Skin
I was worried oil would trigger breakouts. Instead, my skin got clearer because:
Clean pores = fewer breakouts
No irritation = no rebound oil production
Healthy barrier = happier skin
My Routine:
Maintenance: 3x per week for 1 minute (nose + chin)
Deep cleanse: 1x every 2 weeks for 2 minutes (entire face)
*Pro tip*- I personally wash my face with a gentle foaming cleanser right after each oil cleanse. You don’t have to do this step, but I recommend it for acne-prone skin.
The Only Downside:
Around $20. But one bottle lasts 2-3 months, so it’s about $7-10/month. Worth it.
Who Should Buy: Anyone with prominent sebaceous filaments who wants fast results.
This cleansing oil is perfect for a weekly deep cleanse. When I massage this for 2 minutes, the oil feels heavier but dissolves deep buildup. The results are real, just slightly less dramatic than Anua.”
I noticed visible results instantly after one use of deep cleansing with this oil for 3-4 minutes. The results were slightly less dramatic than Anua’s cleansing oil results, but still a very effective product for sebaceous filaments.
Downsides:
Personally, I don’t like the feeling of this cleansing oil as much as others because it’s more dense of an oil, which gives it a very heavy feeling. It also took a little longer for immediate results when massaging onto my skin, whereas Anua’s cleansing oil was very fast-working.
I haven’t personally tested this yet, but it’s the #1 bestselling budget oil cleanser with thousands of 5-star reviews raving about fast results.
What People Love:
Ultra-affordable
Lightweight texture (similar to Anua)
Fast-acting (results in 1-2 weeks based on reviews)
Non-comedogenic
Great emulsification
I Want Your Feedback:
Have you tested Kose Softymo? Drop a comment and tell me:
How long until you saw results?
Did it work on your sebaceous filaments?
Did it cause any breakouts?
Would you repurchase?
I’m building a community section here based on real testimonials. Speed Comparison” section
Pick based on your patience level.
Pick Based on Your Patience Level.
Impatient? Go Anua. Budget-conscious? Try Mung Bean first.
How Fast Do Results Appear?
Anua: Immediate smoothness (1-2 min in), visible results (1 week)
Mung Bean: Immediate smoothness (3-4 min in), visible results (2–3 weeks)
La Roche-Posay: Gradual improvement (3–4 weeks)
Kose Softymo: [Pending your feedback]
My Oil Cleansing Routine
Maintenance (3x Per Week, 1-2 Minutes):
Make sure face and skin are completely dry *this is crucial*
Rub Anua between your hands.
Apply to nose, chin, T-zone
Massage gently for 1-2 minutes (feel those oil plugs!)
Add water, emulsify (turns milky)
Massage for 30 more seconds
Rinse with lukewarm water.
Follow with Foaming Cleanser
Pat dry, apply moisturizer + treatments.
Deep Cleanse (Every 2 Weeks, 4 Minutes)
Why This Works:
Maintenance keeps pores clear. Deep cleanse resets. The balance = consistently clear skin without over-cleansing.
FAQ
Q: Will oil make my acne worse?
A: No. If you use the right lightweight oil and emulsify properly, oil cleansing actually improves acne by removing congestion and keeping your skin barrier healthy.
Q: How long until I see results?
A: Instantly. You’ll feel your skin texture improve after the first cleanse. Visual results (smaller pores, less visible sebaceous filaments):
Q: How often should I oil cleanse?
A: 2-3x per week for acne-prone skin. Daily oil cleansing is too much and can be irritating. On other days, use a water-based cleanser.
Q: What are those bumps I feel while massaging?
A: Oil plugs—solidified sebum + dead skin cells. This is a good sign. You’re literally feeling the congestion dissolve.
Q: Can I oil cleanse if I wear makeup?
A: Yes. Oil cleansing is actually better at removing makeup than water-based cleansers. Just make sure you double cleanse afterward.
Q: What if I have active breakouts?
A: introduce oil cleansing on target areas only for sebaceous filaments 1-2x per week and avoid active breakout areas.
Final Verdict
Best Overall Results: → Anua Heartleaf ($20, fast results, maintenance cleanse)
Best Budget Option: → Mung Bean ($10, deep cleanse, luxe feel)
Best Gentle/Safe: → La Roche-Posay ($15, dermatologist-approved)
Most Popular Budget Pick: → Kose Softymo ($10, pending your feedback)
Ready to Start?
Ready to test this? Pick one oil cleanser and commit to 3 weeks. Your smooth skin is waiting—and yes, the results really are that fast.
Drop a comment: Have you tried oil cleansing? I’m especially looking for feedback on Kose Softymo to help other readers decide. What were your results?
Check out my [Best Skincare Routine for Acne-Prone Skin] guide for a complete routine to pair with oil cleansing.
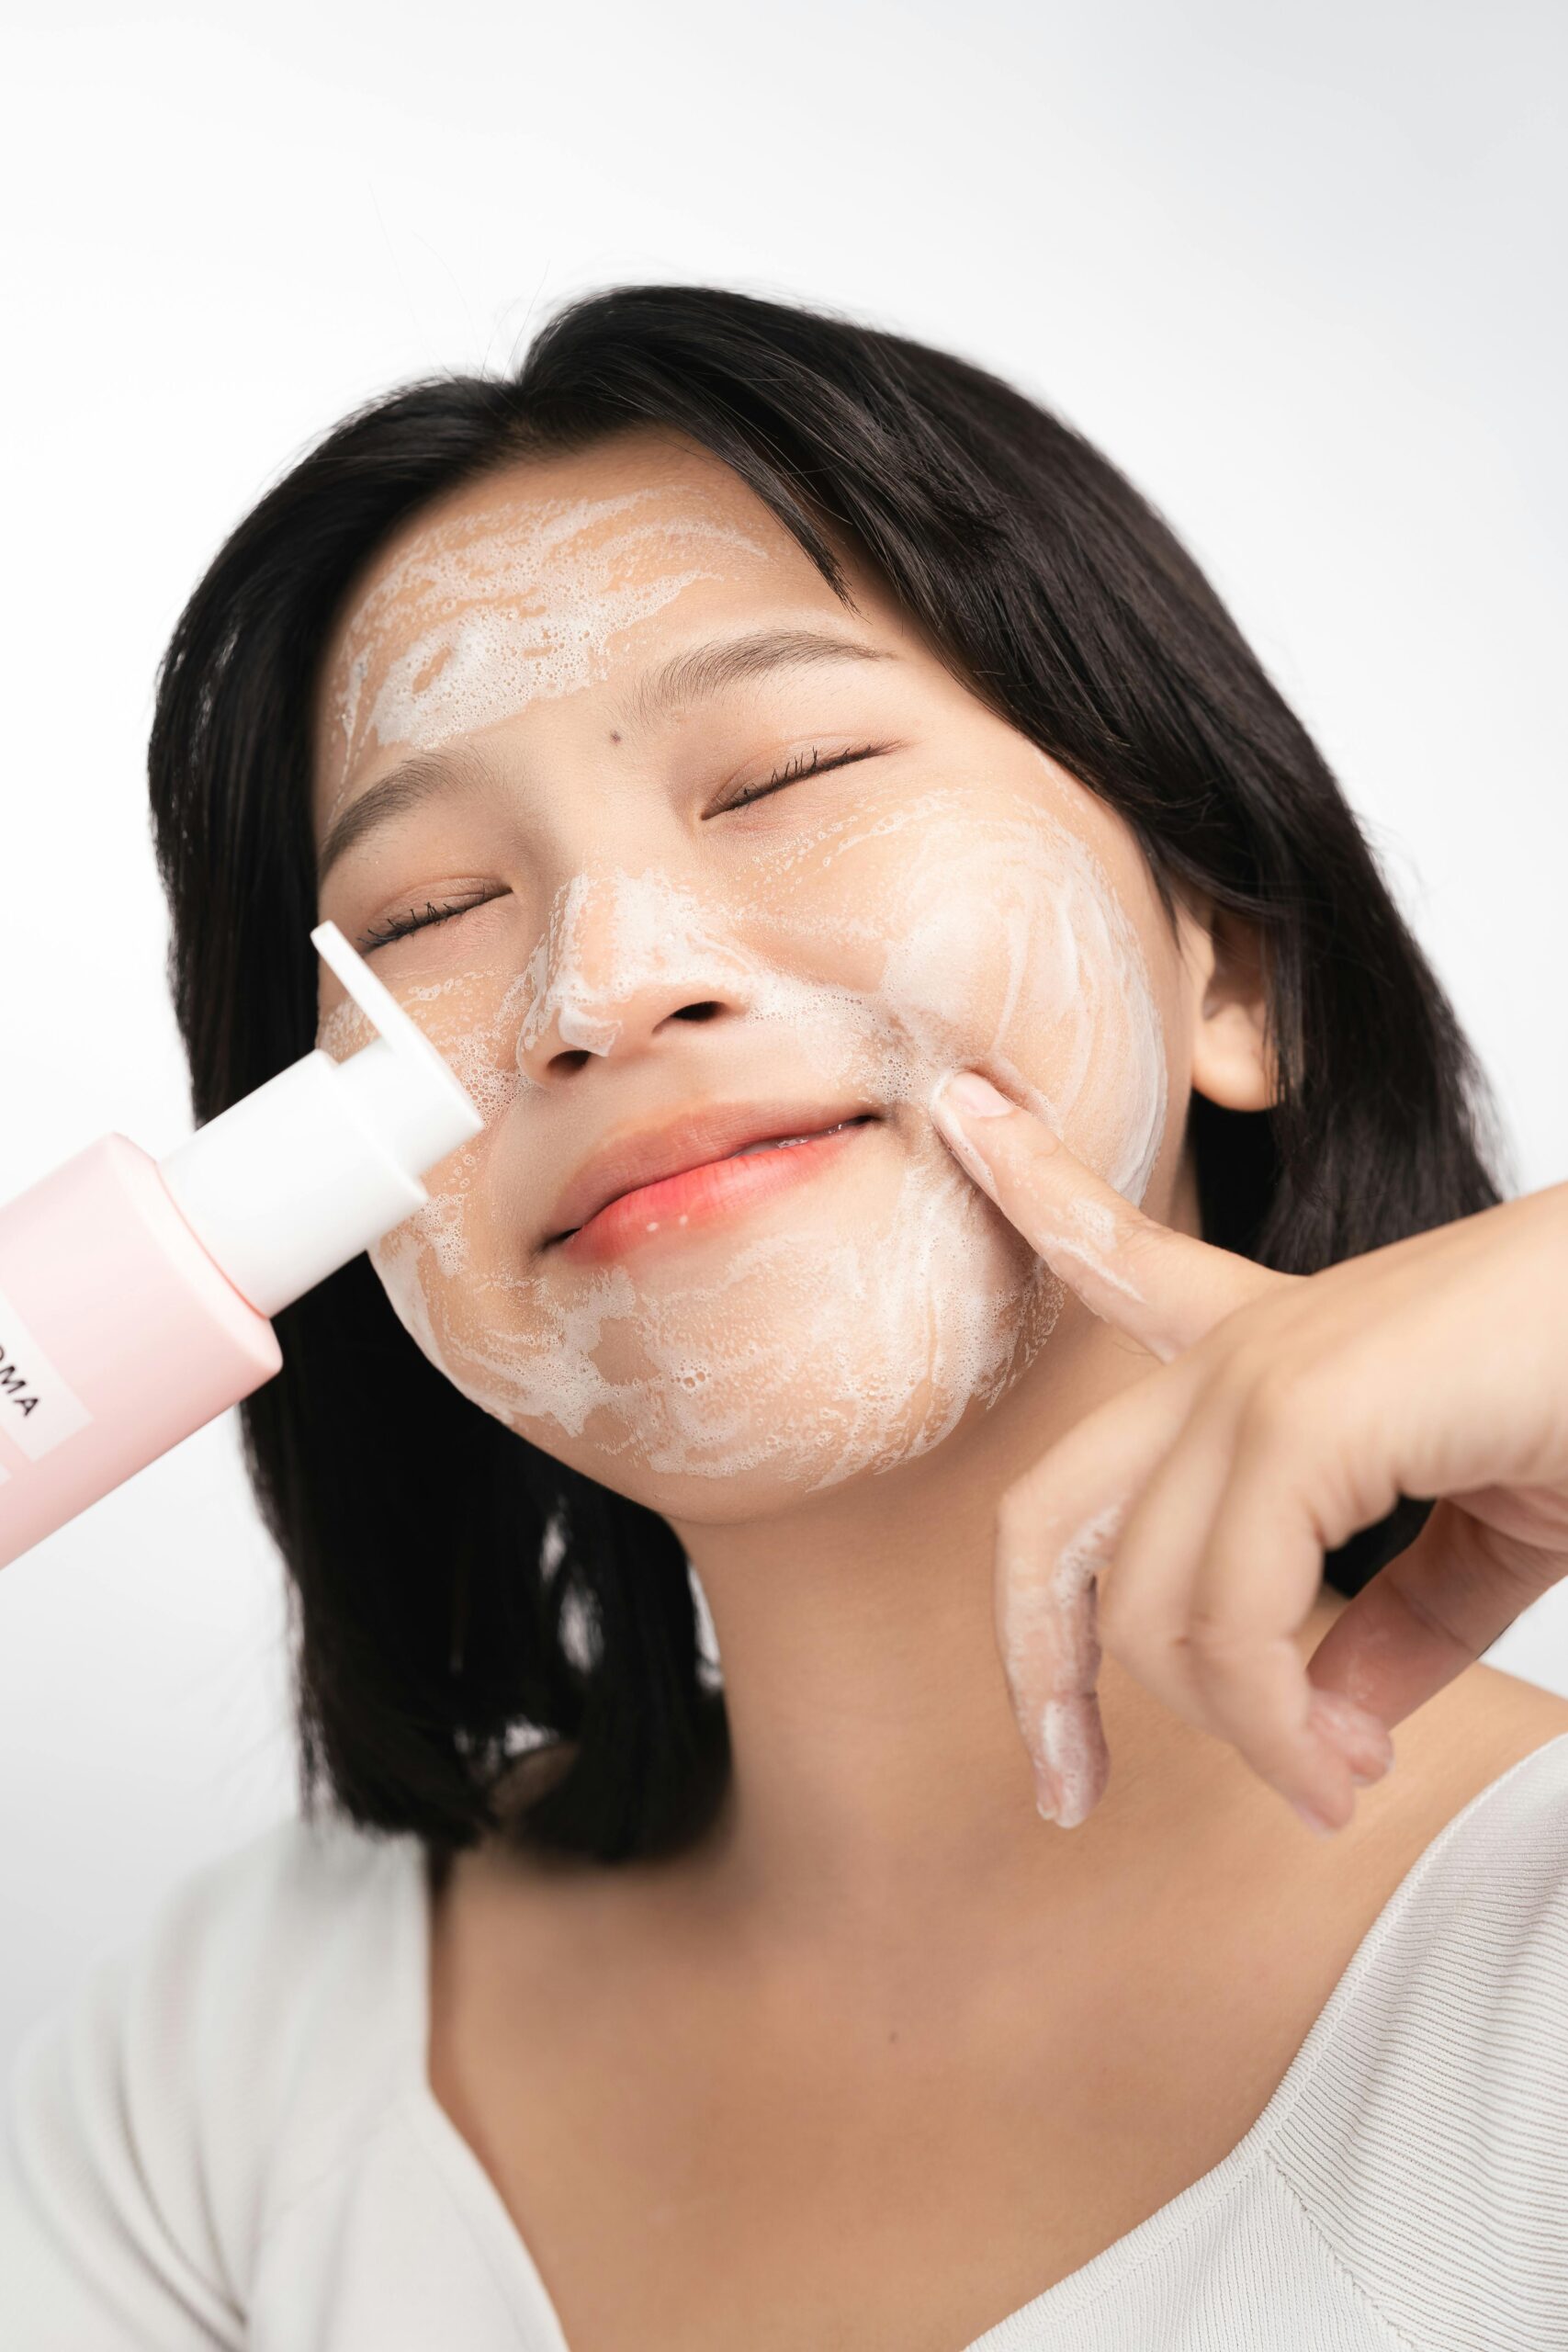
Acne-prone skin needs a cleanser that does two things:
Actually removes oil and debris without stripping
Doesn’t irritate or cause more breakouts
Most drugstore cleansers fail at #1. Most “gentle” cleansers fail at #2.
Over 3 months of testing, I narrowed down the best cleansers for acne-prone skin by testing them on myself. Let’s take a look at my real and honest reviews:
Paula’s Choice RESIST is the only cleanser I tested that actually cleans AND respects your skin barrier.
Most BHA cleansers dry you out. This one doesn’t. That’s because Paula’s Choice formulated it with:
2% Salicylic Acid (effective for acne without overkill)
Hydrating surfactants (removes oil without stripping)
Panthenol + Allantoin (calms and heals)
pH-balanced (doesn’t disrupt skin barrier)
What I noticed after 3 months of use:
✅ Removes oil and light makeup without harsh scrubbing ✅ No drying or tight feeling (unlike Neutrogena or Stridex) ✅ Calms redness from active breakouts ✅ Doesn’t cause irritation even when layered with other actives (retinol, vitamin C) ✅ Lasts a long time (small amount goes a long way)
❌ Expensive ($28–32 per bottle) ❌ Takes 2–3 weeks to see full benefits (BHA needs time) ❌ Not ideal if you’re broke (but worth the splurge)
Ingredient breakdown:
Ingredient
Purpose
Why it matters
Salicylic Acid (2%)
Chemical exfoliant
Unclogs pores without physical scrubbing
Potassium Cocoyl Glycinate
Gentle surfactant
Removes oil without stripping
Panthenol
Humectant + healer
Soothes irritation, locks in moisture
Allantoin
Skin protectant
Calms redness, promotes healing
Glycerin
Humectant
Keeps skin hydrated while cleansing
How to use:
Wet face with lukewarm water
Pump 1–2 times into palm (goes a long way)
Massage gently for 30–45 seconds
Rinse thoroughly with water
Pat dry (don’t rub)
Follow with toner/essence, serum, moisturizer
Pro tip: Use in the morning only if you’re new to BHA. Once your skin adapts (2–3 weeks), use twice daily.
Who should buy:
✅ Acne-prone skin that’s not super sensitive ✅ Combo/oily skin ✅ People using prescription actives (tretinoin, adapalene) ✅ Anyone willing to invest in quality
Who should skip:
❌ Extremely sensitive/reactive skin (use #3 or #4 instead) ❌ Budget-conscious shoppers (use #2 instead) ❌ People with very dry skin (might need extra hydration)
CeraVe Foaming is the best “bang for buck” cleanser for acne-prone skin. It’s not fancy, but it works.
The formula focuses on balance: removes oil effectively without destroying your skin barrier.
What I noticed:
✅ Removes oil and sunscreen without feeling tight ✅ Affordable ($8–10 per bottle) ✅ Dermatologist-approved (Niacinamide + Ceramides) ✅ No fragrance or irritating ingredients ✅ Works with all acne medications (tretinoin, benzoyl peroxide, etc.)
❌ No active ingredients (won’t treat acne on its own) ❌ Takes longer to rinse (slightly foamy formula) ❌ Doesn’t have the “clean” feeling of a BHA cleanser
Ingredient breakdown:
Ingredient
Purpose
Why it matters
Niacinamide (4%)
Regulates sebum
Helps with oily skin + reduces inflammation
Ceramides (3 types)
Skin barrier repair
Prevents moisture loss, strengthens protection
Hyaluronic Acid
Humectant
Keeps skin hydrated while cleansing
Cetyl Alcohol
Emollient
Softens and conditions (NOT drying)
How to use:
Wet face with water
Pump 1–2 times into palm
Massage for 30 seconds
Rinse thoroughly (this one foams, so rinse well)
Pat dry
Pro tip: Use twice daily. Morning and night. It’s gentle enough for daily use.
Who should buy:
✅ Budget-conscious shoppers ✅ Beginners to skincare ✅ People using strong actives (needs a gentle cleanser) ✅ Combo/oily acne-prone skin ✅ Anyone who wants simplicity
Who should skip:
❌ People who want a BHA cleanser (it doesn’t have actives) ❌ Extremely sensitive skin (use #3 instead)
The Mung Bean Cleanser is the gentlest option on this list—and still effective.
It’s a powder that transforms into a creamy paste when you mix it with water. This gives you control over consistency and allows the gentle ingredients to work without harsh surfactants.
What I noticed:
✅ Removes oil gently (no stripping) ✅ Zero irritation (even on compromised skin barriers) ✅ Calms redness immediately (Mung bean is anti-inflammatory) ✅ Minimal ingredients (no fragrance, no sulfates, no alcohol) ✅ Lasts forever (small amount per use)
❌ Powder formula is inconvenient for travel ❌ Takes longer to use (mixing step) ❌ No active ingredients (gentle but not treating)
Ingredient breakdown:
Ingredient
Purpose
Why it matters
Mung Bean Extract
Anti-inflammatory
Calms redness, reduces irritation
Rice Flour
Gentle exfoliant
Removes dead skin without harsh chemicals
Activated Charcoal
Absorbs oil
Doesn’t dry out—just removes excess sebum
Kaolin Clay
Pore cleansing
Lifts debris without stripping
How to use:
Pour ½ teaspoon into palm
Add a few drops of water
Mix into paste
Apply to damp face, massage gently
Rinse thoroughly with warm water
Pat dry
Pro tip: Mix it thicker if you want more exfoliation, thinner if you want a creamy cleanse.
Who should buy:
✅ Sensitive or reactive acne-prone skin ✅ People with compromised skin barriers (over-cleansed, damaged) ✅ Anyone recovering from harsh treatments ✅ Those who prefer minimal ingredients
Who should skip:
❌ People who want convenience (powder is annoying) ❌ Anyone wanting a BHA/AHA cleanser ❌ Travel-heavy people
Rating: ⭐⭐⭐⭐ (4/5) Price: $12–15 Key stats: Thermal spring water, Niacinamide, Ceramides, no fragrance
Why it’s solid:
La Roche-Posay sits in the sweet spot between gentle and effective.
It’s not a BHA cleanser, but the Thermal Spring Water (La Roche-Posay’s signature ingredient) provides antioxidant protection and calming properties that make it especially good for acne-prone, sensitive skin.
What I noticed:
✅ Cleans without stripping (similar to CeraVe, but slightly better for sensitive skin) ✅ Thermal water is genuinely soothing (reduces redness) ✅ Dermatologist-approved formula ✅ No fragrance (important for reactive skin) ✅ Works well as a gentle second cleanser in double-cleanse routines
❌ More expensive than CeraVe (but not as pricey as Paula’s Choice) ❌ No active ingredients (purely cleansing + soothing) ❌ Takes longer to find (not in every drugstore)
Ingredient breakdown:
Ingredient
Purpose
Why it matters
Thermal Spring Water
Antioxidant + soothing
Reduces inflammation, calms redness
Niacinamide
Sebum regulation
Balances oily skin without irritation
Ceramides
Barrier repair
Prevents moisture loss
Sodium Hydroxide (pH buffer)
pH balance
Maintains skin’s natural pH
How to use:
Wet face with water
Pump 1–2 times into palm
Massage for 30–45 seconds
Rinse thoroughly with warm water
Pat dry
Pro tip: Use as a second cleanser after an oil cleanser for sensitive skin (double cleanse method).
Who should buy:
✅ Sensitive + acne-prone skin (the combo) ✅ People recovering from harsh treatments ✅ Anyone using strong prescription actives (tretinoin, azelaic acid) ✅ Those with inflammation-prone skin
Who should skip:
❌ Budget shoppers (go with CeraVe #2) ❌ People wanting BHA treatment (it doesn’t have actives)
Cetaphil is the dermatologist-recommended classic for a reason—it’s incredibly gentle. But for acne-prone skin specifically, it doesn’t do its job.
What I noticed:
✅ Ultra-gentle (won’t irritate even extremely reactive skin) ✅ Affordable ($5–8) ✅ Doesn’t strip (good for very dry skin)
❌ Doesn’t actually clean (leaves an oily residue) ❌ Doesn’t remove makeup or sunscreen effectively ❌ No active ingredients (purely a rinse-off product) ❌ Leaves skin feeling filmy (not that “clean” feeling)
The honest take:
Cetaphil works great IF you have extremely dry, sensitive skin with no acne. But if you’re using this blog, you have acne-prone skin, which means you need a cleanser that actually removes sebum and debris.
Cetaphil just doesn’t do that. It’s like washing your face with a cream—it feels nice but doesn’t clean.
Who should buy:
✅ Only if you have extremely reactive skin AND are using prescription actives (tretinoin, etc.) ✅ People with very dry, non-acne-prone skin
Who should skip:
❌ Anyone with acne-prone skin (use #2, #3, or #4 instead) ❌ Combo/oily skin ❌ People who want actual cleansing
Note: Works best in leave-on products (toners, serums) but OK in cleansers
Azelaic Acid
What it does: Antibacterial, anti-inflammatory, treats rosacea + acne
Strength: 10%–20% (typical products)
Best for: Rosacea, acne, hyperpigmentation
Note: Rare in cleansers (too strong for rinse-off formula)
Warning: Don’t combine with other actives in cleansers (see Byoma issue)
Benzoyl Peroxide
What it does: Kills acne bacteria, reduces inflammation
Strength: 2.5%–10%
Best for: Acne with bacteria (whiteheads, pustules)
Note: Uncommon in cleansers (usually in spot treatments)
Warning: Can bleach fabrics and hair
Glycolic Acid (AHA)
What it does: Exfoliates surface dead skin cells
Strength: 4%–8% in cleansers
Best for: Dull skin, congestion
Note: Less common in cleansers than BHA
Warning: Can be drying; not ideal for sensitive skin
Pro tip: Don’t use a BHA cleanser + BHA toner on the same day. One is enough.
FAQ: CLEANSER QUESTIONS ANSWERED
Q: Can I use a cleanser with Salicylic Acid if I’m using tretinoin?
A: Yes, but carefully. Paula’s Choice RESIST is specifically designed for this (gentle + effective). Start with 1–2x per week and work up. Your skin might need a break period. Listen to your skin—if it’s red or tight, dial back.
Q: How long does it take to see results from a BHA cleanser?
A: 2–3 weeks minimum. Your skin needs time to adjust. Some people see results in 5–7 days; others take a month. If you’re not seeing improvement after 4 weeks, it might not be the right cleanser.
Q: Can I use a BHA cleanser if I have severe cystic acne?
A: BHA cleaners help with comedonal acne (blackheads, whiteheads), but cystic acne usually needs prescription treatment (antibiotics, accutane, spironolactone). Use a gentle cleanser (#3 or #4) and see a dermatologist.
Q: What if my cleanser is making my skin worse?
A: Stop immediately. Your skin barrier might be compromised. Use the Mung Bean Cleanser (#3) for 2 weeks to recover. Then slowly reintroduce other products.
Q: Can I use a physical exfoliant if I’m using a BHA cleanser?
A: No. BHA is chemical exfoliation. Adding physical scrubbing = over-exfoliation. Stick with one method.
THE BOTTOM LINE
Cleanser
Best for
Price
Why
Paula’s Choice RESIST
Best overall
$28–32
Treats acne + hydrates
CeraVe Foaming
Best budget
$8–10
Affordable + effective
Mung Bean
Best for sensitive
$8–12
Ultra-gentle
La Roche-Posay
Best for combo
$12–15
Balanced formula
Cetaphil
Skip for acne
$5–8
Doesn’t clean effectively
Byoma
NOT recommended
$10–12
Too harsh, caused breakouts
Start here:
If budget isn’t an issue: Paula’s Choice RESIST (#1)
If you’re on a budget: CeraVe Foaming (#2)
If your skin is sensitive: Mung Bean Cleanser (#3)
NEXT STEPS
Now that you have the right cleanser, here’s what to do next:
Finding the right skincare routine for acne-prone skin can feel overwhelming, especially with so many products claiming to “clear skin fast.” The truth is, most skin improves with a simple, consistent routine using gentle, non-comedogenic products.
In this guide, I’ll break down an easy skincare routine for acne-prone skin using affordable and trusted brands like CeraVe, La Roche-Posay, The Ordinary, and Medicube—perfect for beginners.
Step 1 of Skincare Routine for Acne-Prone Skin: Cleansing Oil (Night Routine – Optional but Powerful)
Table of Contents
A cleansing oil is used first at night to remove sunscreen, makeup, and excess oil that can clog pores. This step helps prevent breakouts by ensuring your skin is fully clean before your second cleanse.
Recommended products:
La Roche-Posay Lipikar Cleansing Oil Gentle, barrier-friendly, and great for sensitive acne-prone skin.
Haruharu Wonder Black Rice Cleansing Oil Lightweight Korean cleansing oil that removes buildup without stripping skin.
✔ Use only at night ✔ Apply on dry skin, massage, then rinse before cleanser
Step 2 of Skincare Routine for Acne-Prone Skin: Gentle Cleanser (AM + PM)
A gentle cleanser is the foundation of any acne-safe routine. The goal is to clean the skin without stripping it or causing irritation.
✔ Use morning and night (or night only if double cleansing)
Step 3 of Skincare Routine for Acne-Prone Skin: Moisturizer (Don’t Skip This)
Even acne-prone skin needs moisture. Skipping moisturizer can worsen acne by damaging your skin barrier. I made this mistake for years because a dermatologist told me I needed to “dry out” my acne with cleansers and topical spot treatments. I 1,000% recommend that you moisturize your face twice a day, especially if you are using a stripping acne cleanser. Read more about why barrier protection is so important, and what happened to my skin when I was skipping moisturizer here: Skin Barrier Repair and the Biggest Skincare Mistake I Made
Step 4 of Skincare Routine for Acne-Prone Skin: Sunscreen (Daily Must-Have)
Sunscreen is one of the most important skincare steps, especially for acne-prone skin. It prevents dark spots, protects healing skin, and reduces irritation.
✔ Use 2–3 times per week depending on skin tolerance
Simple Skincare Routine for Acne-Prone Skin Summary
Morning:
Cleanser
Moisturizer
Sunscreen
Night:
Cleansing oil (optional but recommended)
Gentle cleanser
Moisturizer
Treatment product (optional)
Final Thoughts
The best skincare routine for acne-prone skin is simple, consistent, and focused on supporting your skin barrier. You don’t need a complicated 10-step routine—just the right products used correctly over time.
Brands like CeraVe, La Roche-Posay, The Ordinary, and Medicube are great starting points because they offer affordable, effective options that work well for sensitive and acne-prone skin types.